How to Turn Spellcheck on or off in Windows 11


- 14 steps
- Includes a restart or sign-out
Spellcheck in Windows 11 checks your spelling as you type across apps like Notepad, Outlook, and web browsers, marking mistakes with a red wavy line.
Turn this feature off in the Windows 11 Settings app when you want to stop Windows from flagging names, foreign words, and slang. You can turn it back on the same way at any time.
Open Settings, go to Time & language Typing, and toggle Highlight misspelled words on or off. The change applies immediately, though red underlines in open apps may take a moment to appear or disappear.
Turn Spellcheck On or Off Using Windows Settings
The simplest way to turn Windows 11 spellcheck on or off is the Settings app. The setting is called Highlight misspelled words, and it lives on the Typing page under Time & language. It works the same on Windows 11 Home and Pro, and you do not need to restart afterwards.
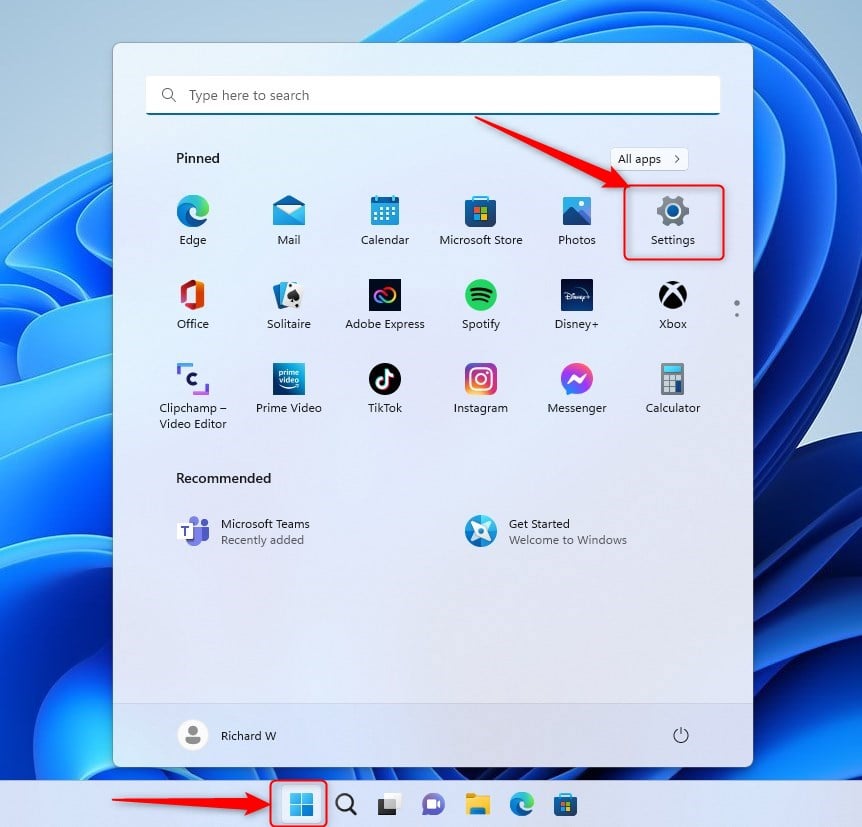
- Open Settings : Click the Start button (the Windows logo) at the bottom-left corner, then choose Settings. Or press Win+I on your keyboard. The Settings window opens with a list of categories on the left.
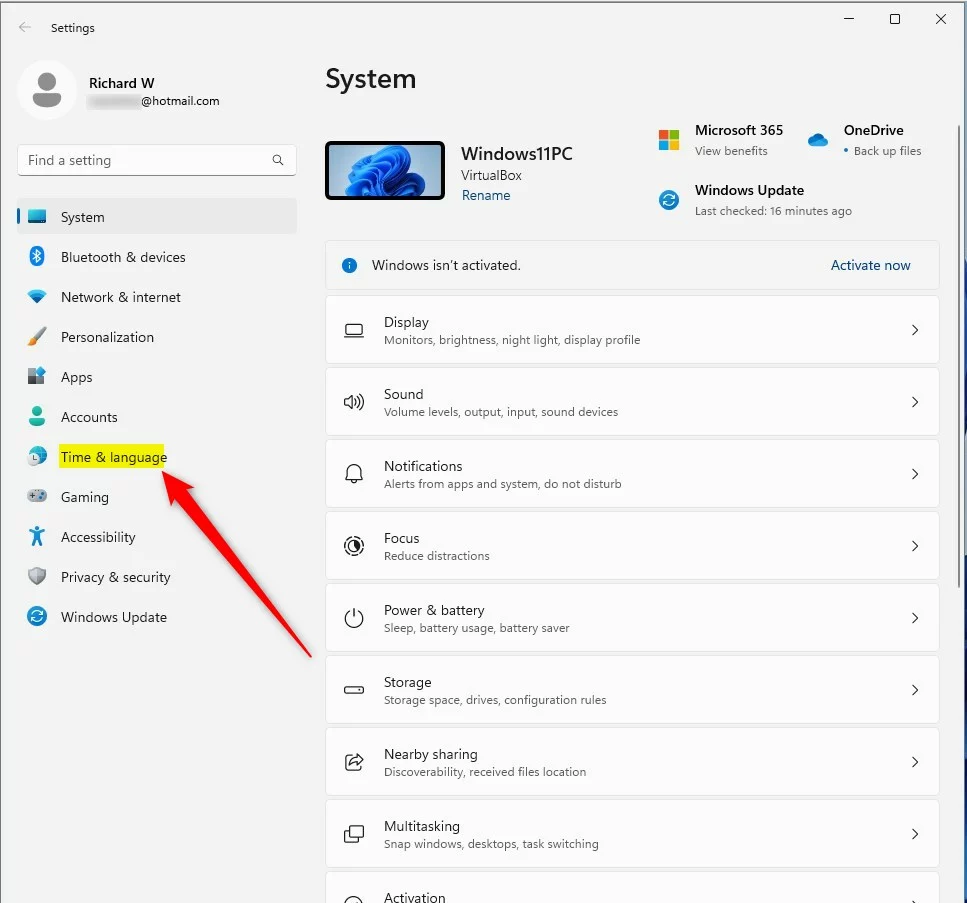
- In the Settings window, click Time & language in the left menu.
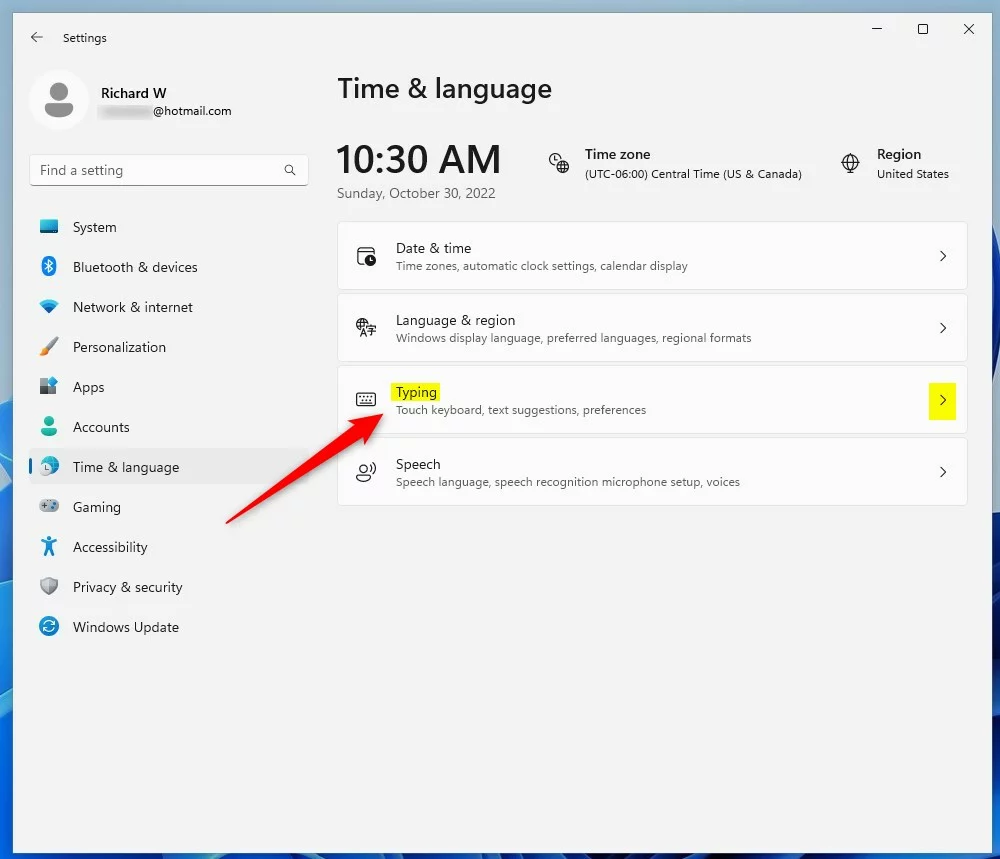
- On the right, click Typing. You should now see the typing options, including text suggestion and autocorrect switches.
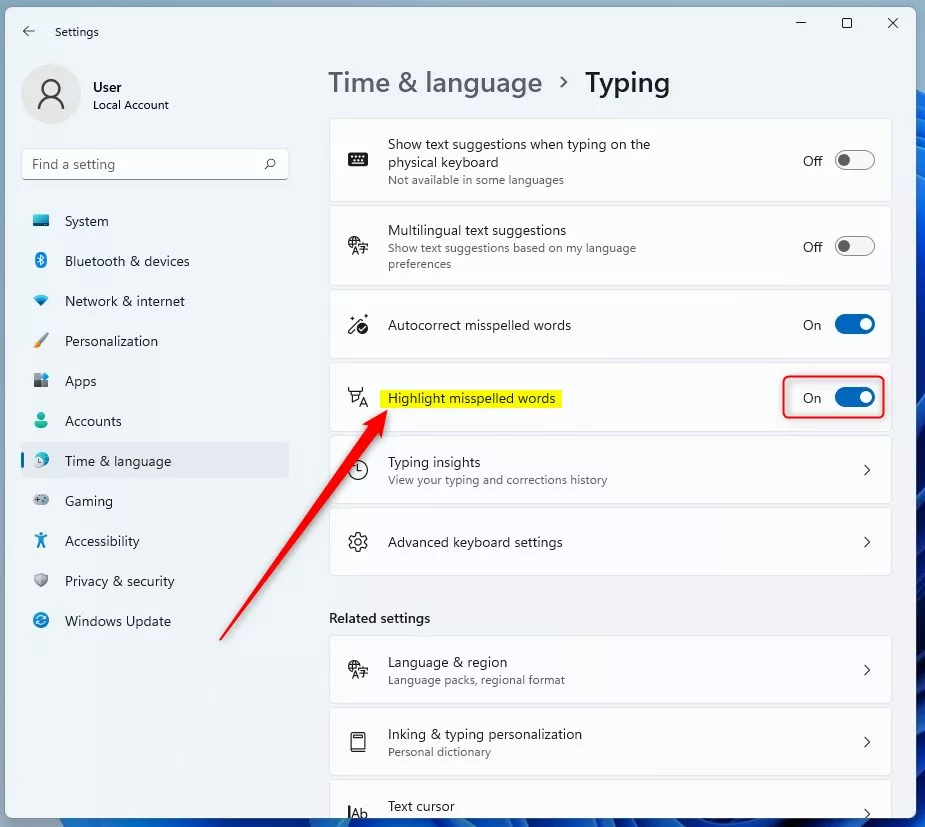
- Find the option Highlight misspelled words.
- Set the switch to On to turn spellcheck on, or Off to turn it off. The change applies straight away. Red underlines in an open app may take a moment to appear or disappear.
A few things to keep in mind:
- Highlight misspelled words only controls the red underlines. If Windows is also changing words as you type, look for the separate Autocorrect misspelled words switch on the same page.
- Some apps keep their own spellcheck settings and may ignore the Windows one. Web browsers and Microsoft Office apps are common examples. If underlines are still showing after you turned the Windows setting off, check the options inside that app.
- If you cannot find the Typing page, make sure you are on Windows 11 and that Windows Update is current. Older builds may lay the settings out differently.
Here are some pictures to help find the right settings:
Bonus: Change Spellcheck Using the Windows Registry (Advanced)
The registry holds low-level system settings, and a wrong edit can cause problems, so follow the steps exactly. Before you start, it is a good idea to back up the registry: in Registry Editor, choose File Export, pick All as the export range, and save the file somewhere safe. To undo any change later, set the value back or double-click your exported file to restore it.
- Open the Registry Editor: Press Windows key + R, type
regedit, and press Enter. If Windows asks Do you want to allow this app to make changes to your device?, click Yes. The Registry Editor window opens. - Navigate to this key. You can copy and paste the path into the address bar at the top of the window:
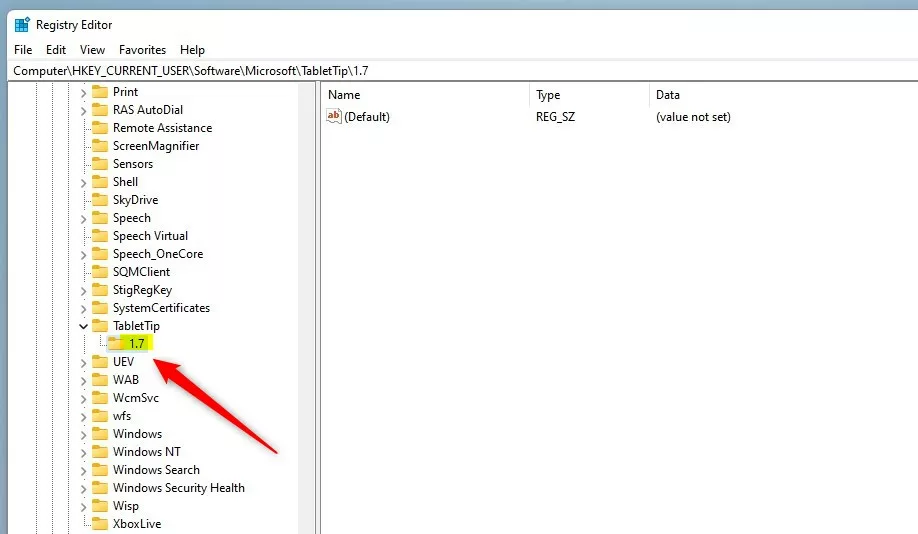
HKEY_CURRENT_USER\SOFTWARE\Microsoft\TabletTip\1.7 - If you don't see the
1.7folder, right-clickTabletTip, choose New Key, and name it1.7. The new folder should now appear in the left pane. - Click the
1.7folder. In the right pane, right-click an empty area and choose New DWORD (32-bit) Value. A new entry appears with its name highlighted for editing. - Name the new value
EnableSpellcheckingand press Enter. - Double-click
EnableSpellcheckingand type the number in the Value data box:- 1 to turn spellcheck ON
- 0 to turn spellcheck OFF
- Close the Registry Editor and restart your computer for the changes to take effect.
If the change does not seem to stick after the restart, check the Settings page described above, and confirm the value name and key path match exactly what is shown in the steps.
Summary
- Spellcheck helps by showing red lines under misspelled words.
- You can turn it on or off in Settings Time & language Typing, using the Highlight misspelled words switch.
- Advanced users can also change this setting in the Windows Registry. Back up first, and restart afterwards.
- Turning spellcheck off can reduce distractions if it marks correct words incorrectly.
- Some apps, such as browsers and Office, have their own spellcheck settings.
Managing Windows 11 spellcheck takes just a few clicks in Settings, or a short edit in the Registry Editor. Spellcheck helps you catch typos by showing red lines under misspelled words, but you can turn it off anytime if it marks correct words incorrectly. Come back to these steps whenever you want to switch it back on or off.
Have a question about this guide?
Answered by AI from this guide. Good questions may be added to this page — please don't include personal details.
Did this guide fix your problem?

About the Author
Richard
Tech Writer, IT Professional
Richard is a writer at Geek Rewind who turns complex IT tasks into clear, step-by-step guides. He draws on years of hands-on experience in system administration and enterprise IT operations, focusing on Windows, Linux and WordPress: the problems people actually run into, and the fixes that work. His server and WordPress guides come from systems he runs himself. Richard builds and maintains the platform behind Geek Rewind, from its Ubuntu servers and Nginx configuration to its custom WordPress plugins. Many new tutorials start with readers' questions, and he's always glad to answer them in the comments.
No comments yet — be the first to share your thoughts!