How to Enable or Disable Microsoft Account Notifications in Windows 11
Microsoft account notifications in Windows 11 send you reminders about your Microsoft services right on your PC.
These alerts pop up on your Start menu, giving you quick links to things like backing up your files or checking your subscriptions.
Microsoft first added these handy pop-ups in the Windows 11 Insider Preview, starting with build 22572. You can decide if you want to see them to make your Windows experience just right for you.
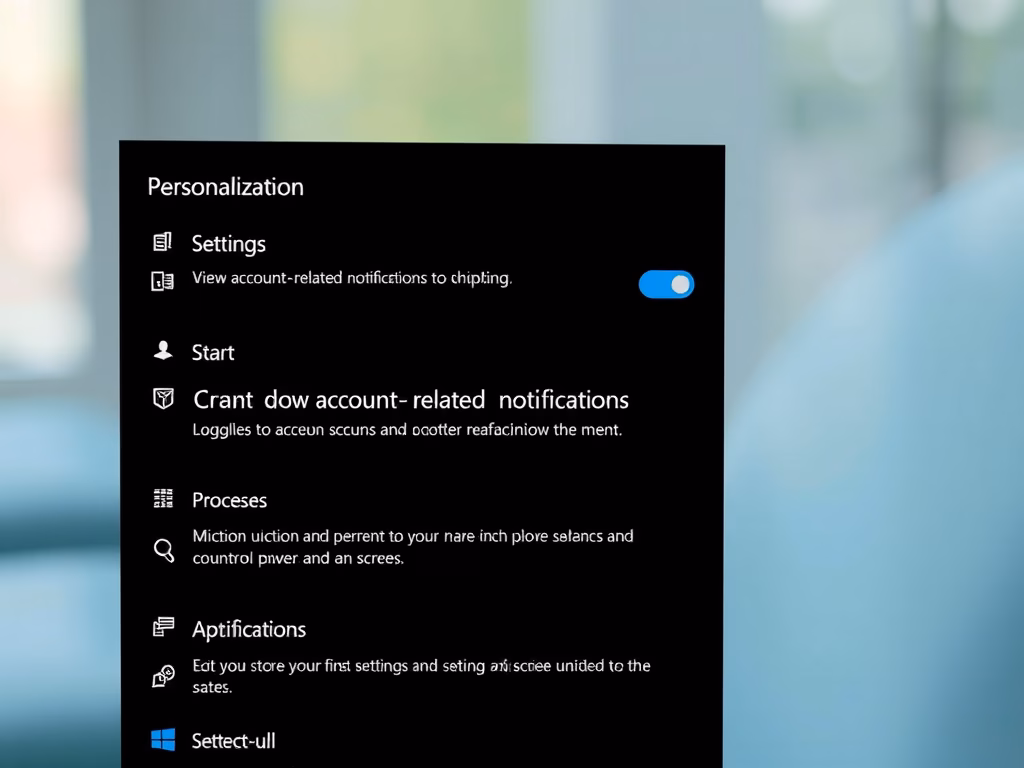
Go to Settings > Personalization > Start. Toggle the “Show account-related notifications” option on or off to control these reminders. You can also use the Registry Editor for advanced users.
How to Turn Microsoft Account Notifications On or Off
Here’s how to control these notifications:
Step 1Open the Settings App
- Click the Start menu (Windows icon) and select Settings.
- Or press
Windows key + Ion your keyboard to open Settings directly.
Step 2Navigate to Personalization
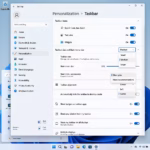
- In Settings, click on Personalization on the left side.
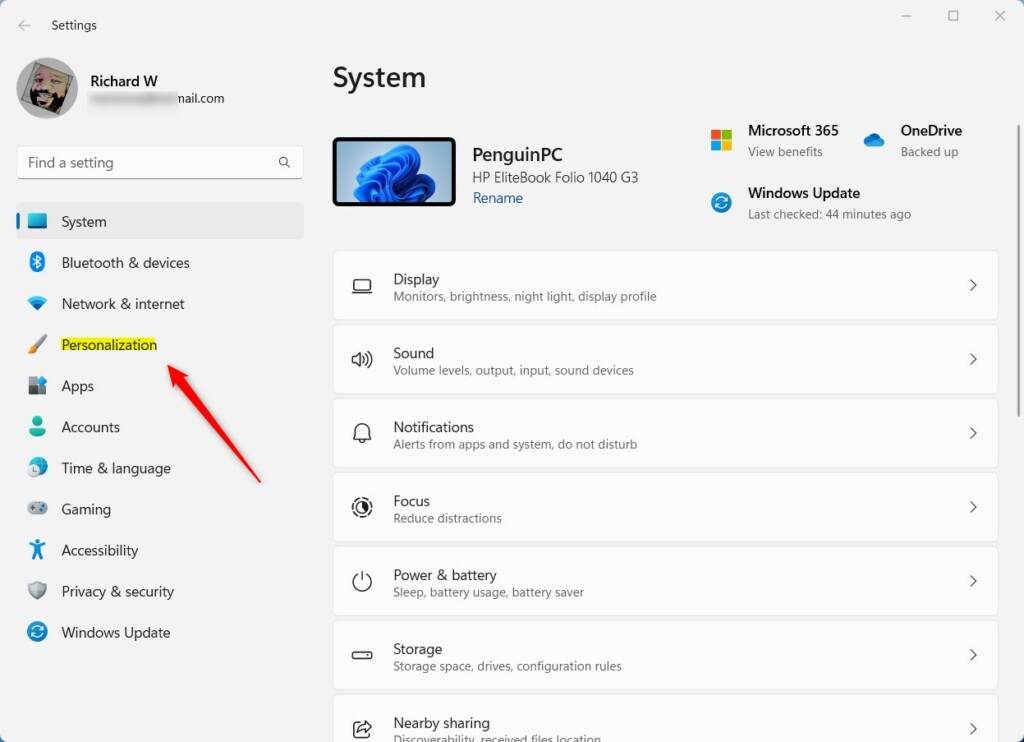
Click Personalization in Settings
Step 3Select Start
- Next, on the right, click Start.
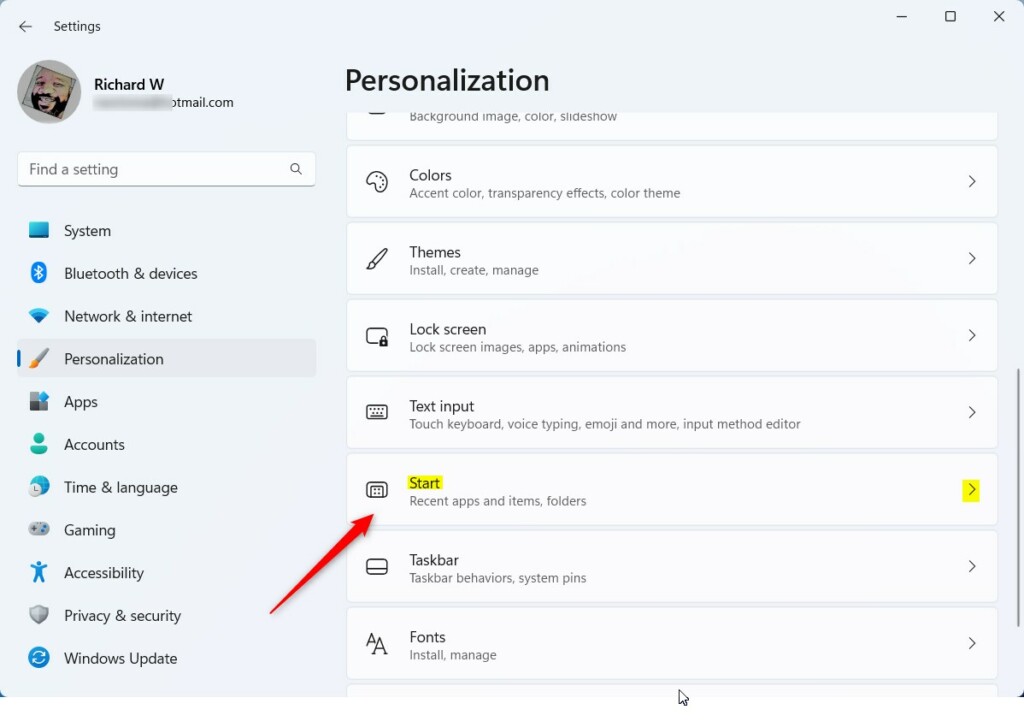
Click Start in Personalization
Step 4Toggle the Notification Setting
- Look for Show account-related notifications and toggle it On to enable or Off to disable.

Turn Show account-related notifications On or Off
Once you’re finished, you can close the Settings window.
Another Way: Use the Windows Registry (For Advanced Users)
For those comfortable with a more technical approach, this feature can be controlled using the Windows Registry Editor (a tool for advanced system settings).
Step 1Open the Registry Editor
- Press
Windows key + R, typeregedit, and press Enter.
Step 2Navigate to the Correct Folder
- Navigate to this folder path:
HKEY_CURRENT_USER\Software\Microsoft\Windows\CurrentVersion\Explorer\Advanced - If you don’t see the Advanced folder, right-click on Explorer, choose New > Key, and name the new key Advanced.
Step 3Create a New Value ⚙️ REQUIRES ADMIN PRIVILEGES
- Right-click anywhere on the right side pane inside Advanced, select New > DWORD (32-bit) Value, and name it
Start_AccountNotifications.
Step 4Set the Value
- Double-click the new
Start_AccountNotificationsvalue and set:1to turn notifications on0to turn notifications off
- Click OK and close the Registry Editor.
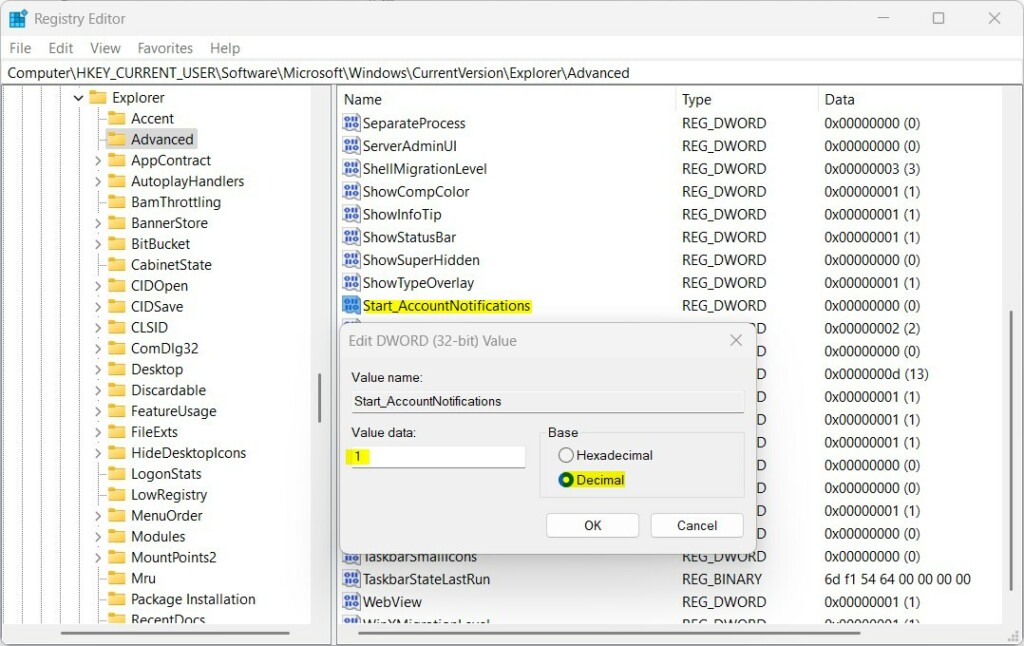
Set Start_AccountNotifications value to 1 or 0
Step 5 Restart Your Computer
- Restart your computer for the changes to take effect.
Summary
Windows 11 account notifications appear on your Start menu, providing important updates for your Microsoft account and security.- Microsoft added a new notification feature for your Microsoft account on the Windows 11 Start menu.
- This feature helps you stay updated about your account and security.
- Not all users see this feature yet. Mainly Insider Preview users have it now.
- You can turn the notifications on or off easily through Settings or using the Registry Editor.
- Choose the method you’re comfortable with.
- For more details, see the official Microsoft announcement: Windows Insider Blog
What are account related notifications on 🪟 Windows 11?
More than likely, you've been prompted by various notification badges on your Windows 11 device. As its name suggests, this feature displays badges on the user profile icon, encouraging you to perform recommended actions related to your Microsoft account, such as setting up OneDrive or starting a Microsoft 365 trial.
Was this guide helpful?

About the Author
Richard
Tech Writer, IT Professional
Richard, a writer for Geek Rewind, is a tech enthusiast who loves breaking down complex IT topics into simple, easy-to-understand ideas. With years of hands-on experience in system administration and enterprise IT operations, he’s developed a knack for offering practical tips and solutions. Richard aims to make technology more accessible and actionable. He's deeply committed to the Geek Rewind community, always ready to answer questions and engage in discussions.

No comments yet — be the first to share your thoughts!