How to Enable or Disable Microsoft Defender Cloud Protection

Microsoft Defender Cloud Protection helps your PC catch new threats instantly.
Cloud-delivered protection is a feature that sends files and data that might be risky to Microsoft for quick checking.
This helps Defender find and stop new viruses and attacks faster than just using regular updates, which might only happen once a day. It uses live threat information from Microsoft’s security systems.
You can choose to turn this Cloud Protection setting on or off in Windows. Doing so changes how Microsoft Defender Antivirus uses smart cloud tools to find dangers.
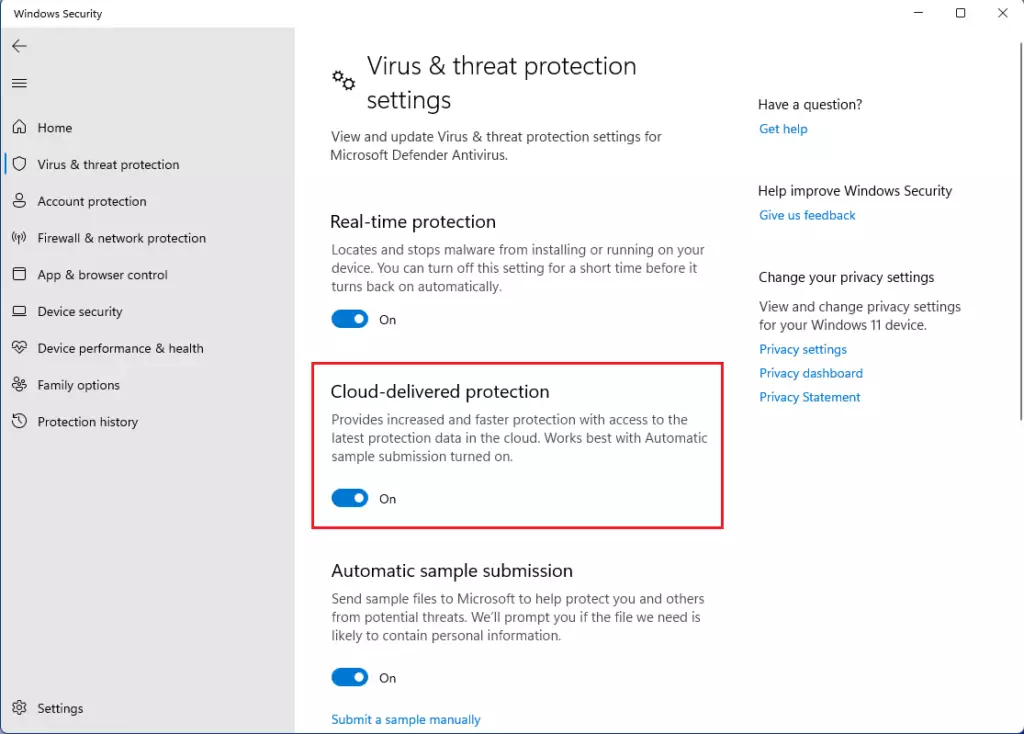
To enable or disable Microsoft Defender Cloud Protection, open Windows Security, go to Virus & threat protection > Manage settings, and toggle Cloud-delivered Protection on or off. This feature enhances real-time threat detection by sending suspicious files to Microsoft for analysis.
Why use Cloud Protection?
Microsoft Defender Cloud Protection helps keep your computer safe by quickly finding new viruses and threats using the cloud, offering near-instant protection against the latest malware even before traditional updates arrive.
What happens when done?
When Microsoft Defender Cloud Protection is turned off, your computer stops getting the newest security updates from Microsoft’s cloud. This makes it more vulnerable to viruses and other online dangers. Also, if you turn on ‘Automatic sample submission,’ Microsoft might collect files to check for threats, so be sure you understand what that means for your privacy.
How to change settings in Windows Security
Changing your Microsoft Defender Cloud Protection settings is possible using the Windows Security app. Open the app, find ‘Virus & threat protection,’ and you’ll see the options there to manage your security settings.
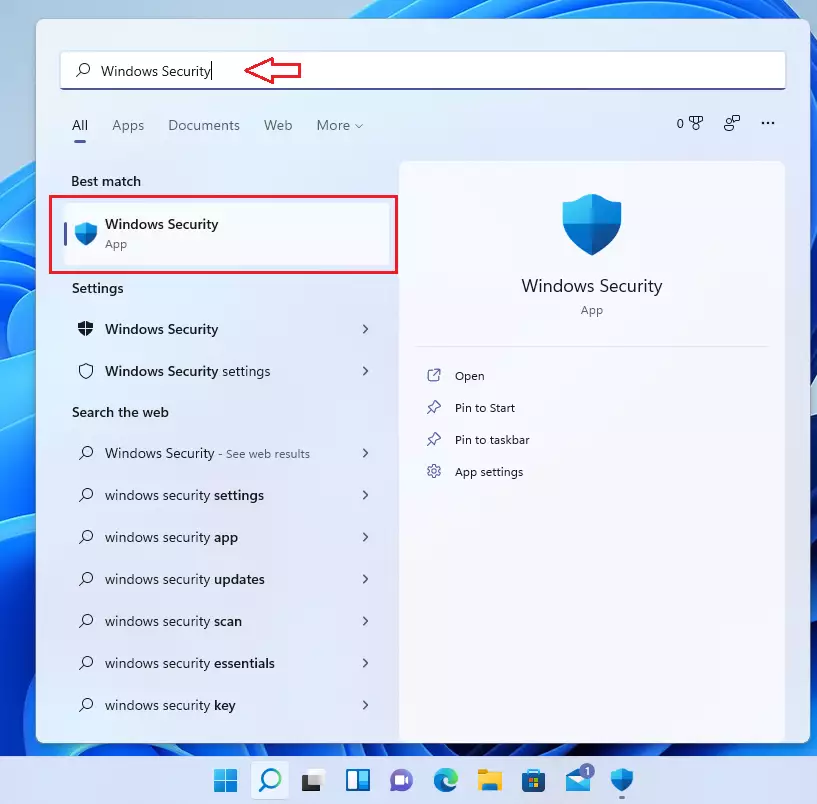
- Click the search box on your taskbar and type Windows Security.
- Select Windows Security from the list.
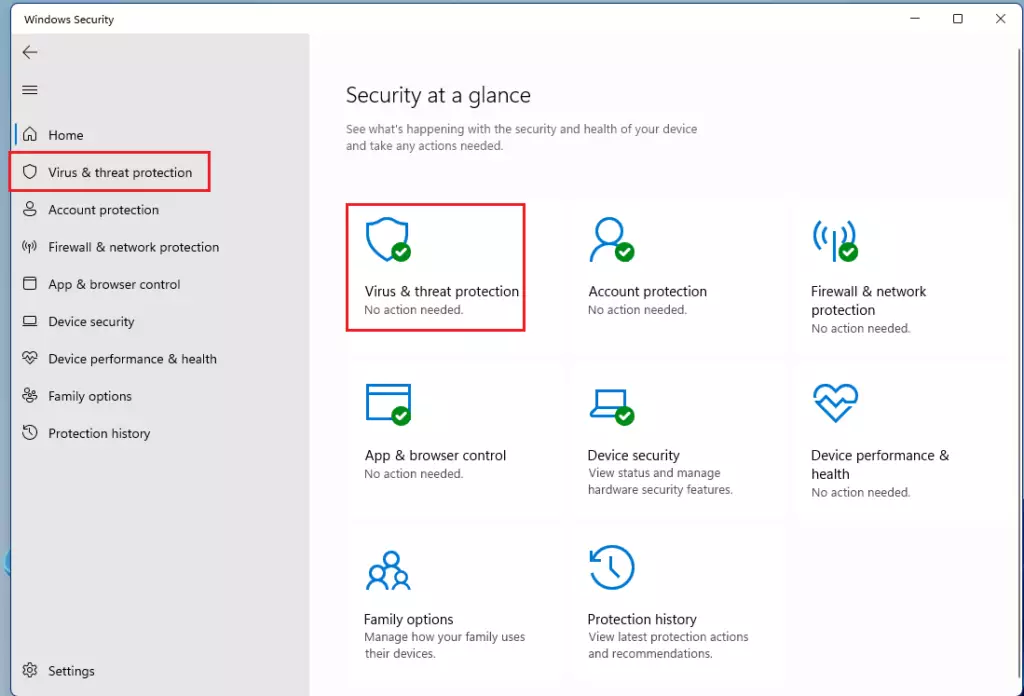
- Click on Virus & threat protection.
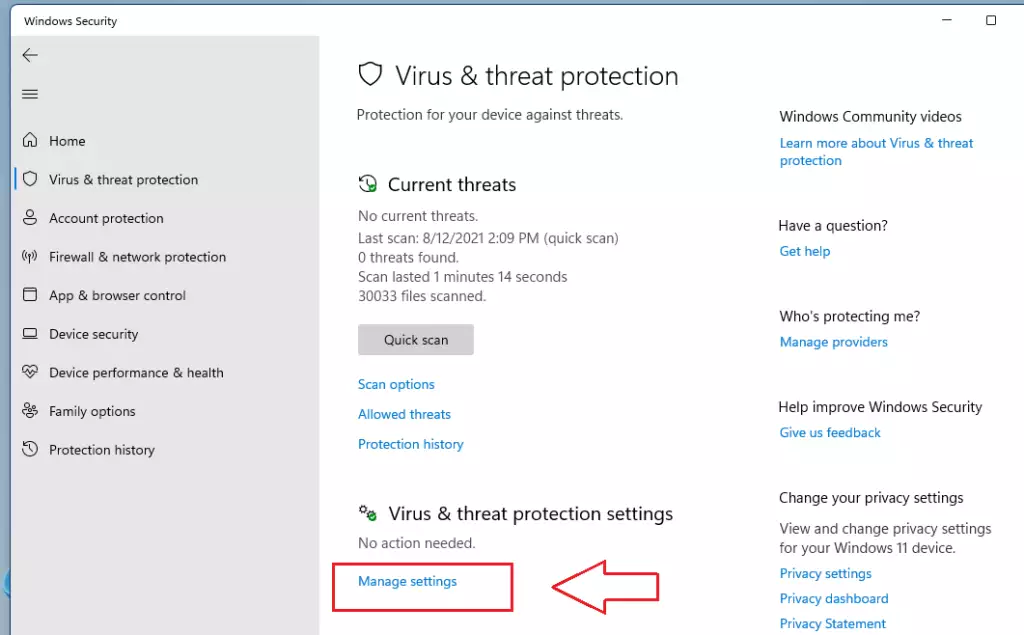
- Look for Virus & threat protection settings and click Manage settings.
- Toggle Cloud-delivered Protection to On or Off.
How to use Group Policy (Admin Privileges Required)
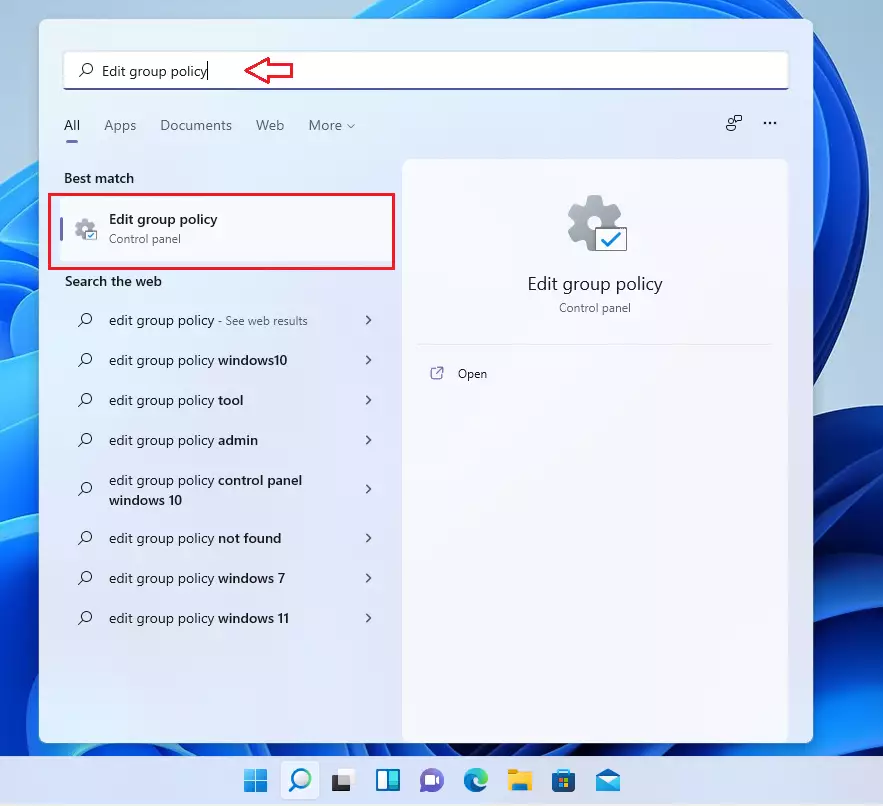
IT pros and advanced users can manage Microsoft Defender Cloud Protection settings with the Group Policy editor. To find it, search for ‘Edit group policy’ and then follow a specific path within the editor.
- Click the Start menu and search for Edit group policy.
- Select it to open the editor.
- In the left menu, follow this path: Computer Configuration > Administrative Templates > Windows Components > Microsoft Defender Antivirus > MAPS.
- On the right side, double-click Join Microsoft MAPS.

- Choose Enabled and set it to Basic MAPS or Advanced MAPS.
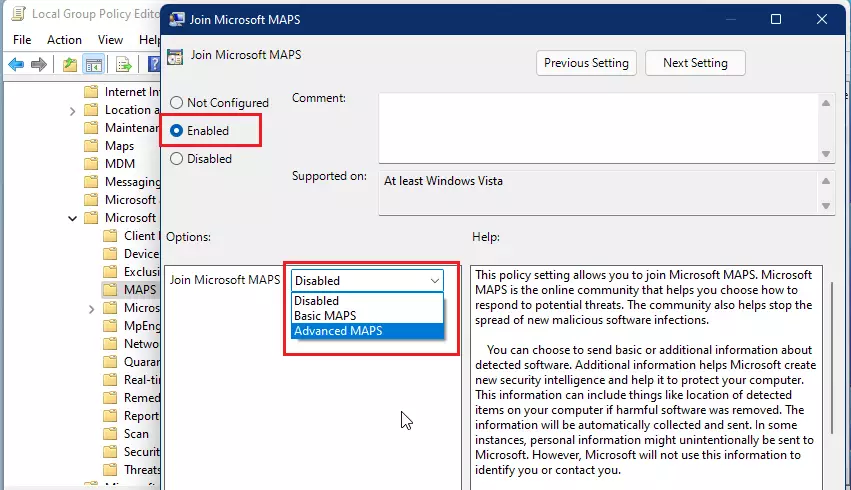
- Click OK and close the window.
Summary
Microsoft Defender Cloud Protection is a vital security feature that connects your device to Microsoft’s threat analysis service for real-time protection against the latest digital threats. Keeping it enabled is strongly recommended.
Does cloud protection impact system performance?
Microsoft Defender Cloud Protection is designed to be lightweight and generally improves your computer’s security without slowing down daily tasks, as it sends minimal data and performs heavy analysis in the cloud.
What data is sent to Microsoft when cloud protection is enabled?
When Microsoft Defender Cloud Protection is enabled, Microsoft collects telemetry data (information about how the software is used) and metadata (data about other data) regarding potential threats. It may also upload suspicious files if automatic sample submission is turned on, all to help improve security for everyone.
Was this guide helpful?

About the Author
Richard
Tech Writer, IT Professional
Richard, a writer for Geek Rewind, is a tech enthusiast who loves breaking down complex IT topics into simple, easy-to-understand ideas. With years of hands-on experience in system administration and enterprise IT operations, he’s developed a knack for offering practical tips and solutions. Richard aims to make technology more accessible and actionable. He's deeply committed to the Geek Rewind community, always ready to answer questions and engage in discussions.


No comments yet — be the first to share your thoughts!