How to Turn Dropbox Badge on or off in Windows 11

The Dropbox badge is a small shortcut icon that appears inside Microsoft Office apps such as Word, Excel, and PowerPoint when you open a file stored in your Dropbox account. It gives you quick access to features like sharing the file and viewing its version history without leaving the document.
You can leave the badge on, turn it off completely, or set it to appear only when another person is working in the same file. If the icon distracts you, you can hide it in a few clicks. The change affects only the badge, not syncing or any other part of Dropbox.
Click the Dropbox icon in the taskbar , select your profile picture, then click Preferences. Find the Dropbox badge setting, click its dropdown menu, and choose Never show to turn it off, Always show to turn it on, or Show only if others’ present to display it only during collaboration.
Finding Your Dropbox Settings
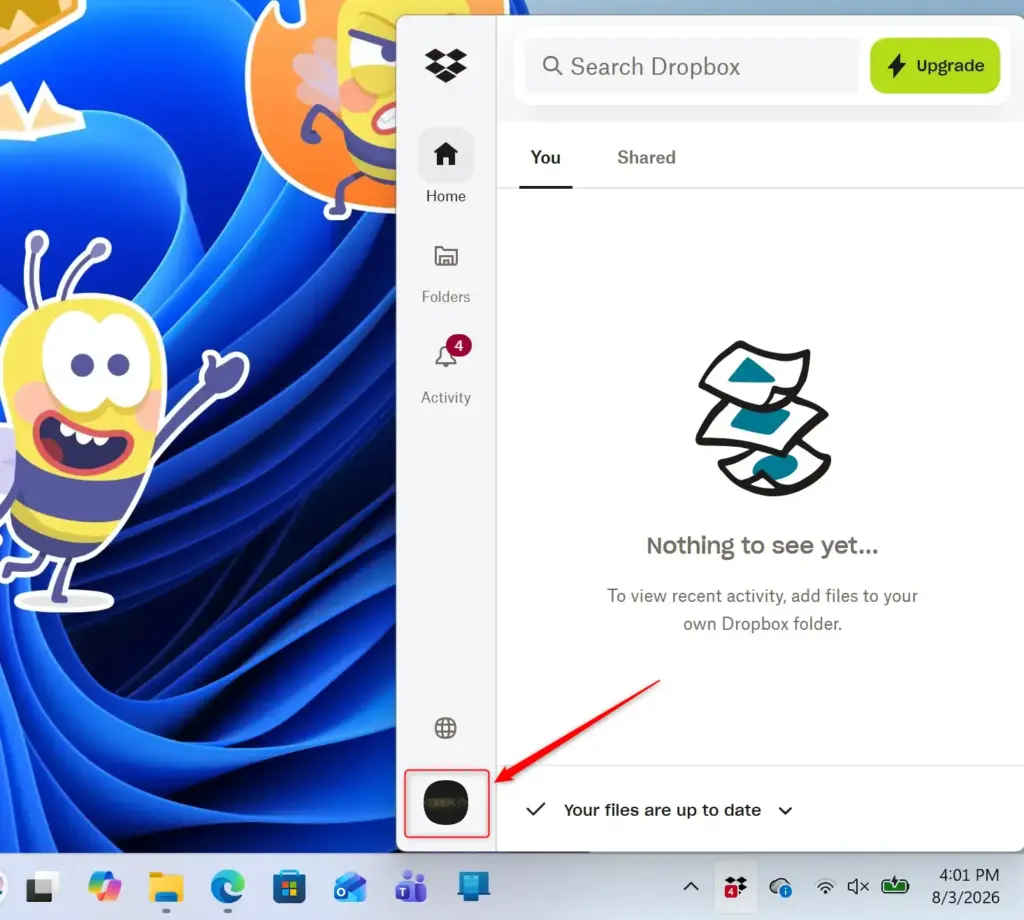
All the badge settings live in the Dropbox Preferences window. You reach it from the Dropbox icon in the taskbar , so start there.
- Look at the bottom-right corner of your screen, near the clock. Find the Dropbox icon. It usually looks like a light blue square with a white Dropbox logo. If Dropbox is paused or not connected, it may be a white square with a blue logo.
- If you don’t see the icon, click the small up arrow (Show hidden icons) in the taskbar to open the overflow area. The Dropbox icon is often tucked in there.
- Click the Dropbox icon. A small Dropbox menu opens.
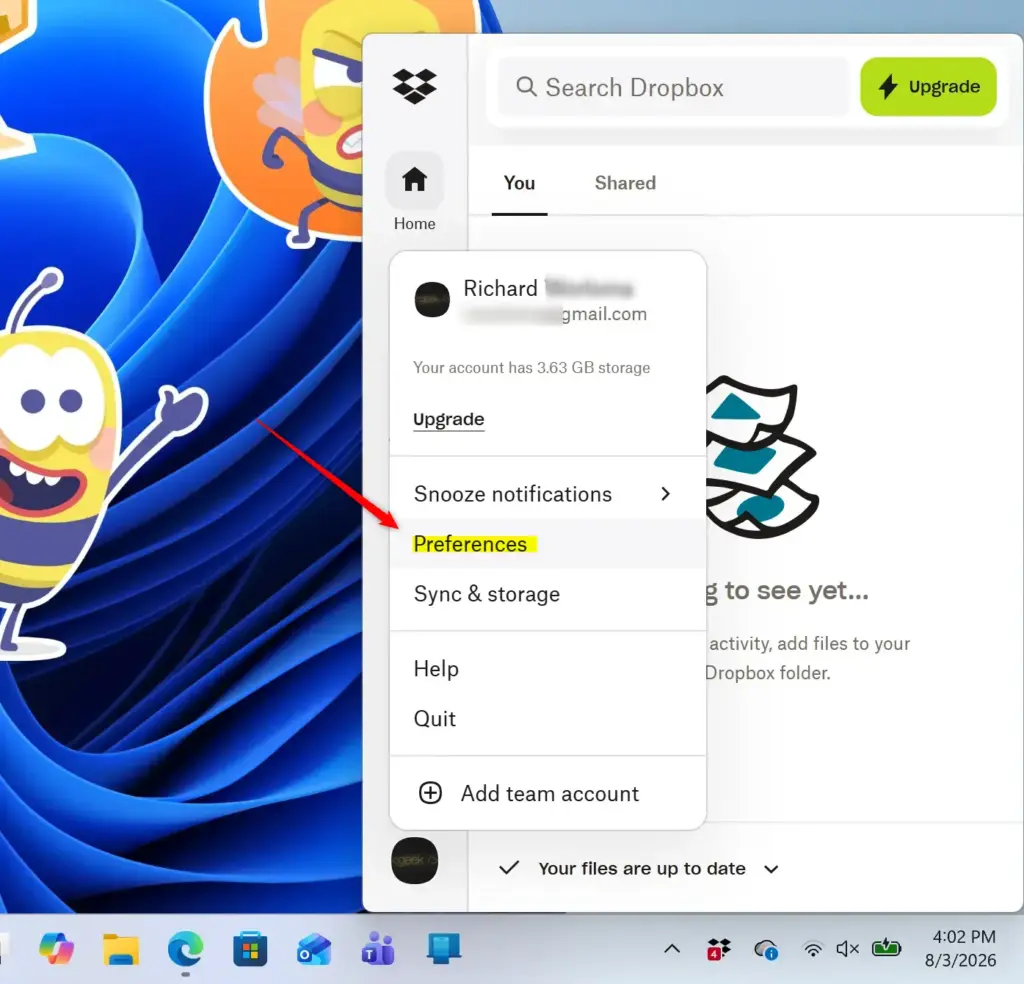
- Click your profile picture or your initials in the corner of this menu. The corner is usually the top right in recent versions of the app. Older versions put it at the bottom left. A second menu opens with more options.
- Click Preferences. The Dropbox Preferences window opens.
If the Dropbox icon isn’t in the taskbar or the hidden icons area, Dropbox probably isn’t running. Open it from the Start menu and wait a few seconds for the icon to appear.
Controlling the Dropbox Badge Display
The badge setting controls when the small icon shows up inside Office files. You change it with a dropdown in Preferences, and you can switch between the choices at any time.
- Open Preferences using the steps above.
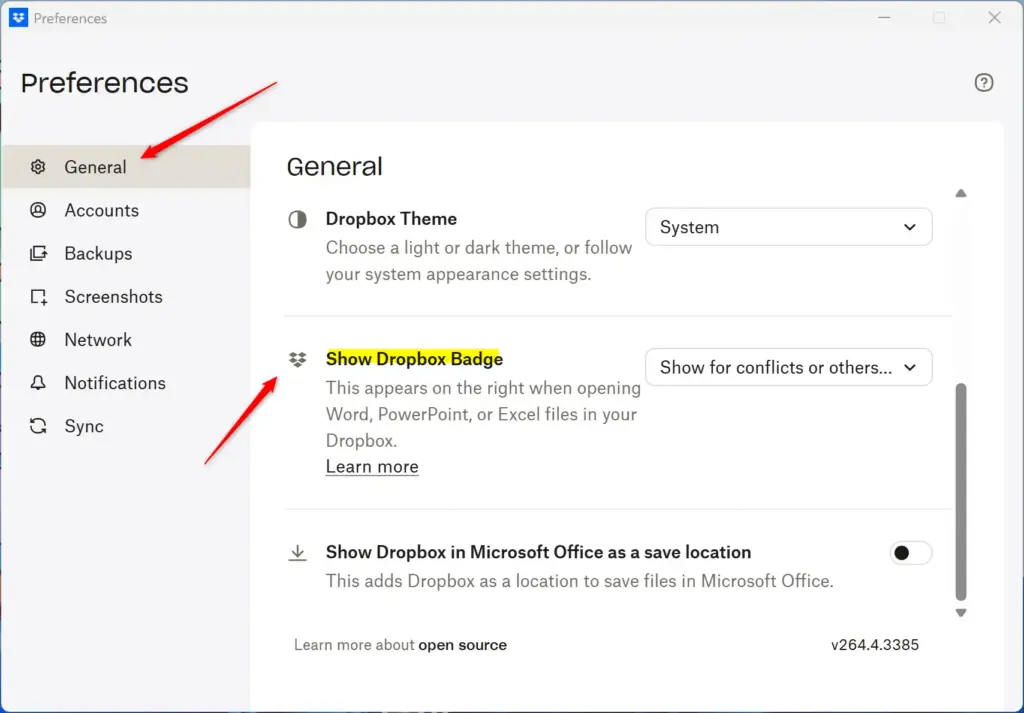
- Find the Dropbox badge setting. It is usually on the General tab, but the layout can differ slightly between Dropbox versions, so check the other tabs if you don’t see it.
- Click the dropdown menu next to Dropbox badge. A list of choices opens.
First, the badge works with the desktop versions of Word, Excel, and PowerPoint, so it won’t appear if Office isn’t installed. Second, an out-of-date Dropbox app may not have the option, so update Dropbox and look again.
These are the choices in the dropdown:
- Always show: The badge appears every time you open a Word, Excel, or PowerPoint file stored in your Dropbox.
- Show only if others' present: This is a good middle option. The badge appears only when someone else is viewing or editing the same document. It tells you when you're collaborating and stays out of the way the rest of the time.
- Never show: The badge is turned off completely.
Click the option you want. The dropdown closes and shows your choice.
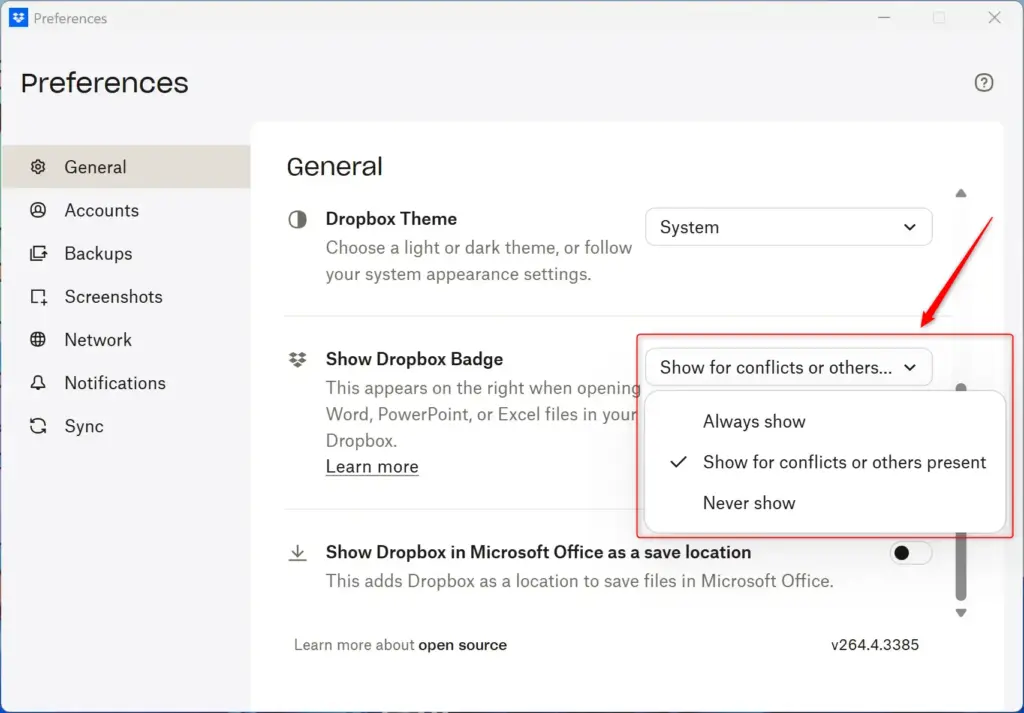
There is no Save or OK button to hunt for, so you can just close the Preferences window. You don't need to restart Windows. If you have a Word or Excel file open, close it and reopen it to see the new badge behavior.
Turning the Dropbox Badge Off Completely
To hide the badge for good, set it to Never show. This stops it from appearing while you edit Word, Excel, or PowerPoint files in your Dropbox.
- Click the Dropbox icon in the taskbar. Use the up arrow first if the icon is in the hidden icons area.
- Click your avatar (profile picture or initials) in the corner of the menu.
- Click Preferences.
- Find the Dropbox badge setting.
- Click the dropdown menu next to it.
- Choose Never show. The dropdown now shows that option.
- Close the Preferences window. The change is already saved.
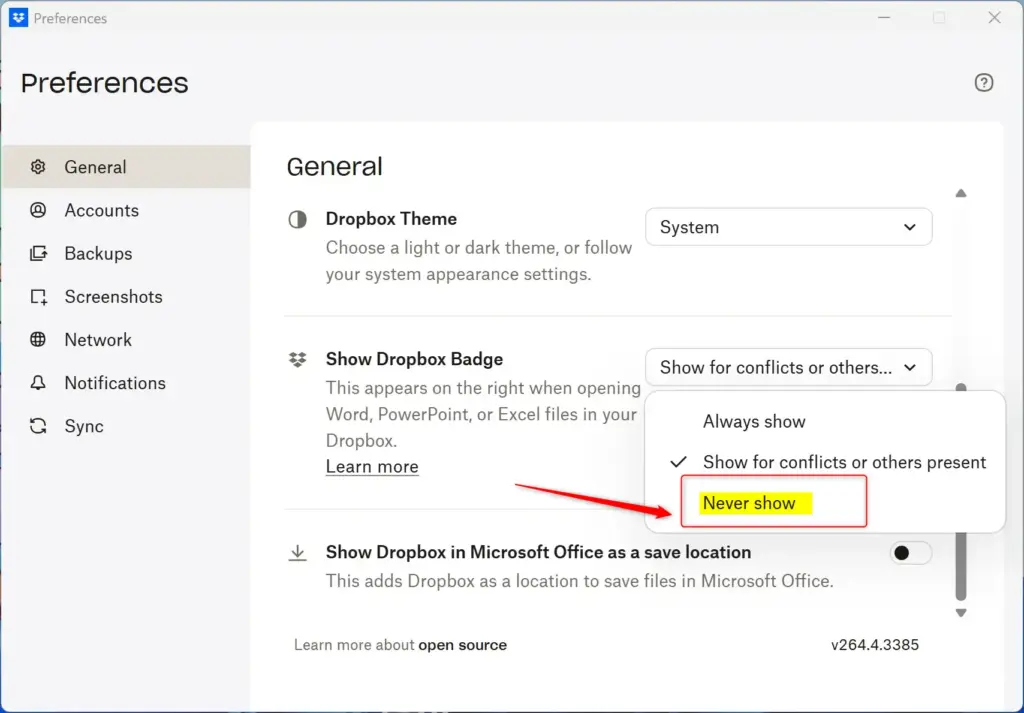
The badge no longer appears in your Office documents, and you won't see it when you work on files saved in your Dropbox. If a file was already open, close it and reopen it. To bring the badge back, repeat the same steps and choose Always show or Show only if others' present.
References:
Summary
Managing the Dropbox badge takes a few clicks in the Dropbox preferences. Open the Dropbox menu from the taskbar, click your profile picture, choose Preferences, and use the badge dropdown to pick one of three behaviors: always show it, show it only when others are in the file, or never show it. The change saves on its own and you can reverse it at any time.
Did this guide fix your problem?

About the Author
Richard
Tech Writer, IT Professional
Richard is a writer at Geek Rewind who turns complex IT tasks into clear, step-by-step guides. He draws on years of hands-on experience in system administration and enterprise IT operations, focusing on Windows, Linux and WordPress: the problems people actually run into, and the fixes that work. His server and WordPress guides come from systems he runs himself. Richard builds and maintains the platform behind Geek Rewind, from its Ubuntu servers and Nginx configuration to its custom WordPress plugins. Many new tutorials start with readers' questions, and he's always glad to answer them in the comments.
No comments yet — be the first to share your thoughts!