How to Enable or Disable Capitalizing the First Letter in a Sentence in Windows 11 Touch Keyboard

Automatic capitalization in the Windows 11 Touch Keyboard starts every new sentence with a capital letter without you pressing the Shift key. The Touch Keyboard is the on-screen keyboard that appears when you tap a text box on a touchscreen or tablet. This tutorial shows how to turn the feature on or off. It only affects the on-screen keyboard. Your physical keyboard is not changed.
Press Win+I, go to Time & language, select Typing, scroll to Touch keyboard, and toggle “Capitalize the first letter of each sentence” on or off. The change applies immediately without restarting.
How to Turn On or Off Auto-Capitalization Using Windows Settings
The easiest way is the Settings app , and it works the same on Windows 11 Home and Pro. Press Win+I, go to Time & language, select Typing, and switch the ‘Capitalize the first letter of each sentence’ option to the position you want. You can undo the change at any time by repeating the steps and flipping the option back.
- Open the Settings app. You can do it either of these ways:
- Click the Start menu and select Settings, or
- Press Win+I on your keyboard.
- In the Settings window, click Time & language on the left side. The right pane now shows the date, language and typing options.
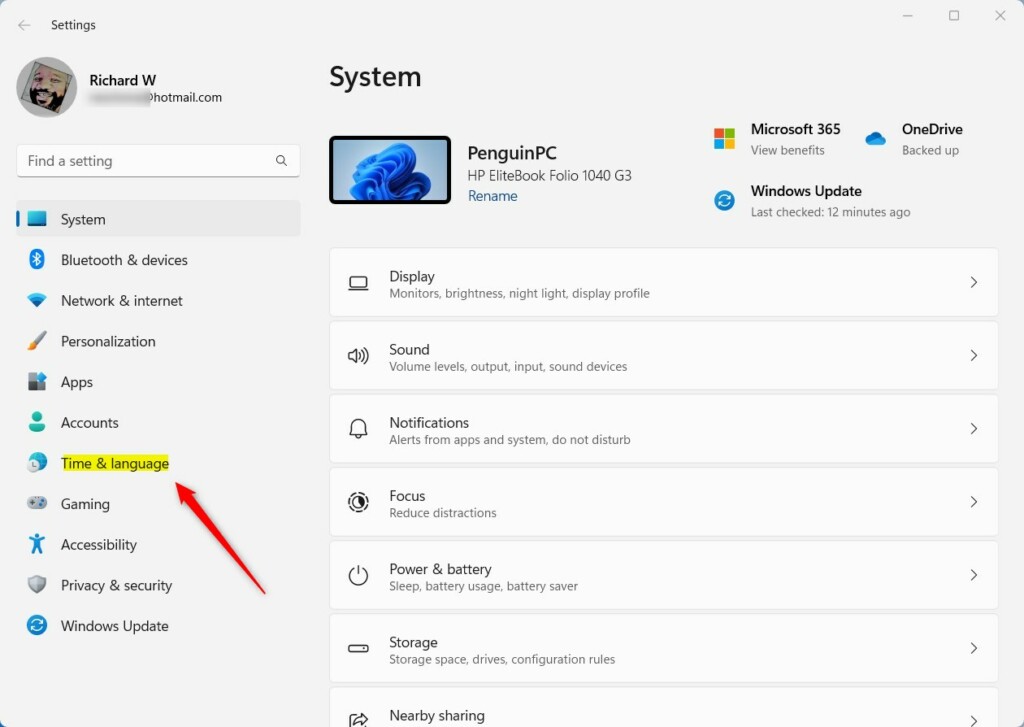
Windows 11 Time & Language button in Settings app - On the right, click the Typing section to open it. You should see the typing and keyboard options for your device.
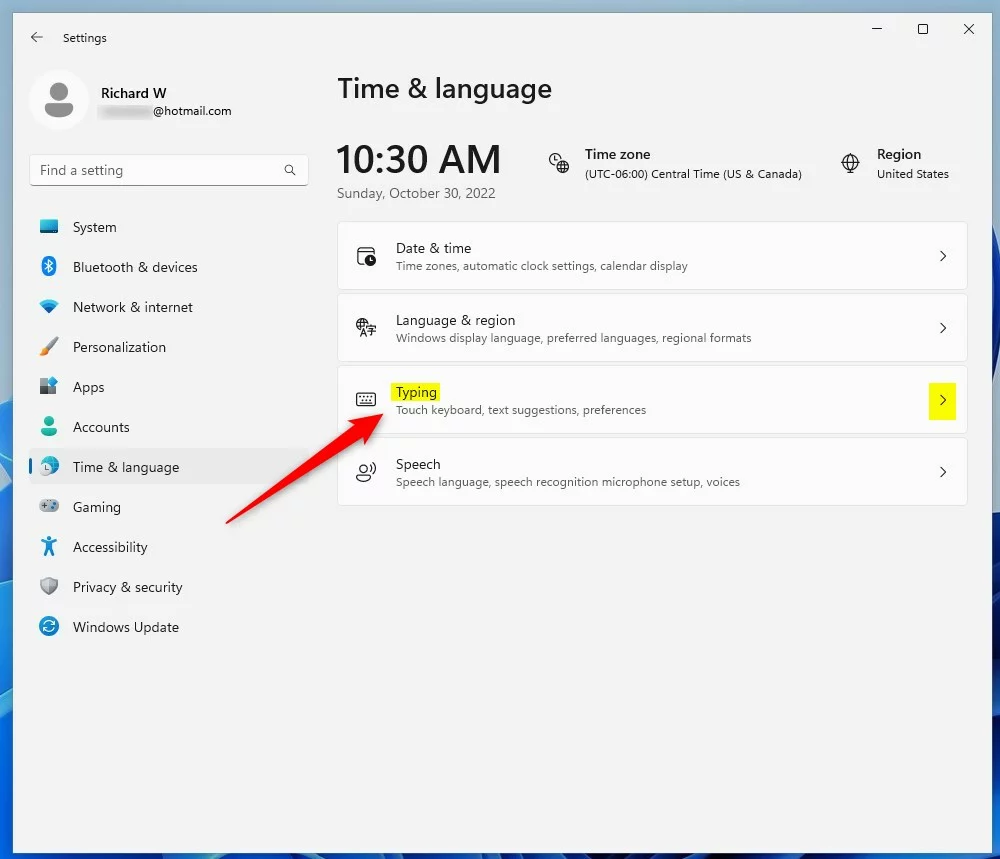
windows 11 time and language typing tile - Scroll down and find the Touch keyboard section. Click to expand it. If you can’t find it, check that Windows is fully updated. The layout of the Typing page has changed between Windows 11 builds.
- Look for the option labeled “Capitalize the first letter of each sentence”. Check the box to turn it on, or uncheck the box to turn it off. The change is saved as soon as you click.
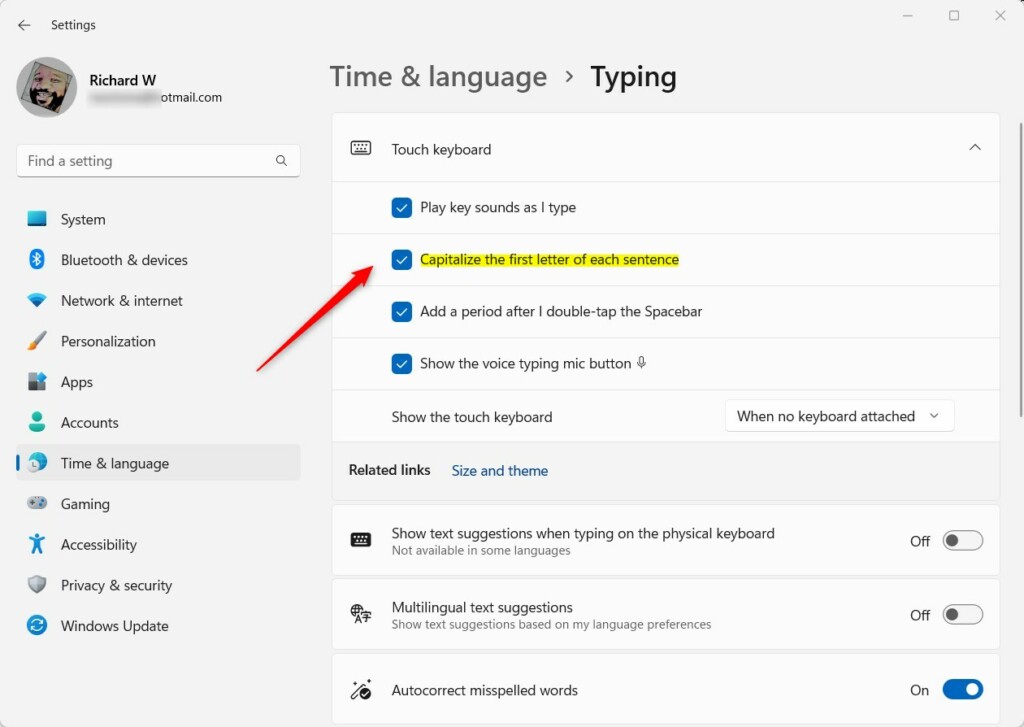
Enable or disable capitalize first letter of each sentence in Windows 11 Touch keyboard - Close the Settings app when you’re done. Your changes apply right away, and you don’t need to restart. To test, open the touch keyboard in any text box and type a sentence. To undo the change, repeat these steps and set the box back the way it was.
How to Enable or Disable Auto-Capitalization Using the Windows Registry (Advanced)
The values involved live under the TabletTip key in 🗝️HKEY_CURRENT_USER\
Changing the wrong settings can cause problems with your PC. Before you start, consider backing up the key you’re about to change. In Registry Editor, select it, then choose File and Export to save a copy you can double-click to restore later.
- [Admin Required] Open the Registry Editor:
- Press Win+R, type
regedit, and press Enter. If a User Account Control prompt appears, click Yes. The Registry Editor window opens with a folder tree on the left.
- Press Win+R, type
- Navigate to this folder (key). You can click through the tree on the left, or paste the path into the address bar at the top of the window:
HKEY_CURRENT_USER\Software\Microsoft\TabletTip\1.7
- If you don’t see the 1.7 folder, right-click on TabletTip, select New Key, and name it 1.7. The new key now appears under TabletTip. Select it before you continue.
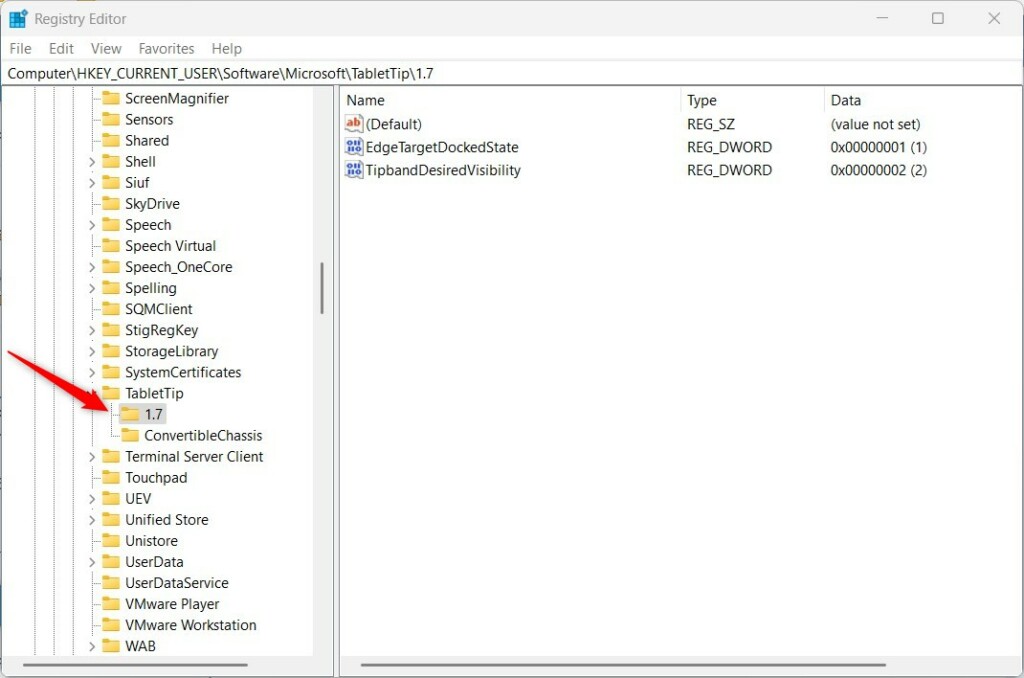
Windows Registry - TabletTip key - Inside the 1.7 folder, right-click on an empty area in the right pane. Select New DWORD (32-bit) Value. A new entry appears with its name highlighted for editing.
- Name the new entry:
EnableAutoShiftEngage. If the value already exists, skip creating it and edit the existing one. - Double-click
EnableAutoShiftEngageand set the value in the Value data box:1to turn on auto-capitalization0to turn it off
Make sure the base is set to Decimal.
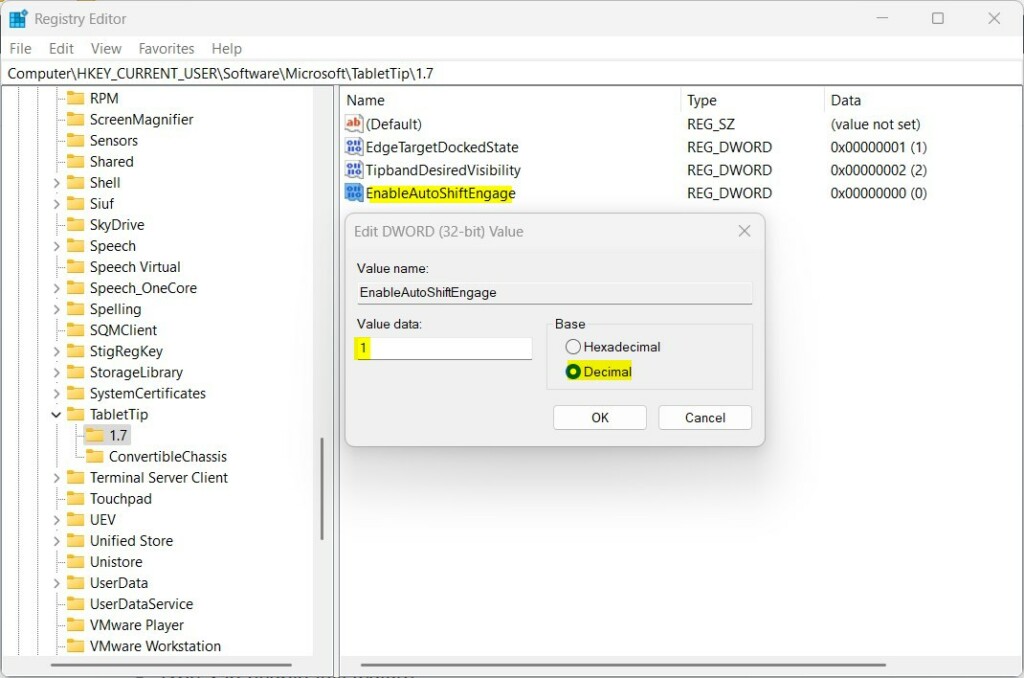
Windows Registry EnableAutoShiftEngage value - Click OK, close the Registry Editor, and restart your PC for changes to take effect. To undo the change, go back to the same value, set it to the opposite number, and restart again. You can also import the backup you exported earlier.
Summary
Windows 11 auto-capitalization helps you type faster by automatically capitalizing the first letter of sentences on the touch keyboard. For most people, the Settings app is the quickest way to switch it on or off. The Registry method is there for cases where the setting is missing or you need to set it by hand.
Have a question about this guide?
Answered by AI from this guide. Good questions may be added to this page — please don't include personal details.
Did this guide fix your problem?

About the Author
Richard
Tech Writer, IT Professional
Richard is a writer at Geek Rewind who turns complex IT tasks into clear, step-by-step guides. He draws on years of hands-on experience in system administration and enterprise IT operations, focusing on Windows, Linux and WordPress: the problems people actually run into, and the fixes that work. His server and WordPress guides come from systems he runs himself. Richard builds and maintains the platform behind Geek Rewind, from its Ubuntu servers and Nginx configuration to its custom WordPress plugins. Many new tutorials start with readers' questions, and he's always glad to answer them in the comments.
No comments yet — be the first to share your thoughts!