How to Turn On “Activate on Hover” Mouse Feature in Windows 11
The “Activate on hover” mouse feature in Windows 11 lets you open any window just by moving your mouse pointer over it, meaning you don’t have to click.
This handy setting changes how you interact with your open programs, making it quicker to switch between them.
For example, instead of clicking on an icon in the taskbar, you can simply move your mouse over it, and the window will appear.
This feature can really speed up your workflow, especially if you juggle many applications at once.
Open Settings, go to Accessibility > Mouse, and toggle “Activate on hover” on. Alternatively, use Control Panel, navigate to Ease of Access > Ease of Access Center > Make the mouse easier to use, and check the “Activate a window by hovering” box.
Turn On “Activate on Hover” Using Settings App
You can turn on the “Activate on hover” mouse feature in Windows 11 right from the Settings app. This handy setting lets you switch to an open window just by moving your mouse pointer over it, no clicking needed. To find it, go to Accessibility, then Mouse, and flip the switch to On.
- Open Settings: Click the Start menu (the Windows icon at the bottom-left corner) and select Settings. Or press Windows key + I on your keyboard to open Settings right away.
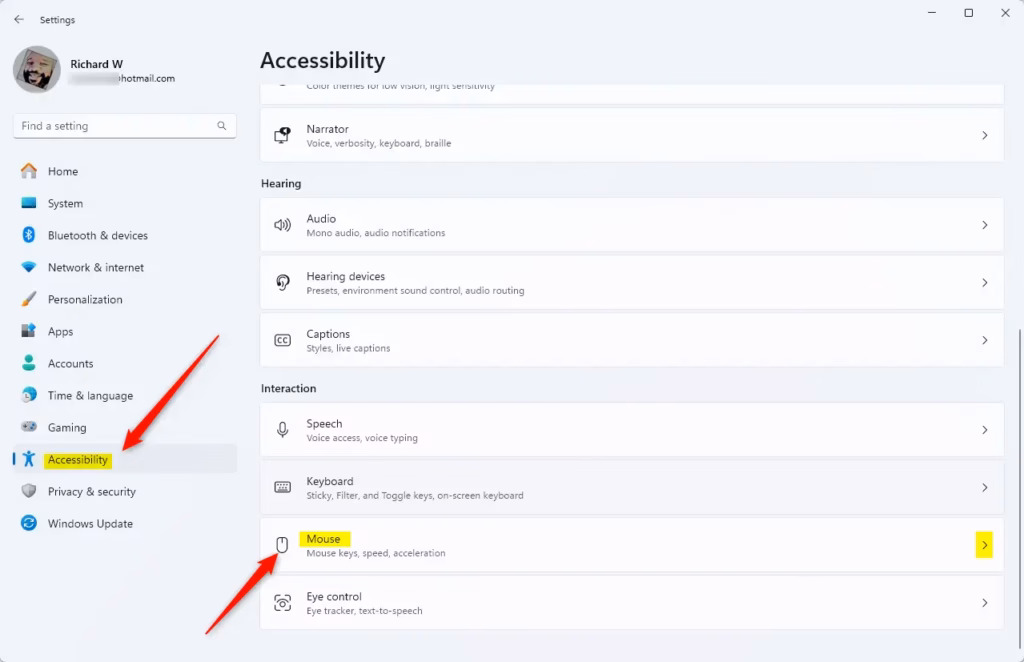
- In the Settings window, click on Accessibility in the left panel.
- Scroll down and click on the Mouse option on the right side.
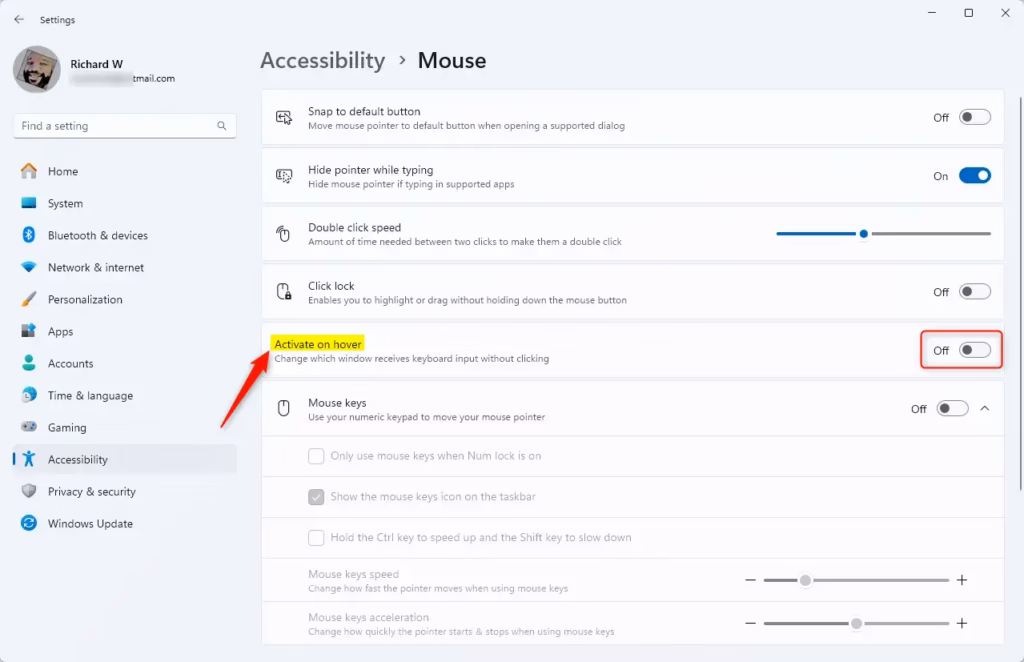
- Find the Activate on hover toggle switch and click it to turn it On.
- Once done, you can close the Settings app.
These images will show you exactly where to click:
Turn On “Activate on Hover” Using Control Panel
You can also activate the “Activate on hover” mouse setting in Windows 11 through the older Control Panel. This feature helps you switch between open windows by hovering your mouse over them. To set this up, open the Control Panel, then find Ease of Access, and go into the Ease of Access Center.
- Open Control Panel: Click the Start menu, type Control Panel, and press Enter. Or learn more about opening Control Panel here: Open Control Panel in Windows 11.
- In Control Panel, go to Ease of Access > Ease of Access Center.
- Under the Explore all settings section, click on Make the mouse easier to use.
- Check the box next to Activate a window by hovering over it with the mouse to turn it on.
- Click OK or Apply to save your changes.
These images will show you exactly where to click:
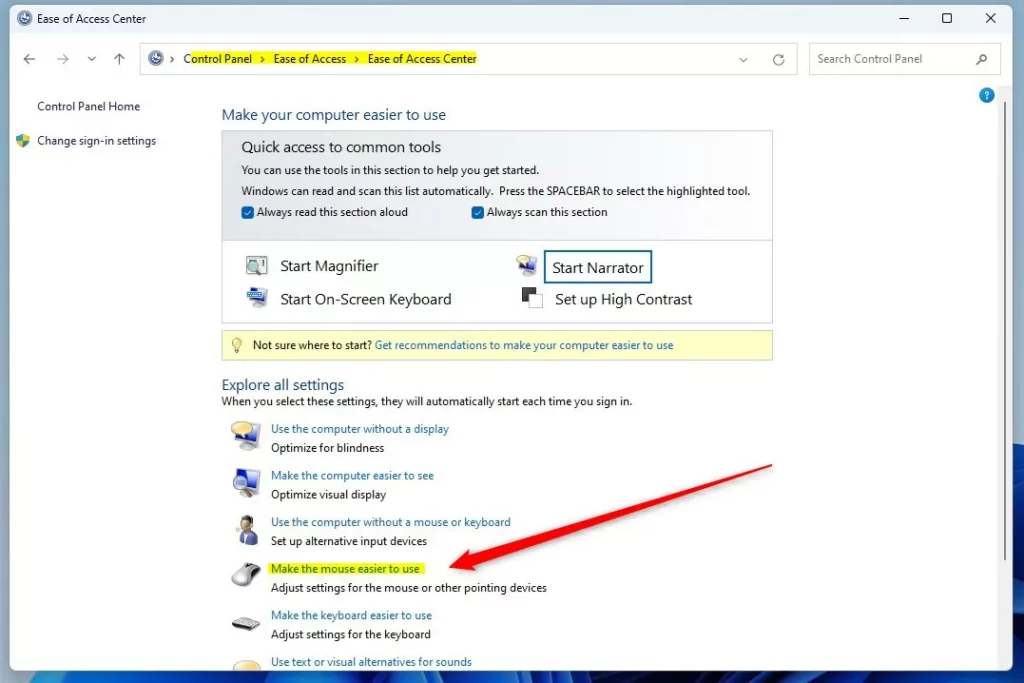
Within the “Explore all settings” section, click “Make the mouse easier to use.”
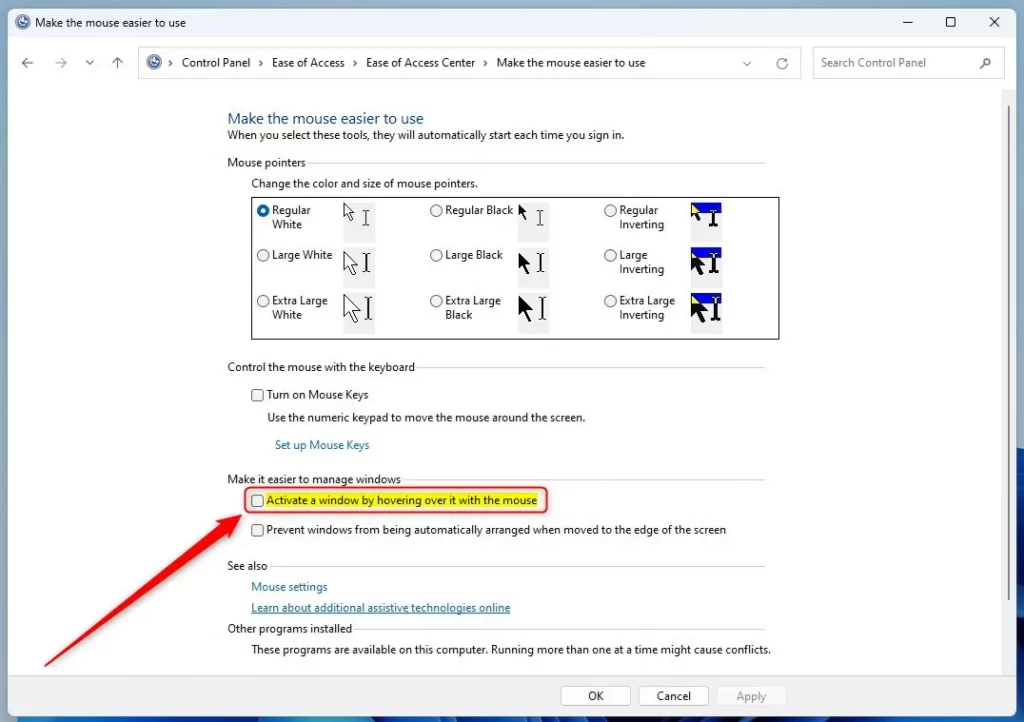
The “Activate a window by hovering over it with the mouse” checkbox in Windows 11 controls a mouse feature that lets you open programs and windows by moving your mouse pointer over them. This mouse hover activation speeds up daily computer tasks by offering faster access to applications, an improvement first introduced in Windows 95.
Summary
The “Activate on hover” setting in Windows 11 speeds up how you switch between open programs, as you don’t need to click. You can turn this useful mouse feature on or off using either the main Settings app or the older Control Panel. Selecting an open program happens just by moving your mouse pointer over its window.
The “Activate on Hover” setting in Windows 11 speeds up switching between open programs. Selecting an open program happens just by moving your mouse pointer over its window, removing the need for a click. This change offers efficiency when you frequently shift between multiple applications, providing a quicker way to manage open windows.
Windows 11’s “Activate on Hover” mouse feature opens items when a user simply points at them. This setting can be managed within Windows Settings or the Control Panel. The “Activate on Hover” feature can speed up computer use for many people by reducing the need for clicks.
Try it out and see if it improves your Windows 11 experience!
How do you hover to activate a window in 🪟 Windows 11?
To activate a window by hovering in Windows 11, go to the Accessibility Center. You’ll find this by clicking Ease of Access, then Accessibility Center, and selecting “Make the mouse easier to use.”
Was this guide helpful?

About the Author
Richard
Tech Writer, IT Professional
Richard, a writer for Geek Rewind, is a tech enthusiast who loves breaking down complex IT topics into simple, easy-to-understand ideas. With years of hands-on experience in system administration and enterprise IT operations, he’s developed a knack for offering practical tips and solutions. Richard aims to make technology more accessible and actionable. He's deeply committed to the Geek Rewind community, always ready to answer questions and engage in discussions.


No comments yet — be the first to share your thoughts!