How to Use Fast User Switching In Windows 11

Fast User Switching in Windows 11 lets multiple people share one computer without signing out of their accounts or closing open apps. This feature keeps separate desktop sessions running at the same time so you can hop between accounts instantly.
Your work stays right where you left it while someone else uses their own account. The feature works on all Windows 11 versions, including Home and Pro.
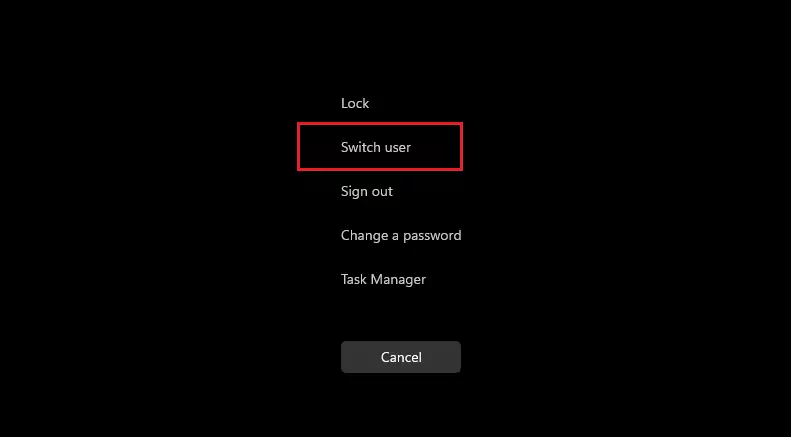
You can switch users from the Start Menu by clicking your profile icon and selecting another user, or from the login screen by clicking your account name. The Ctrl+Alt+Del screen also offers a “Switch user” option.
Why Use Fast User Switching?
Fast User Switching helps people share one computer securely. Each person keeps their apps and files private. When a user switches accounts, their computer session stays on in the background. This allows the user to quickly return to their work.
Prerequisites
Set up multiple user accounts on your PC to use this feature. Both Windows 11 Home and Pro editions allow fast user switching. Administrator rights might be needed for some settings.
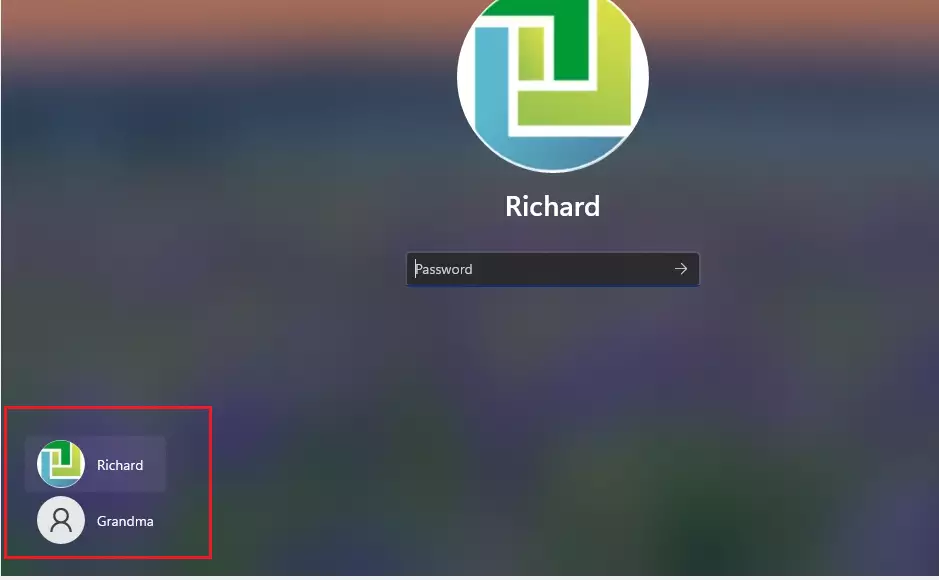
Method 1Switch from the Login Screen
You’ll often find this option first on the login screen. Click the account name on the bottom left to swap sessions.
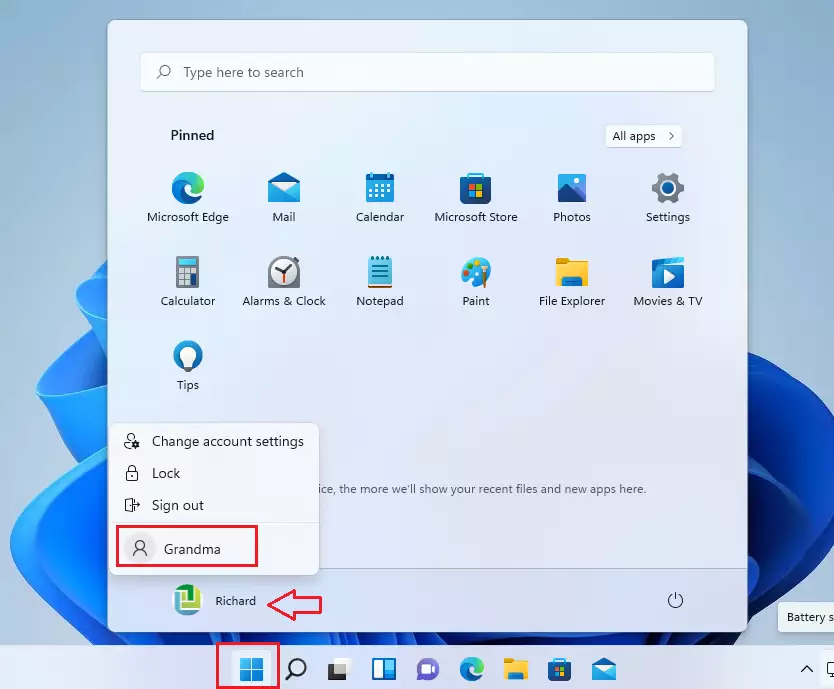
Method 2Switch from the Start Menu
Click the Start button, select your profile icon, and choose another user from the list.
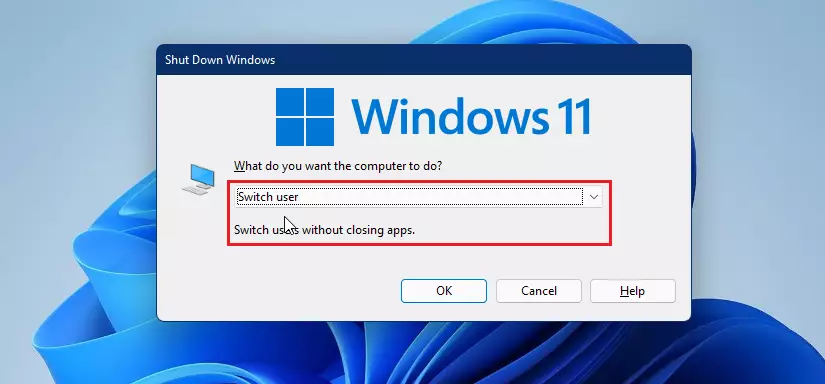
Method 3Use the Shutdown Dialog Window
- Press
WIN + Dto show your desktop. - Press
ALT + F4to open the shutdown menu. - Select Switch user from the dropdown list.
Method 4Use Ctrl + Alt + Delete
- Press
CTRL + ALT + DEL. - Select Switch user from the blue screen menu.
Troubleshooting: Fix Missing Fast User Switching
If the "Fast User Switching" option is missing in Windows 11, administrators may need to check system policies. You will need an administrator account (an account with permission to change system-wide settings) to make these changes.
Using the Registry Editor
Fast User Switching Windows 11 can be turned on using the Registry Editor (a tool for changing advanced system settings) if the feature is missing from your sign-out menu. You need to open the Registry Editor, find a specific policy key, and change its value to 1 to make the user switching option show up again for everyone.
- Press
WIN + R, typeregedit, and press Enter. - Navigate to:
HKEY_LOCAL_MACHINE\SOFTWARE\Microsoft\Windows\CurrentVersion\Policies\System - Look for
HideFastUserSwitching. If it exists, set the value to 0. If it does not exist, right-click, create a new DWORD (32-bit) Value, and name itHideFastUserSwitchingwith a value of 0.
Using Group Policy Editor
If you have Windows 11 Pro, you can use the Group Policy Editor:
- Press
WIN + R, typegpedit.msc, and press Enter. - Go to
Computer Configuration\Administrative Templates\System\Logon. - Find Hide entry points for Fast User Switching and set it to Disabled.
Performance Impact on System Resources
Fast User Switching uses more RAM. Each logged-in user runs background apps, which increases computer memory use by approximately 200 MB per user. If your computer feels slow, signing out of unused accounts frees up system resources.
Summary
Windows 11's Fast User Switching lets you swap between different user accounts without logging off completely. You can use the Start menu, login screen, or keyboard shortcuts to switch users quickly, making it possible to share your PC.
Was this guide helpful?

About the Author
Richard
Tech Writer, IT Professional
Richard is a writer at Geek Rewind who turns complex IT tasks into clear, step-by-step guides. He draws on years of hands-on experience in system administration and enterprise IT operations, focusing on Windows, Linux and WordPress: the problems people actually run into, and the fixes that work. His server and WordPress guides come from systems he runs himself. Richard builds and maintains the platform behind Geek Rewind, from its Ubuntu servers and Nginx configuration to its custom WordPress plugins. Many new tutorials start with readers' questions, and he's always glad to answer them in the comments.




[…] as well as the user’s sign-in tile, is displayed. This behavior is the same when the Switch user feature is […]
[…] all users at the bottom of the Sign-in screen. Instead of listing all user accounts, you will see a Switch user […]