How to Stop a Website from Using Your Camera and Microphone in Microsoft Edge

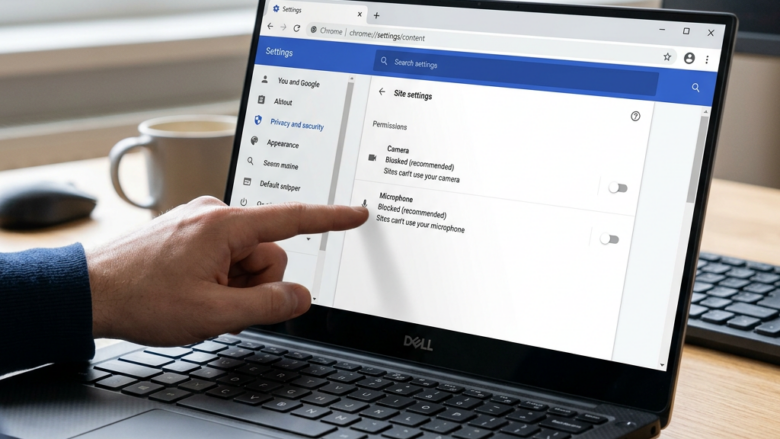
Camera and microphone permissions in Microsoft Edge decide whether a website can record audio and video from your computer. Edge asks before a site can use either device, and it remembers your answer. This tutorial covers Edge version 120 and later, where you can block hardware access for every page at once or set rules for individual sites.
Reviewing these permissions takes a few minutes and keeps web apps from recording you without your knowledge. Everything below is done in the Edge settings menu. No restart is needed, and you can undo any change.
Open Microsoft Edge and select Settings Privacy, search, and services > Site permissions Camera or Microphone. Toggle off the permission to block all websites, or scroll down to find a specific site and change its setting from Allow to Block.
What Happens When You Block Access?
Blocking a website stops that site from accessing your camera or microphone. The block stays in place until you change it, so the site can no longer prompt you or start recording on a later visit. Sites you have never visited are not affected by a block on another site, so check each one you care about.
How Windows Shows Access
Windows and your hardware show you when a website is using your camera or microphone. A small light turns on next to your webcam lens, and a microphone icon appears on your screen. Learn what these signals look like first. They tell you when a site is recording, whatever permission you think you gave it.
- Camera Light: Many cameras have a small light next to the lens. It turns on whenever the camera is active. If a site is using the camera and the light is on when you didn’t expect it, close the tab and check that site’s permissions. If your camera doesn’t have a light, Windows shows a message on your screen instead. Some laptops have no light at all, so don’t assume a missing light means the camera is off.
- Microphone Icon: You will see a small microphone symbol in the corner of your screen, near the clock. It appears when an app or website is using your microphone. Hover over it to see which app is listening. If it is Edge, one of your open tabs is the source.
These indicators show when a website is using your computer’s camera or microphone. Watching them is the quickest way to spot unwanted access. If you see one when you didn’t expect it, follow the steps below to block the site.
How to Stop Websites from Using Your Camera and Microphone in Microsoft Edge
That means you manage them inside Microsoft Edge. Windows also has its own camera and microphone switches under Settings Privacy & security. If Edge is not allowed there, no site in Edge can use the device at all. Check that setting if a site can’t find your camera even though you allowed it in Edge.
Step 1Open Edge Settings
Start by opening the main Edge menu, then go into Settings. The steps below walk through it. From there you can change what websites are allowed to do on your computer.
- Open the Microsoft Edge browser. A browser window with your home page or last session should appear.
- Look for the three dots in a row at the top right corner. This is the Settings and more button. Click it. A dropdown menu opens.
- Click Settings in the menu. The settings page opens in a new tab, with a list of categories down the left side.

Step 2Find Site Permissions
Next, find the permissions area in the settings page. The category names can differ a little between Edge releases. If you can't find Permissions under Privacy, search, and services, look for Cookies and site permissions in the left sidebar. Site permissions are listed there in newer builds. These settings are the same in Home and Pro editions of Windows, because they belong to the browser.
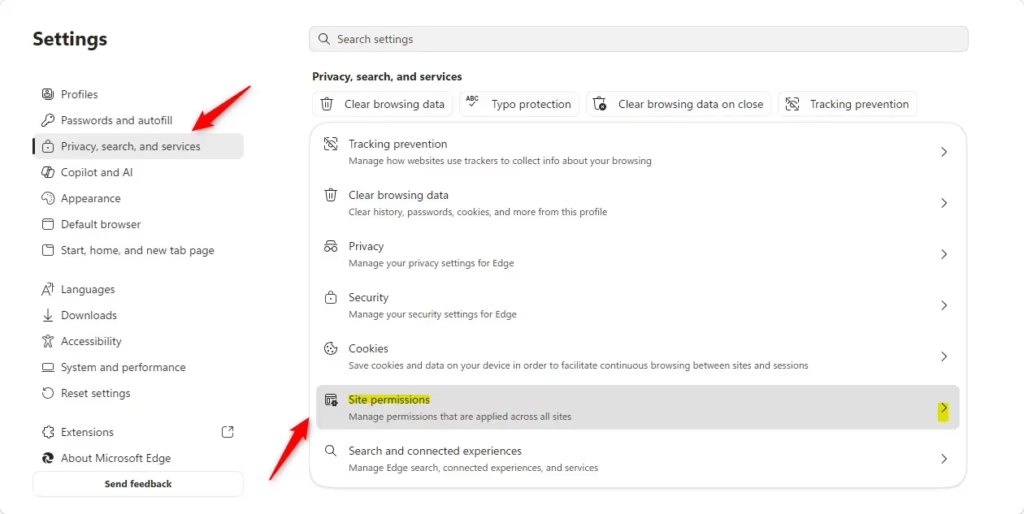
- On the left side of the settings screen, click Privacy, search, and services. The main part of the screen changes to show privacy options.
- Scroll down the main part of the screen. Look for a section called Permissions.
- Under Permissions, click Site permissions. A page opens with a list of permission types, such as location, camera and microphone.
Step 3Manage Permissions for Websites
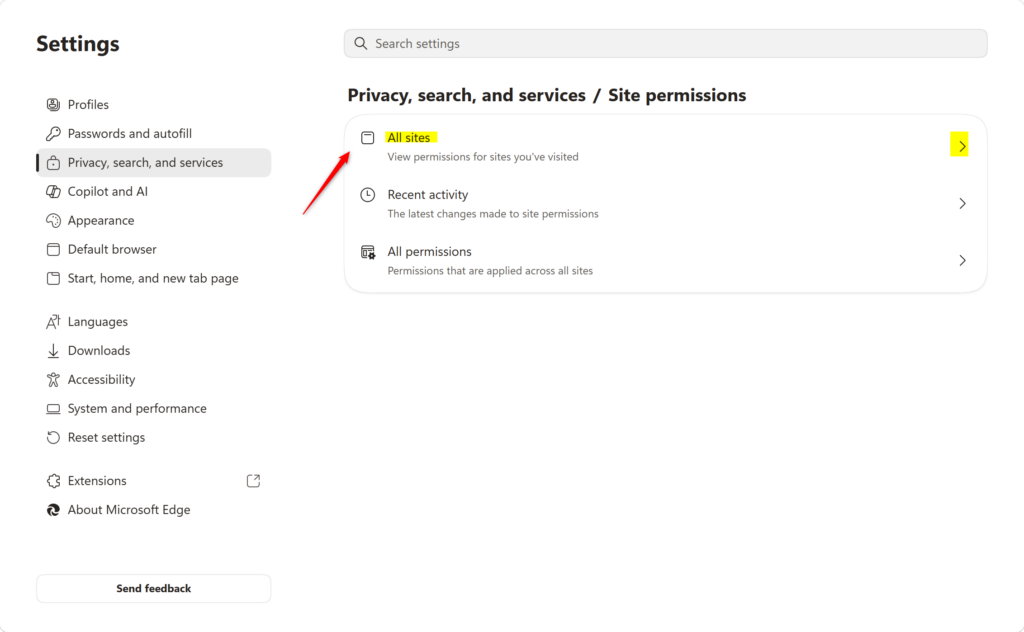
The All sites option lists every website that has stored settings in Edge, including ones that have asked to use your camera or microphone. Browse the list or search for a specific site, then block its camera and microphone. The change applies immediately.
The site will then prompt you before it can use the device. If a block seems to have no effect, reload the site's tab.
- In the Site permissions section, click All sites. A list of websites appears.
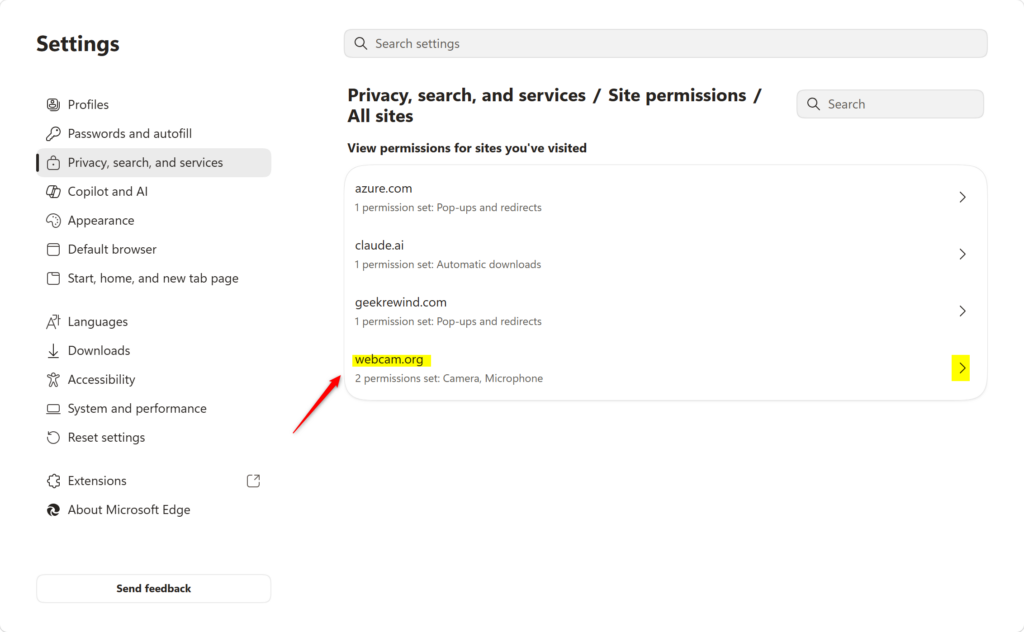
- Scroll through the list, or type a website name in the search box to narrow it down.
- Find the website you want to control and click its name. A page with that site's permissions opens.
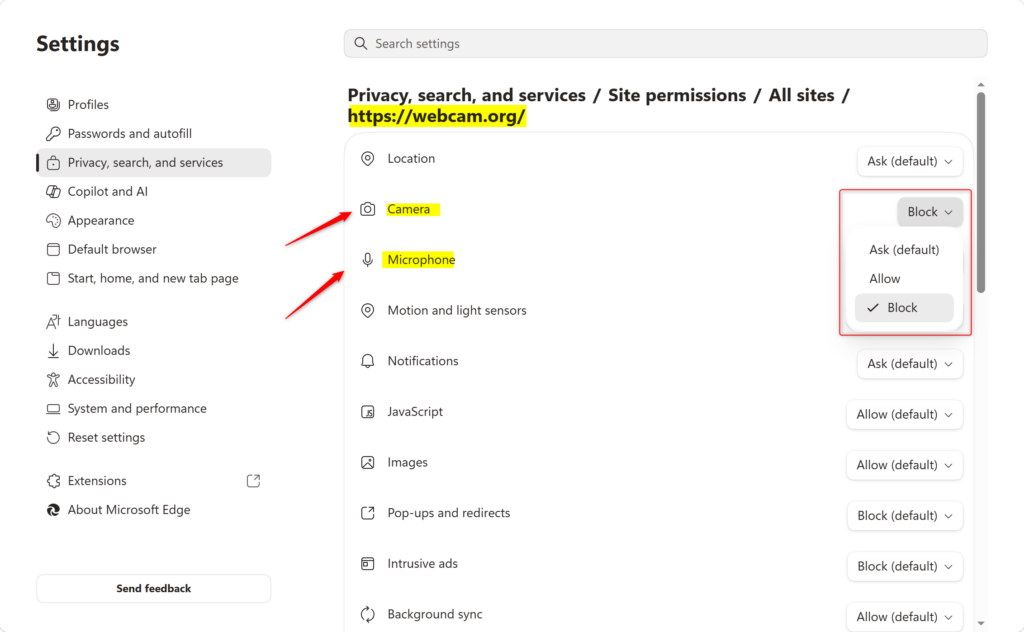
- Look for the Camera and Microphone entries. Each one has a dropdown showing its current setting.
- Click the box next to Camera. A menu pops up. Choose Block. The box now shows Block.
- Do the same for Microphone. Click the box and choose Block. The site can no longer use either device.
Reference:
Summary
To stop a website from using your camera and microphone in Microsoft Edge, go to Settings, select Privacy, search, and services, and open Site permissions. Then choose All sites, pick the site, and set Camera and Microphone to Block. To reverse it, set them back to Ask (default).
How do I stop a website from using my Camera?
Open Microsoft Edge and go to Settings Privacy, search, and services > Site permissions Camera. Find the website you want to block and select it, then choose Block. Edge will prevent that site from accessing your camera on all future visits.
How do I disable the Camera and mic?
In Microsoft Edge, open Settings Privacy, search, and services > Site permissions. You'll find Camera and Microphone listed separately. Click each one and toggle off "Ask before accessing" to disable requests, or select individual sites and choose Block for granular control.
How do I turn off the Microphone on a website?
Open Microsoft Edge Settings Privacy, search, and services > Site permissions Microphone. Find the website in the list, select it, and choose Block. The site won't be able to access your microphone anymore, and Edge won't ask for permission on future visits.
Can you disable webcam Microphone?
Yes. In Microsoft Edge, go to Settings Privacy, search, and services > Site permissions Microphone. Locate the website and select Block. You can also turn off "Ask before accessing" at the top to deny all microphone requests by default across all sites.
Was this guide helpful?

About the Author
Richard
Tech Writer, IT Professional
Richard is a writer at Geek Rewind who turns complex IT tasks into clear, step-by-step guides. He draws on years of hands-on experience in system administration and enterprise IT operations, focusing on Windows, Linux and WordPress: the problems people actually run into, and the fixes that work. His server and WordPress guides come from systems he runs himself. Richard builds and maintains the platform behind Geek Rewind, from its Ubuntu servers and Nginx configuration to its custom WordPress plugins. Many new tutorials start with readers' questions, and he's always glad to answer them in the comments.


No comments yet — be the first to share your thoughts!