This post describes the steps to set priority notifications with Do Not Disturb in Windows 11.
In Windows, notifications are alerts from apps, settings, and other senders in the notification center.
Focus is a new feature in Windows 11 that helps you minimize distractions. To help you stay on track, it integrates with the Clock app with features like a focus timer and music integration.
Focus and Do Not Disturb are similar features in Windows. They help minimize distractions by silencing notifications during focus sessions and times you don’t want to be disturbed.
However, even in focus sessions and business meetings, you may still want to receive notifications from essential apps, which are considered a priority.
Below is how to turn on priority notifications during focus hours.
How to set priority notifications with do not disturb in Windows 11
As described above, users can set priority notifications during focus sessions.
Below is how to do that.
Windows 11 has a centralized location for the majority of its settings. Everything can be done, from system configurations to creating new users and updating Windows from its System Settings pane.
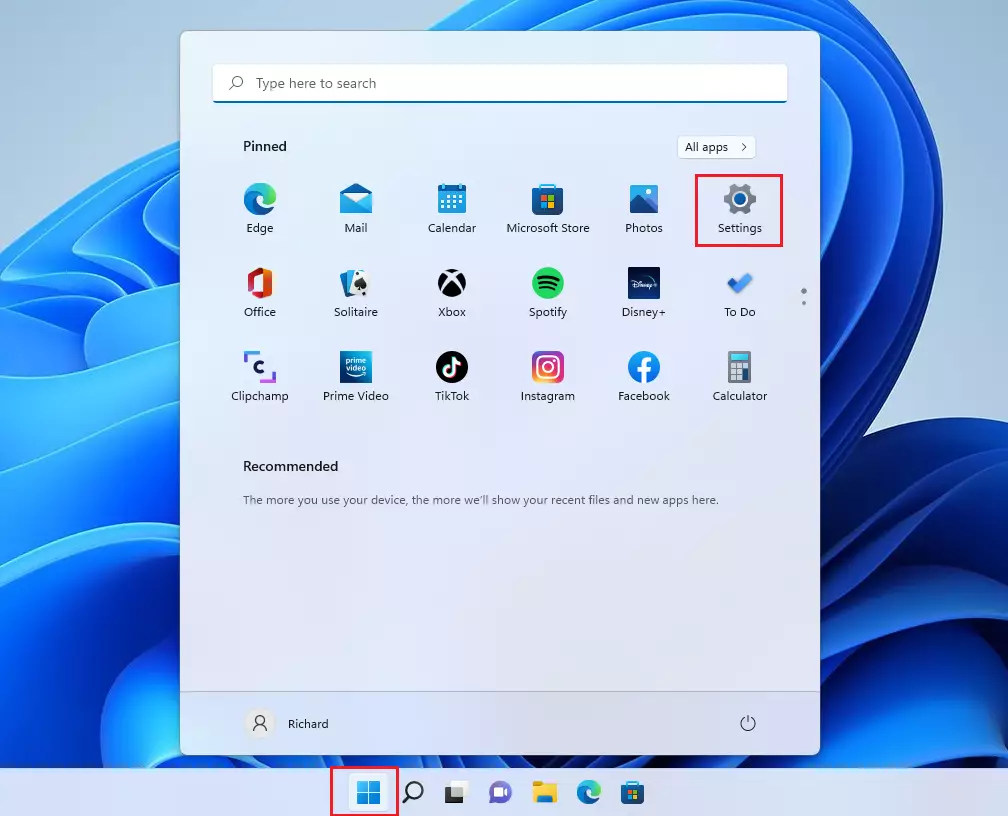
To get to System Settings, you can use the Windows key + I shortcut or click on Start ==> Settings, as shown in the image below:

Alternatively, you can use the search box on the taskbar and search for Settings. Then select to open it.
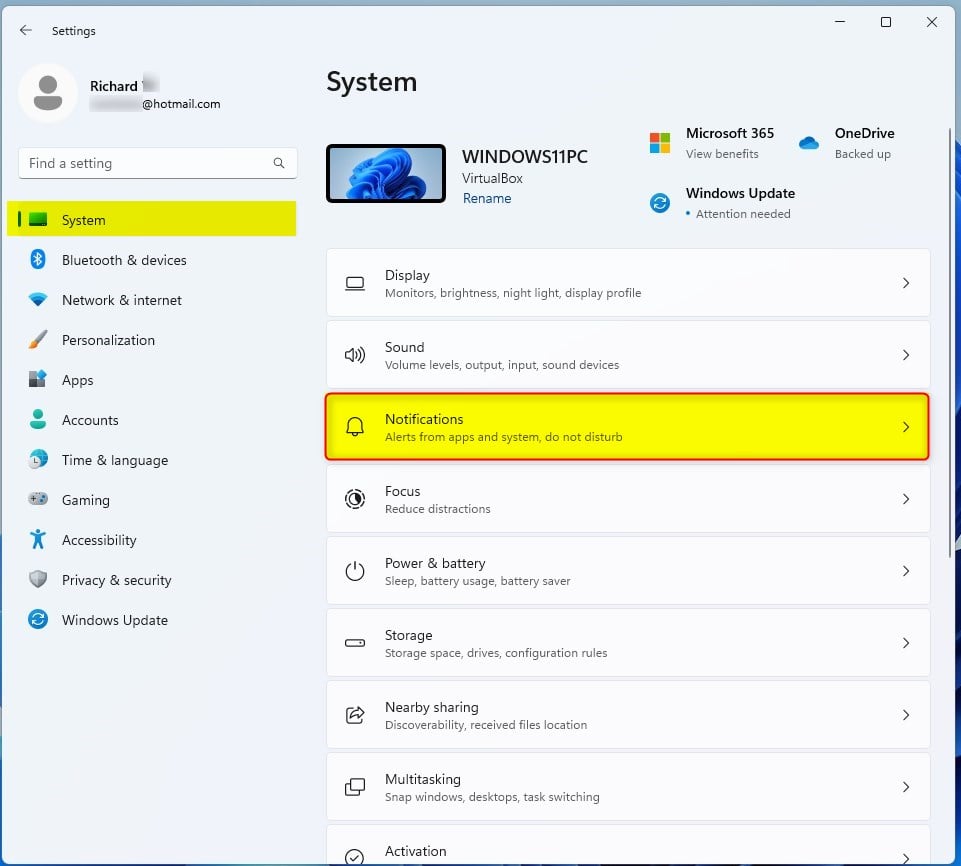
Windows Settings pane should look similar to the image below. On the Windows Settings app, click the System on the left, then select the Notifications tile on the right pane, as highlighted in the image below.

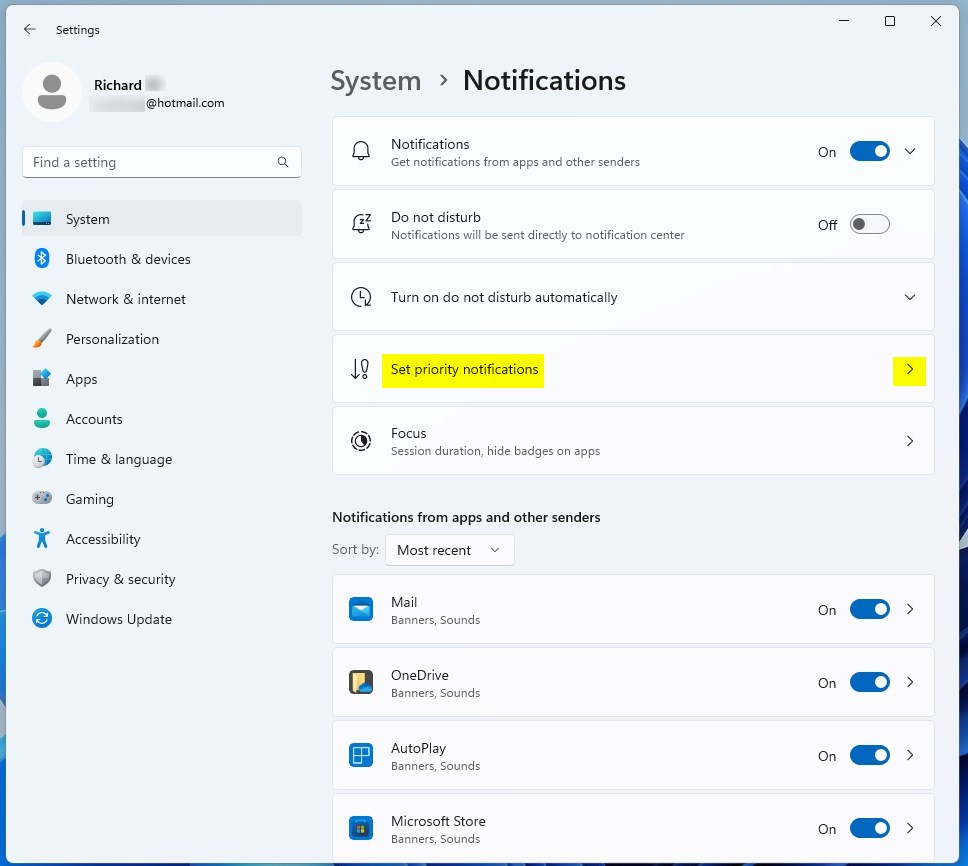
On the System -> Notifications settings pane, click on the Set priority notifications tile to expand.

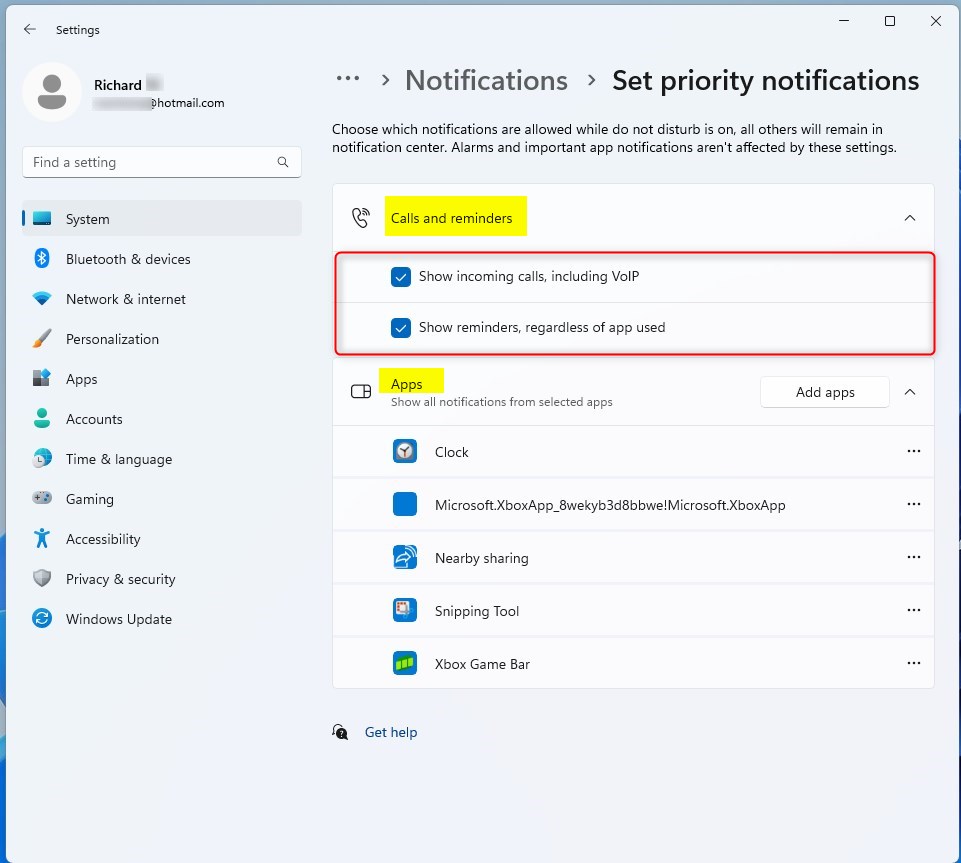
Under Calls and reminders, you can check or uncheck to receive notifications for:
- Show incoming calls, including VoIP
- Show reminders, regardless of the app used

Under Apps, you can check or uncheck the following apps:
- Clock
- Microsoft.XboxApp_ Microsoft.XboxApp
- Nearby sharing
- Snipping Tool
- Xbox Game Bar
Click on Add apps to add more to the list of apps you want to receive notifications during focus hours.
That should do it! You can now close the Windows Settings app.
Conclusion:
- Priority notifications in Windows 11’s Do Not Disturb feature are valuable for minimizing distractions during focus sessions and important meetings.
- Users can access the System Settings via the Windows key + I shortcut or by clicking on Start => Settings, allowing them to customize their notification preferences easily.
- Users can select specific apps for priority notifications and ensure that essential alerts are not silenced during designated focus hours.
- Windows 11 empowers users to tailor their notification experience, balancing focus and staying connected with vital information.

Leave a Reply