How to Turn Underline Access Keys on or off in Windows 11

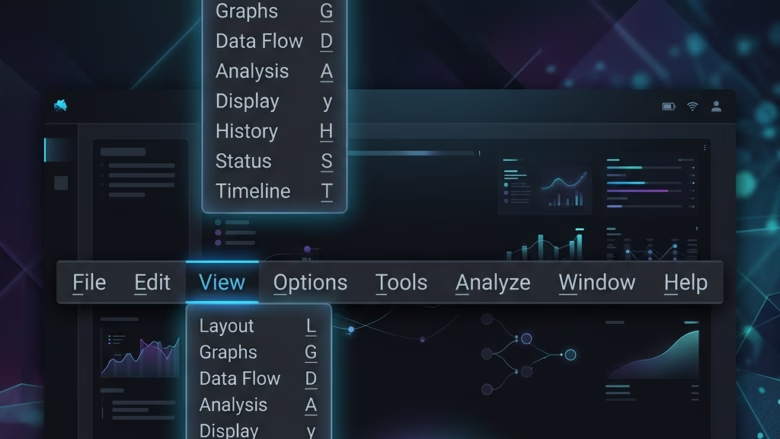
Underline access keys are keyboard shortcuts that show a small line under a letter in a menu item or button. Press that letter, usually together with Alt, and Windows runs the command without the mouse.
You can set Windows 11 to show these underlines all the time, or to hide them until you press the Alt key. The switch is in Settings Accessibility Keyboard, and it is called Underline access keys. This guide shows where to find it and how to check that it works.
Open Settings , go to Accessibility Keyboard, and turn on the Underline access keys switch. The underlines appear immediately in menu items and buttons across Windows and compatible apps, letting you press access key letters without using Alt first.
Why do this?
Access keys let you work through menus and dialog boxes using only the keyboard. That helps if you have trouble using a mouse or trackpad. It also helps if you just type fast and don’t want to reach for the mouse.
With the underlines always visible, you don’t have to guess or press Alt first to find the shortcut. You can see which letter opens a menu, selects a button or runs a command, and press it straight away.
What happens when you do this?
An access key is the letter underlined in a menu item or button label. For example, the “F” in File may be underlined. Press Alt and then that letter to open the menu. Inside an open menu or a dialog box, you can often press the underlined letter alone.
When you turn the setting on, the lines stay visible across Windows and in apps that support access keys. Some apps draw their own menus and ignore this setting, so you may not see underlines everywhere.
How to Turn on Underlined Access Keys in 🪟 Windows 11
The setting lives in the Settings app under the accessibility options. It takes effect straight away and needs no restart. It is the same on Windows 11 Home and Pro.
- Open Settings . Press the Win and R together to open the Run box. Type
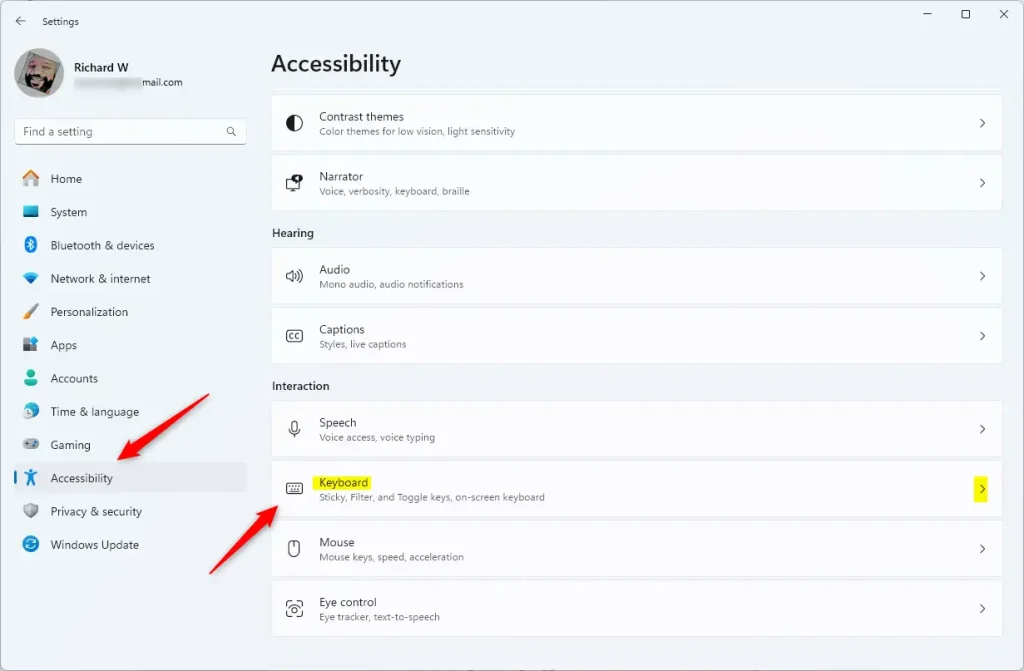
ms-settings:and press Enter. The Settings window should open. You can also click Start and then the Settings gear icon, or press the Win and I. - Go to Accessibility. In the list on the left side of Settings, click Accessibility. The page on the right now shows the options that make Windows easier to use.
- Open the Keyboard page. Scroll down to the Interaction section and click Keyboard. You should now see the keyboard options, such as Sticky keys, Filter keys and Toggle keys.
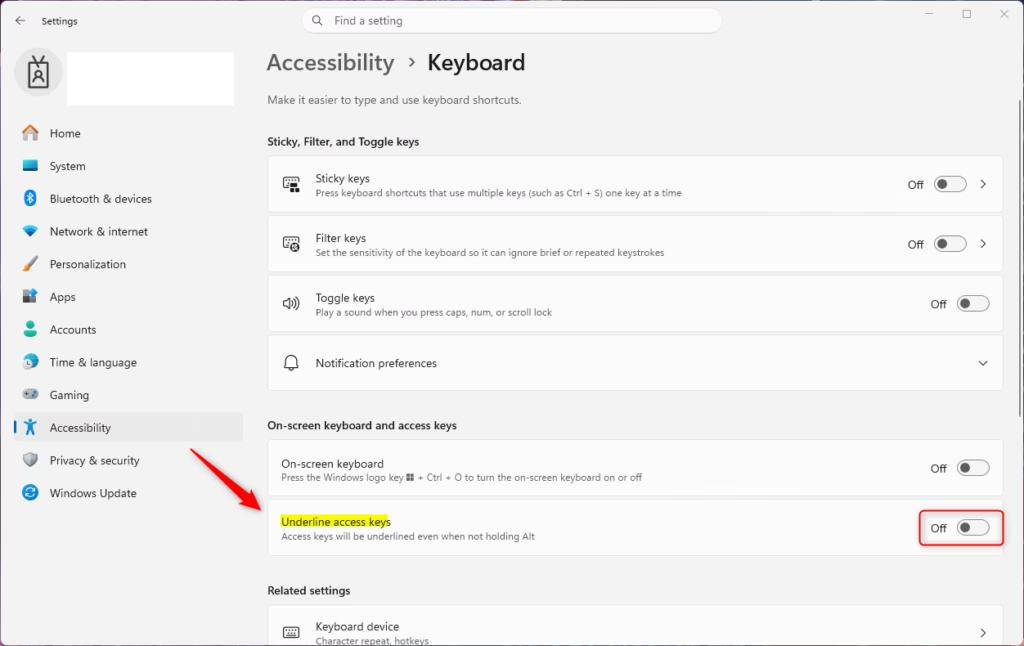
- Find the access keys setting. Look for Underline access keys. On some builds the label reads Underline access keys when they are available. A switch sits next to it.
- Turn the switch on. Click the switch so it moves to the right and shows On. The switch usually changes colour to match your Windows accent colour.
The underlines will then appear only after you press Alt.
That is all you need to do. To check it, open an app with menus, such as Notepad or File Explorer, or open a dialog box. You should see underlined letters in menu names, buttons and other items that use access keys. If you left the switch off, press the Alt key and the underlines will appear then.
If an app you already had open still shows no underlines, close it and open it again. If it still shows none, that app probably doesn't use standard Windows menus.
Reference:
Summary
Underline access keys give you a faster way to control Windows 11 from the keyboard. They show which letter does what, so you don't have to remember it or press Alt to find out. It is a single switch in the accessibility settings, and you can turn it off again whenever you like.
Have a question about this guide?
Answered by AI from this guide. Good questions may be added to this page — please don't include personal details.
Did this guide fix your problem?

About the Author
Richard
Tech Writer, IT Professional
Richard is a writer at Geek Rewind who turns complex IT tasks into clear, step-by-step guides. He draws on years of hands-on experience in system administration and enterprise IT operations, focusing on Windows, Linux and WordPress: the problems people actually run into, and the fixes that work. His server and WordPress guides come from systems he runs himself. Richard builds and maintains the platform behind Geek Rewind, from its Ubuntu servers and Nginx configuration to its custom WordPress plugins. Many new tutorials start with readers' questions, and he's always glad to answer them in the comments.
No comments yet — be the first to share your thoughts!