How to Save Windows Spotlight Images in Windows 11
You can save Windows Spotlight images in Windows 11 by locating them in a hidden system folder and copying them to a new location.
Windows Spotlight is a feature that automatically downloads beautiful, high-resolution images from Microsoft for your lock screen and desktop background. These images are sourced from various locations and often feature stunning photography.
Windows Spotlight downloads images, but these images store in a temporary, hidden folder, making direct access difficult. You might want to save a specific Windows Spotlight image for your personal wallpaper or to share.
The Spotlight image saving process involves navigating to the specific AppData folder where Spotlight stores its assets, typically found within 📁C:\Users\[YourUsername]\AppData\Local\Packages\Microsoft.Windows.ContentDeliveryManager_cw5n1h2txyewy. By following these steps, you will create a dedicated folder to store all your favorite Spotlight images.
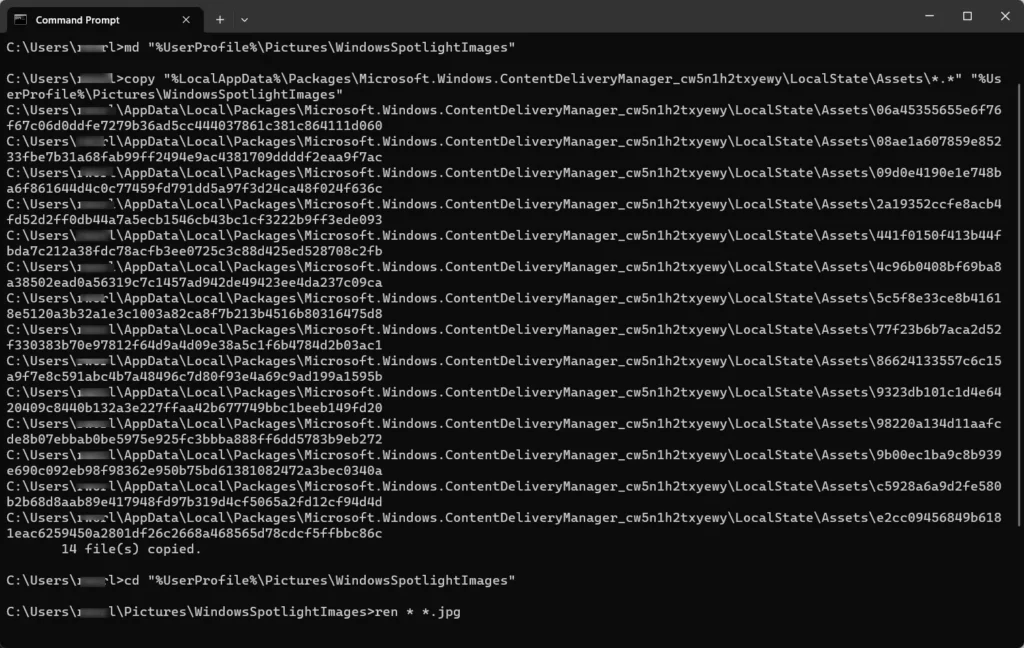
Access the hidden Assets folder at 📂%LocalAppData%\Packages\Microsoft.Windows.ContentDeliveryManager_cw5n1h2txyewy\LocalState\Assets. Copy the files from this folder to a new location and rename each one by adding .jpg to the end of its filename.
Manual Extraction Method
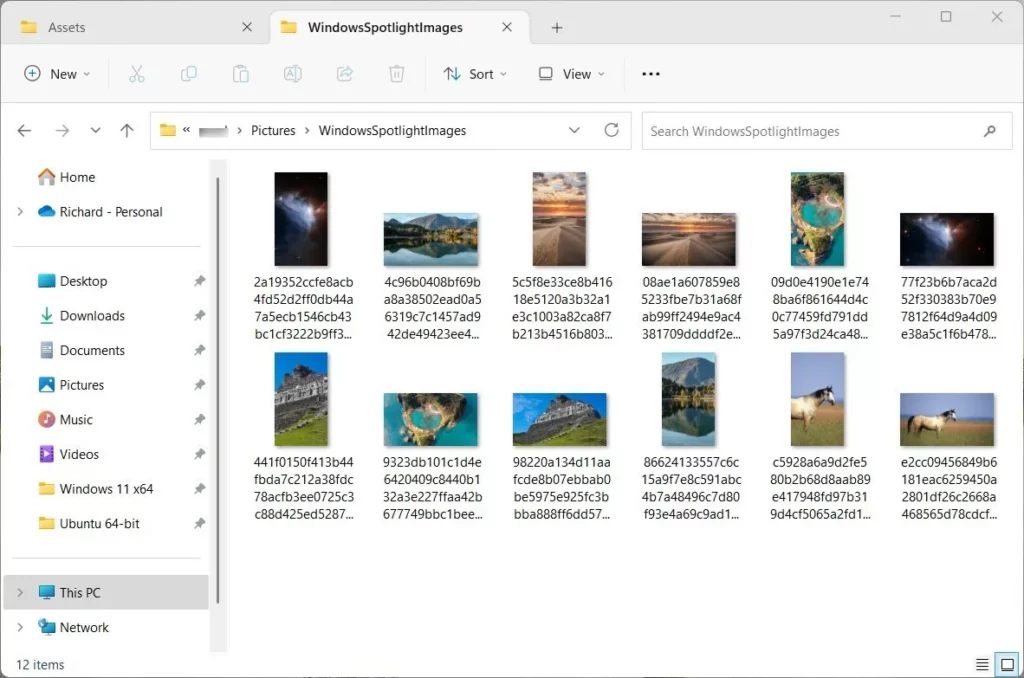
You can save Windows Spotlight images manually by finding the images in a hidden folder on your PC. Open File Explorer and paste this exact path into the address bar: 📂%LocalAppData%\Packages\Microsoft.Windows.ContentDeliveryManager_cw5n1h2txyewy\LocalState\Assets. You will see a bunch of files without names; copy these files to a new folder and add .jpg to the end of each file name to see the pictures.
- Open File Explorer and paste this path into the address bar:
%LocalAppData%\Packages\Microsoft.Windows.ContentDeliveryManager_cw5n1h2txyewy\LocalState\Assets - You will see a list of files with no extensions.
- Copy these files to a new folder on your desktop.
- Rename each file by adding
.jpgto the end of the filename.
Automated Extraction with PowerShell
Saving Windows Spotlight images is much faster using a simple PowerShell script that grabs and sorts them for you. To do this, open PowerShell as an administrator and run the following command to create a folder and copy the files: New-Item -Path “$HOME\Pictures\Spotlight” -ItemType Directory; Copy-Item -Path “$env:LOCALAPPDATA\Packages\Microsoft.Windows.ContentDeliveryManager_cw5n1h2txyewy\LocalState\Assets\*” “$HOME\Pictures\Spotlight”. This command makes a new folder and puts all the images there.
- Open PowerShell as an administrator.
- Run the following command to create a folder and copy the files:
New-Item -Path "$HOME\Pictures\Spotlight" -ItemType Directory; Copy-Item -Path "$env:LOCALAPPDATA\Packages\Microsoft.Windows.ContentDeliveryManager_cw5n1h2txyewy\LocalState\Assets\*" -Destination "$HOME\Pictures\Spotlight" - Run this command to rename them:
Get-ChildItem -Path "$HOME\Pictures\Spotlight" | Rename-Item -NewName { $_.Name + ".jpg" }
Comparison of Extraction Methods
| Method | Difficulty | Speed |
|---|---|---|
| Manual | Easy | Slow |
| PowerShell | Intermediate | Fast |
| Third-Party Tools | Easy | Fast |
Troubleshooting and Limitations
If a file does not open as an image, delete that file. These files are often small icons or system files, not the Windows Spotlight images you seek. Windows updates the cache frequently, so check back every few days for new Spotlight photos.
Summary
You can save your favorite Windows Spotlight images by finding them in a hidden folder or using a quick PowerShell script.
Are Windows Spotlight images free to use for personal projects?
Windows Spotlight images are free for you to use as your desktop background on your own computer.
Why are some Spotlight images saved in portrait orientation?
Some Windows Spotlight images are saved in portrait style because they're meant for devices like phones or tablets that are held upright.
Was this guide helpful?

About the Author
Richard
Tech Writer, IT Professional
Richard, a writer for Geek Rewind, is a tech enthusiast who loves breaking down complex IT topics into simple, easy-to-understand ideas. With years of hands-on experience in system administration and enterprise IT operations, he’s developed a knack for offering practical tips and solutions. Richard aims to make technology more accessible and actionable. He's deeply committed to the Geek Rewind community, always ready to answer questions and engage in discussions.


[…] Windows uses this feature so you can set their desktop background with Spotlight collections, save Spotlight images for use, and see new photos on your […]