How to Reset Network Stack Completely in Windows 11

Resetting the network stack in Windows 11 clears out damaged network files, broken settings, and hidden bugs that block your connection to routers and websites. Your network stack is the core set of software rules your PC uses to talk to the internet.
Corrupted network data can make pages stop loading even after you restart your computer. A full network reset wipes out these bad files and puts your connection back to its default state. This guide starts with the simplest fix and works toward the more thorough ones, so stop as soon as your connection works again.
Open Command Prompt as an administrator, type netsh winsock reset, press Enter, and then type netsh int ip reset. This clears out corrupted software rules and brings your internet connection back to its original factory defaults, letting your Windows 11 computer start fresh with a clean slate.
Understanding the 🪟 Windows 11 Network Stack and Why It Breaks
The Windows 11 network stack is a group of software layers that moves data from your web browser to servers across the internet. It breaks down when temporary files get corrupted, when a bad update changes network settings, or when third-party virtual private network (VPN) apps leave behind broken system rules that block your web traffic.
In Windows 11, the network stack includes several main parts:
- TCP/IP: The basic language that computers use to find each other and share data over the internet.
- Winsock Catalog: A directory that tells your network programs how to use TCP/IP connections. Many third-party apps, like security software and VPNs, plug into this catalog.
- DNS Cache: A temporary notebook where your computer remembers the addresses of sites you visit often so they load faster next time.
- Network Adapters: The physical or virtual hardware, like your Wi-Fi card or Ethernet port, that sends and receives signals.
The Winsock catalog and DNS cache normally keep your connection fast and steady, but damaged entries cause real problems. If an app crashes while downloading a file, or if security software is removed incorrectly, it can leave broken entries in the Winsock catalog. If your DNS cache fills up with old or wrong addresses, your browser may fail to load pages and show error messages even though the connection itself is fine.
Resetting the network stack means clearing these temporary files, putting the main settings back to their defaults, and giving your computer a clean slate to connect to the internet.
Before You Begin: Basic Checks to Rule Out Other Issues
Before you reset anything, rule out simple hardware problems. A reset does nothing if the cable is loose or your provider has an outage. It takes about five minutes to check.
Run through these quick checks in order:
- Check physical cables: If you use a wired Ethernet connection, make sure the cable is plugged firmly into your computer and your router. You should feel the small plastic clip click into place.
- Look at your router and modem: Check the lights. A blinking red light, or an internet light that is off, usually means the problem is with your internet provider, not your Windows 11 computer.
- Power cycle your network equipment: Unplug the power cable from your modem and your router. Wait about thirty seconds, then plug them back in. Give them a few minutes to start up, then check whether your computer connects.
- Test another device: Open a webpage on your smartphone or another computer on the same Wi-Fi network. If other devices cannot get online either, your internet service is down. If they work fine, the issue is on your Windows 11 computer.
If other devices work and your physical setup looks healthy, move on to resetting the Windows 11 network stack.
Method 1The Easiest Way Using 🪟 Windows 11 Settings
The Network reset tool is the easiest method because it needs no typed commands. It removes your network adapters and reinstalls them, and it sets other networking components back to their defaults. It is available in both Windows 11 Home and Pro.
Know what you will lose before you start. This method removes all saved Wi-Fi networks, so you will need to enter each wireless password again. It also removes VPN connections and virtual switches. Make sure you have your Wi-Fi password to hand, and note down any VPN settings you need. VPN software may need to be set up again.
Follow these steps to use the Network Reset feature:
- Click the Start button on your taskbar, or press the Windows key.
- Open the Settings app, which has a gear icon. You can also search for Settings.
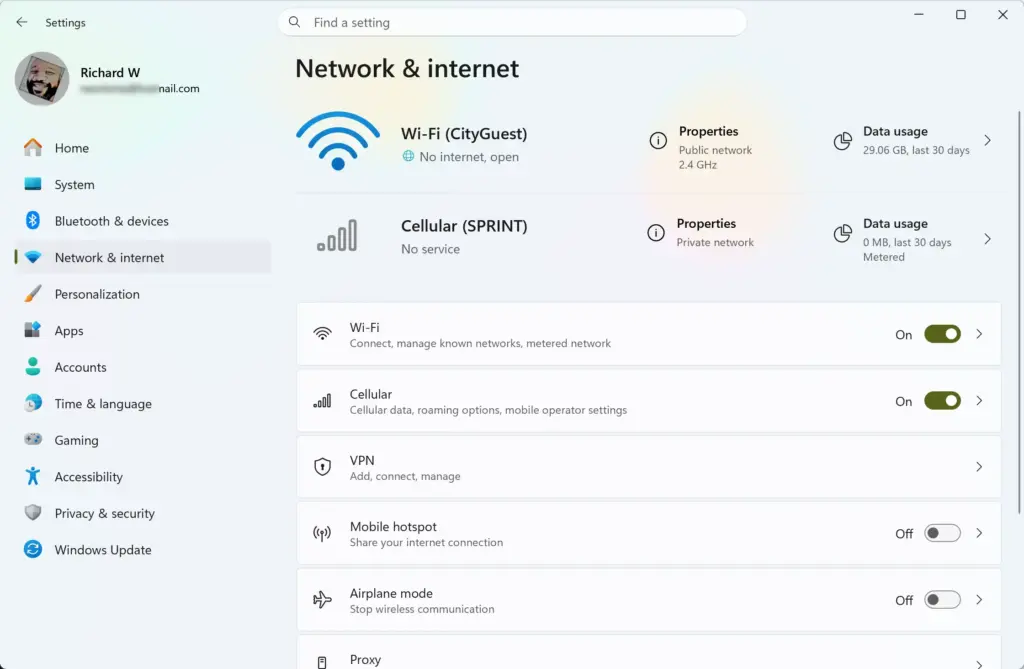
- In the Settings window, click Network & internet in the left-hand menu.
- Scroll down and click Advanced network settings.
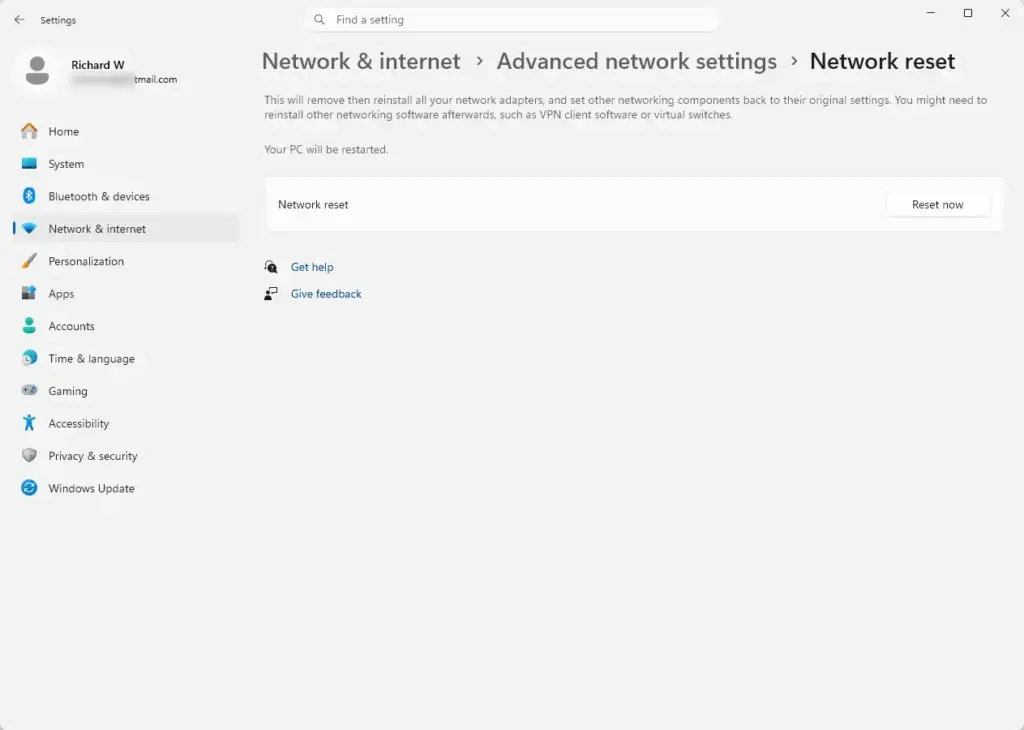
- Under More settings, click Network reset. You should see a short warning explaining what the reset will do.
- Read the warning, then click Reset now. If User Account Control asks for permission, click Yes. The reset needs administrator rights, so a standard account will be asked for an admin password.
- When a confirmation box asks if you are sure, click Yes.
Windows starts the reset and tells you that it needs to restart. Save any open work first. If you do nothing, Windows restarts on its own after a short countdown. When it comes back, your network adapters are reinstalled and you can reconnect to your Wi-Fi network by selecting it and entering the password.
Method 2Deep Reset Using Command Prompt (For Stubborn Issues)
If the settings reset did not help, or you prefer to see exactly what is being changed, use Command Prompt. These commands reset your IP configuration, repair the Winsock catalog, clear the DNS cache, and request a new address from your router. Together they clear out most stubborn connection bugs.
Do not let the black command window put you off. You only need to type or paste a few lines. You must open Command Prompt with administrator rights, or the commands will fail with an "access denied" type of error.
Follow these steps to run the network commands:
- Click the Start button on your taskbar.
- Type cmd in the search box. Command Prompt should appear in the results.
- Right-click Command Prompt and select Run as administrator.

Command Prompt - If a window asks whether you want to allow this app to make changes to your device, click Yes. A black window with white text opens, and the title bar should say Administrator: Command Prompt.
- First, reset the IP setup. Type the following command and press Enter:Code
netsh int ip reset - Next, reset the Winsock catalog to clear out broken app connections. Type the following command and press Enter:Code
netsh winsock reset - Now clear the DNS cache so your computer forgets old website addresses and looks up fresh ones. Type the following command and press Enter:Command Prompt
ipconfig /flushdns - Finally, release your current local IP address and ask your router for a new one. Type these two commands, pressing Enter after each:Command Prompt
ipconfig /releaseYour connection may drop for a moment between the two commands. That is expected.Command Promptipconfig /renew - Close the Command Prompt window by clicking the X in the top-right corner.
Restart your computer now. The Winsock and IP resets only take full effect after a restart. Once Windows is back up, open your browser and test your connection.
Method 3Reinstalling Network Adapters via Device Manager
If resets do not help, the network adapter driver itself may be damaged. When that happens, Windows may not even see your hardware properly. Uninstalling the adapter in Device Manager removes the damaged driver, and Windows installs a fresh one the next time it starts.
Follow these steps to reinstall your network adapters:
- Right-click the Start button on your taskbar and select Device Manager. You need administrator rights to make changes here.
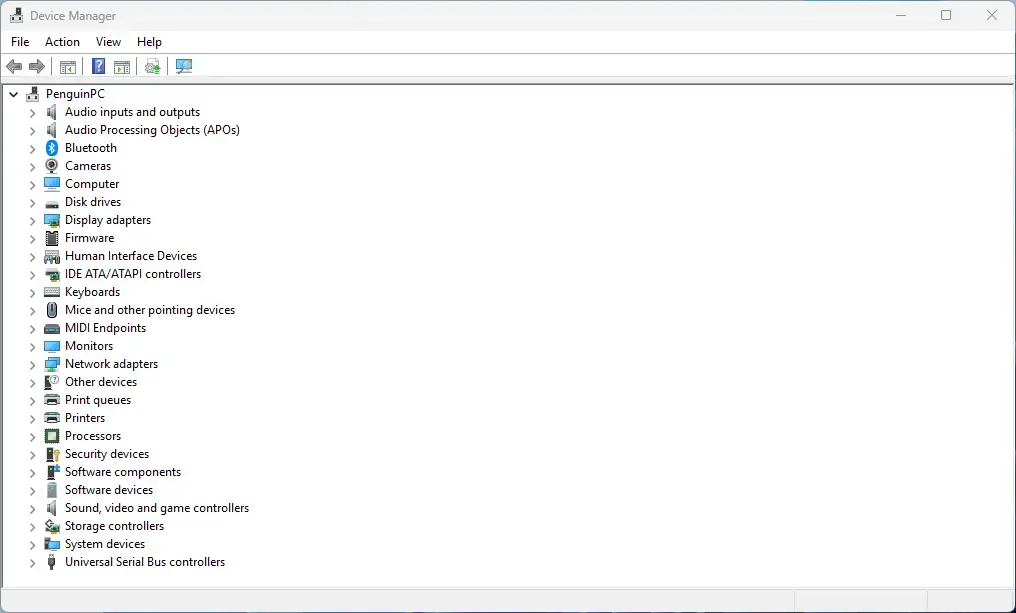
Device Manager - Find the category named Network adapters and click the small arrow next to it. The list of adapters expands.
- Find your network device. A Wi-Fi adapter usually has words like Wireless or Wi-Fi, or a brand name like Intel or Realtek, in its name. A wired connection is usually called something like PCIe Ethernet Connection.
- Right-click your network adapter and select Uninstall device.
- A warning box opens. If you see a checkbox labeled Attempt to remove the driver for this device, leave it unchecked unless you have already downloaded a backup copy of the driver. Click Uninstall.
- Expect your internet to disconnect and your network icons to change. This is normal, so do not panic.
- Close Device Manager and restart your Windows 11 computer.
When the computer starts, Windows notices that a network adapter has no driver and installs a fresh default one automatically. If the adapter does not come back, open Device Manager again and choose Action Scan for hardware changes. If that still fails, download the driver from your PC or adapter maker's website, using another device if needed.
Advanced Troubleshooting: Fixing IP and DNS Problems After a Reset
IP and DNS problems can remain after a reset, when your computer cannot translate web addresses or hits an address conflict. If the clear-cache commands above did not fix it, try switching to a public DNS service such as Google or Cloudflare instead of the default one from your internet provider.
Follow these steps to change your DNS settings:
- Open the Windows Settings app.

Settings - Click Network & internet in the left menu, then click Wi-Fi or Ethernet, depending on how you connect.
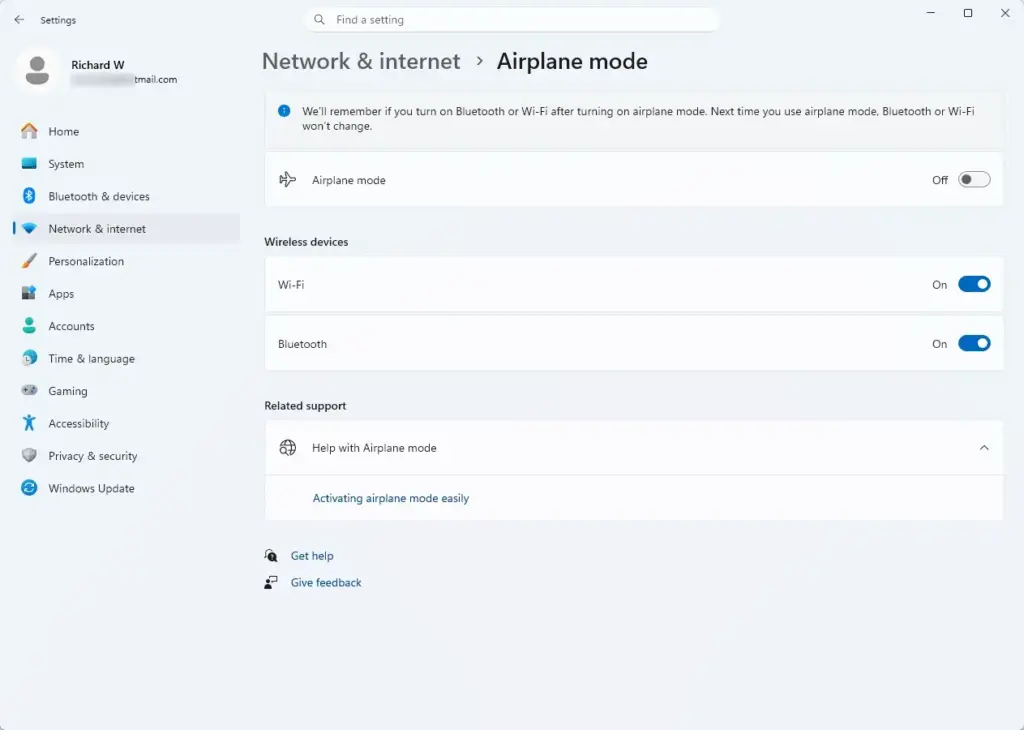
Settings › Network & internet › Airplane mode - Click the name of your active network connection. On Wi-Fi, this may be the properties page for your network.
- Find DNS server assignment and click the Edit button next to it.
- In the drop-down menu that says Automatic (DHCP), choose Manual.
- Turn on the IPv4 switch.
- In the Preferred DNS box, type a reliable public address, such as
8.8.8.8. - In the Alternate DNS box, type a secondary address, such as
8.8.4.4. These numbers belong to public DNS services run by major tech companies and are safe to use. - Click Save.
Test your browser again. Public DNS servers often get around slow or broken lookups from a provider's own servers. To undo the change, return to the same screen, click Edit, and set the drop-down back to Automatic (DHCP).
Unique Angles and Expert Tips for Persistent Network Issues
Most guides stop after the settings reset and the command strings. If your network stack keeps breaking, though, a software conflict is usually causing the damage, and resetting again will only fix it temporarily. Here are two checks to make when the standard resets fail.
Checking for Third-Party VPN and Firewall Interference
Third-party VPN and firewall software often causes connection problems by leaving behind broken virtual network adapters and deep system hooks. This is common when a VPN app crashes or an uninstall does not finish cleanly. The leftover rules can block all regular internet traffic.
If you use a VPN or a third-party security suite, try uninstalling it completely. Use Settings Apps Installed apps, and if the vendor offers a removal tool, run that as well. Once the program is gone, repeat the Command Prompt steps from earlier in this guide and restart your computer. If your internet now works normally, that software was the cause. You can then reinstall a current version, or choose a different product.
Handling Rogue Background Services and Network Bottlenecks
Network optimization tools and utilities pre-installed by computer makers can also cause trouble. Gaming boosters, traffic shapers, and file-sharing utilities can interfere with Windows updates and corrupt TCP/IP settings.
Open Settings Apps Installed apps and look through the list for network utilities supplied by your computer manufacturer. If you find ones you do not need, uninstall them, then restart. Removing this kind of unneeded software often restores stability to your Windows 11 network stack for good. If you are not sure what an app does, search for its name first before removing it.
Summary
Completely resetting the network stack in Windows 11 fixes stubborn connection problems by clearing corrupted settings and starting fresh. The key steps are the built-in Network reset tool in Settings, the cleanup commands in an administrator Command Prompt, and reinstalling your network adapter drivers through Device Manager. If problems keep coming back, look for conflicting VPN, security, or manufacturer software.
Have a question about this guide?
Answered by AI from this guide. Good questions may be added to this page — please don't include personal details.
Did this guide fix your problem?

About the Author
Richard
Tech Writer, IT Professional
Richard is a writer at Geek Rewind who turns complex IT tasks into clear, step-by-step guides. He draws on years of hands-on experience in system administration and enterprise IT operations, focusing on Windows, Linux and WordPress: the problems people actually run into, and the fixes that work. His server and WordPress guides come from systems he runs himself. Richard builds and maintains the platform behind Geek Rewind, from its Ubuntu servers and Nginx configuration to its custom WordPress plugins. Many new tutorials start with readers' questions, and he's always glad to answer them in the comments.
No comments yet — be the first to share your thoughts!