How to Remove Duplicate Bluetooth Devices from Windows 11 Device List

Ghost Bluetooth entries in Windows 11 are leftover connection profiles that refuse to delete normally from your device list. They usually pile up after system updates, accessory resets, or when you move a Bluetooth adapter to a different USB port.
Windows saves a separate profile for every piece of hardware you connect. Background glitches can trap these records, so the standard remove button stops working. To clear them for good, you often have to go beyond the basic Settings app .
These are the usual causes:
- Interrupted removals, where the interface shows the item as gone but the background record keeps the profile alive.
- Driver conflicts, where your Bluetooth adapter gets confused by more than one software version.
- Hardware changes, such as swapping the internal Wi-Fi and Bluetooth card or adding an external USB Bluetooth dongle.
- Fast Startup, which saves the system state when you shut down and can keep old device caches loaded.
Knowing the cause helps you pick the right fix. The methods below go from the simplest to the most thorough. Work through them in order and check your device list after each one. Removing a device does not damage the accessory itself. You can pair it again at any time from Settings Bluetooth & devices
Open Settings (Win+I), go to Bluetooth & devices, click the three dots (…) beside the ghost entry, and select Remove device. If it returns or Settings shows an error, turn on Show hidden devices in Device Manager under View, then uninstall the greyed-out Bluetooth entries. Removing a device does not harm the accessory, and you can pair it again later.
Method 1Using Modern 🪟 Windows 11 Settings
Start with the normal Settings route. It works for most duplicates and takes less than a minute.
- Press the Win+I to open Settings . You can also click the Start button on your taskbar and select Settings (the gear icon).

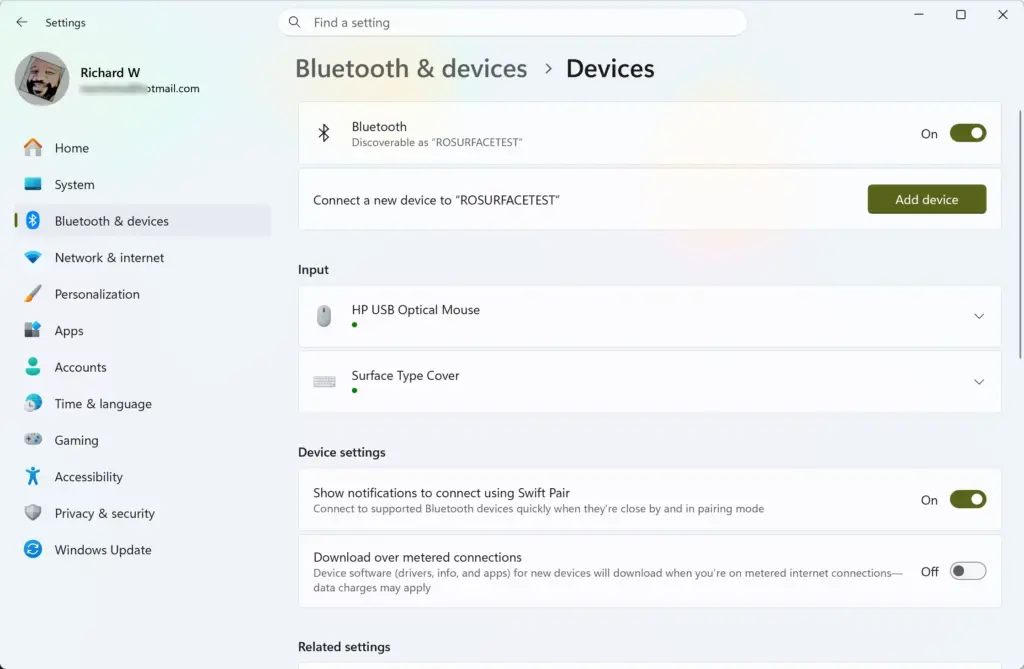
Taskbar - Click Bluetooth & devices in the left-hand menu. You should see your paired devices listed as cards on the right.
- Look through the list and find the duplicate or ghost accessory. If the same name appears twice, the one that shows “Connected” is usually the good one. Remove the one that does not.
- Click the three dots (…) next to the device name. A small menu appears.
- Select Remove device.
- Click Yes if a confirmation prompt appears. The card should disappear from the list.
If the device disappears and stays gone, you are done. If it comes straight back or you get an error, move on to the next method.
Method 2Removing Devices Through the Classic Control Panel
The classic Control Panel uses a different device list from the Settings app. It often removes a stuck accessory that Settings refuses to delete.
- Click the Start button, type Control Panel into the search box, and click the app when it appears.

Control Panel - In the Control Panel window, find the Hardware and Sound heading and click View devices and printers. If your Control Panel is set to large or small icons instead of categories, click Devices and Printers instead.
- Wait for the new window to open. It lists your connected hardware, including audio gear, mice, keyboards, and printers.
- Find the stubborn duplicate in the list.
- Right-click the device icon.
- Click Remove device in the context menu.
- Click Yes to confirm. The icon should vanish from the window.
If the entry is still there, or Windows reports an error, the stuck record is probably a hidden driver profile. Device Manager is the next place to look. You can open it quickly by pressing the Windows key + X and choosing it from the menu. It bypasses the newer interface, which is where most of these bugs live.
Method 3Cleaning Up Hidden Items in Device Manager
Hidden devices in Device Manager are old driver profiles for hardware that is not connected right now. Windows does not show them by default, so you have to turn them on first.
You must be signed in to an administrator account to make changes in Device Manager.
- Right-click the Start button on your taskbar and select Device Manager.
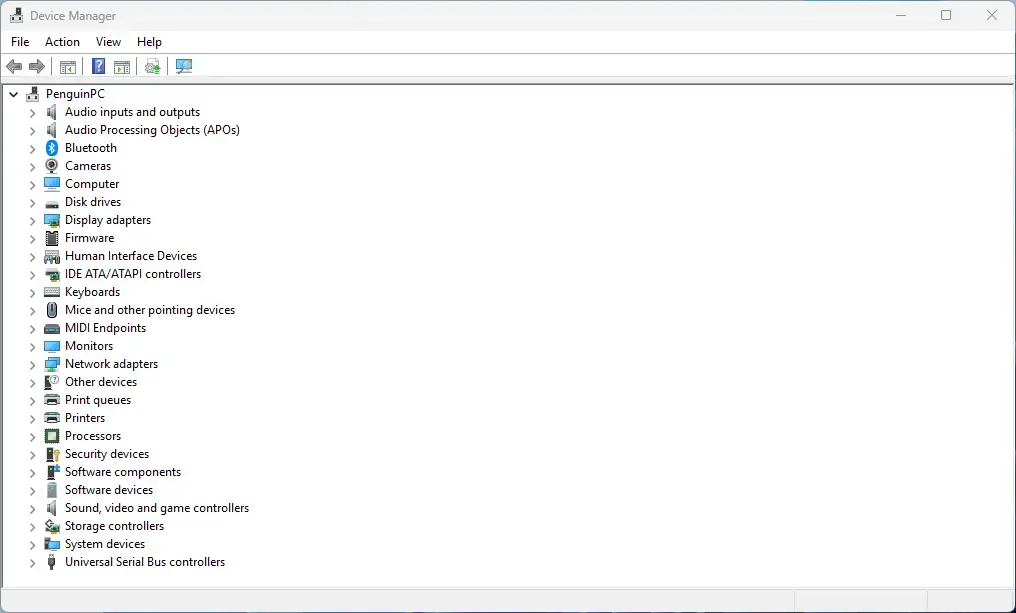
Device Manager - Click View in the menu bar at the top of the window.
- Select Show hidden devices. This reveals items that are turned off or disconnected but still saved in your system. The list may get noticeably longer.
- Expand categories such as Bluetooth or Audio inputs and outputs by clicking the small arrow next to them.
- Find the faded or duplicate entries that match your stubborn device. A faded icon means the hardware is not actively connected.
- Right-click the duplicate item and select Uninstall device.
- If a warning box asks whether you want to attempt to remove the driver for this device, check the box (if it is available) and click Uninstall.
Be careful which entries you remove. Uninstall only the duplicate accessory entries. Leave your actual Bluetooth adapter (the radio) alone unless you are deliberately reinstalling it. If you remove the adapter by mistake, restart the PC and Windows will normally reinstall it automatically.
Restart your computer afterwards so Windows can rebuild its hardware list. Use Restart from the Start menu rather than Shut down. With Fast Startup enabled, a normal shutdown can keep the old state, while a restart does a full reload.
Method 4Running the Built-In Bluetooth Troubleshooter
The built-in Bluetooth troubleshooter checks the adapter, the driver, and the Bluetooth service, and it can fix common connection glitches that leave phantom devices behind.
- Press the Windows key + I to open Settings.
- Click System in the left-hand menu.
- Click Troubleshoot in the main panel.
- Click Other troubleshooters. You will see a full list of diagnostic tools.
- Find Bluetooth in the list and click the Run button next to it.
- Follow any instructions that appear while the tool scans your system and fixes background errors. It may ask you to apply a fix or tell you it found nothing.
When the troubleshooter finishes, restart your PC and check Settings Bluetooth & devices again. A restart clears temporary cached data, which helps Windows refresh the list so it shows only the accessories you actually use. If the troubleshooter reports that it found nothing, that is normal. Move on to the next method.
Method 5Restarting the Bluetooth Support Service
If the Bluetooth Support Service is hung, Windows may not save changes such as deleting a device. Restarting it refreshes the system's Bluetooth controls without a full reboot.
- Click the Start button, type Services into the search bar, and open the app.
- Scroll down the alphabetical list until you find Bluetooth Support Service.
- Right-click Bluetooth Support Service and select Properties. A properties window opens.
- Find the Startup type drop-down menu and change it to Automatic. On many PCs it is set to Manual by default, so this makes sure the service starts with Windows.
- If the service status says Running, click the Stop button. When it has stopped, click Start to turn it back on. A quicker alternative is to right-click the service in the list and select Restart.
- Click Apply, then click OK to save your changes.
Go back to Settings Bluetooth & devices and try removing the duplicate device again. If you want to undo the change later, reopen the same properties window and set Startup type back to its previous value.
Expert Tips for Preventing Future Bluetooth Clutter
A few habits keep ghost entries from coming back. Most duplicates appear because Windows creates a new profile each time an accessory reconnects in a slightly different way.
- Turn off accessories before pairing: If you switch a headset or speaker between your phone and your computer, turn it off completely before you pair it fresh. This stops Windows from creating a brand-new profile every time.
- Keep your drivers updated: Visit your computer manufacturer's website regularly to download the latest Bluetooth and chipset drivers. Outdated drivers are a common cause of phantom device loops.
- Avoid unnecessary dongles: If your PC has built-in Bluetooth, do not plug in a USB Bluetooth adapter unless the internal hardware is broken. Two adapters cause driver conflicts and a cluttered device list. If you do use a dongle, keep it in the same USB port so Windows does not treat it as new hardware.
Summary
You can clear duplicate and ghost Bluetooth devices in Windows 11 with four tools: the Settings app, the classic Control Panel, hidden devices in Device Manager, and a restart of the Bluetooth service. Start with the simplest method and work down. Once the extra entries are gone, a few pairing habits will keep your device list clean.
Have a question about this guide?
Answered by AI from this guide. Good questions may be added to this page — please don't include personal details.
Did this guide fix your problem?

About the Author
Richard
Tech Writer, IT Professional
Richard is a writer at Geek Rewind who turns complex IT tasks into clear, step-by-step guides. He draws on years of hands-on experience in system administration and enterprise IT operations, focusing on Windows, Linux and WordPress: the problems people actually run into, and the fixes that work. His server and WordPress guides come from systems he runs himself. Richard builds and maintains the platform behind Geek Rewind, from its Ubuntu servers and Nginx configuration to its custom WordPress plugins. Many new tutorials start with readers' questions, and he's always glad to answer them in the comments.
No comments yet — be the first to share your thoughts!