How to Pause and Resume Updates for Windows 11
Pausing Windows 11 updates lets you control when new software gets installed on your PC. This feature is built into Windows 11 and allows you to temporarily stop automatic downloads and installations.
You can use this to avoid interruptions when you’re in the middle of an important task or if you’re concerned about a new update causing problems. For example, you can pause updates for up to 5 weeks.
Resuming updates is just as simple, ensuring your computer gets important security fixes when you’re ready. This guide shows you how to manage update pauses and resumes in Windows 11.
You can pause Windows 11 updates by going to Settings, then Windows Update, and selecting a pause duration. To resume updates, navigate to the same Windows Update settings and click the “Resume updates” button.
Why pause updates?
Pausing updates is helpful if you’re working on an important project, have a slow internet connection, or want to avoid an unexpected restart.
What happens when you pause?
Pausing Windows 11 updates stops your PC from downloading new software for a set time. This means your computer won’t get feature updates or non-security updates for the duration you choose. Don’t worry, important security updates, like those for Microsoft Defender, will still install automatically to keep your PC safe.
Reference: Pause updates in Windows – Microsoft Support
Option 1Pause Updates in Settings
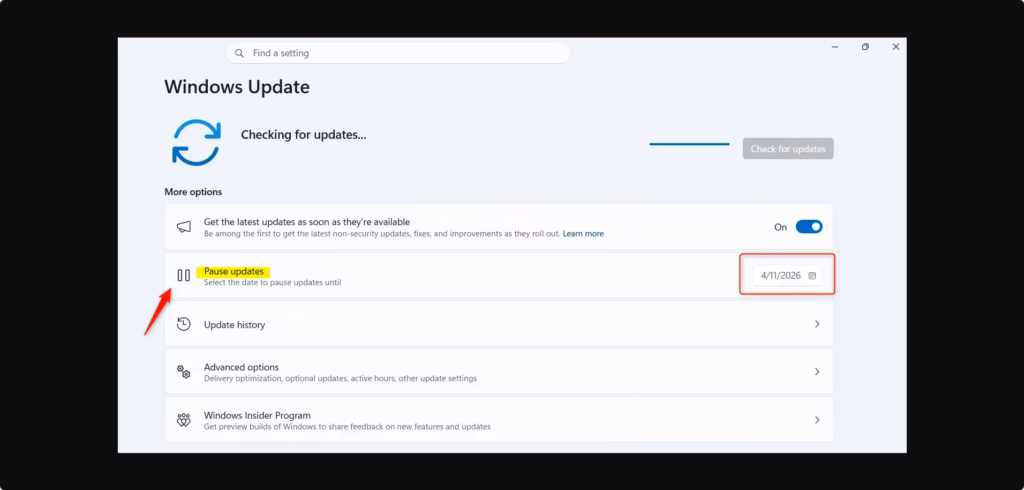
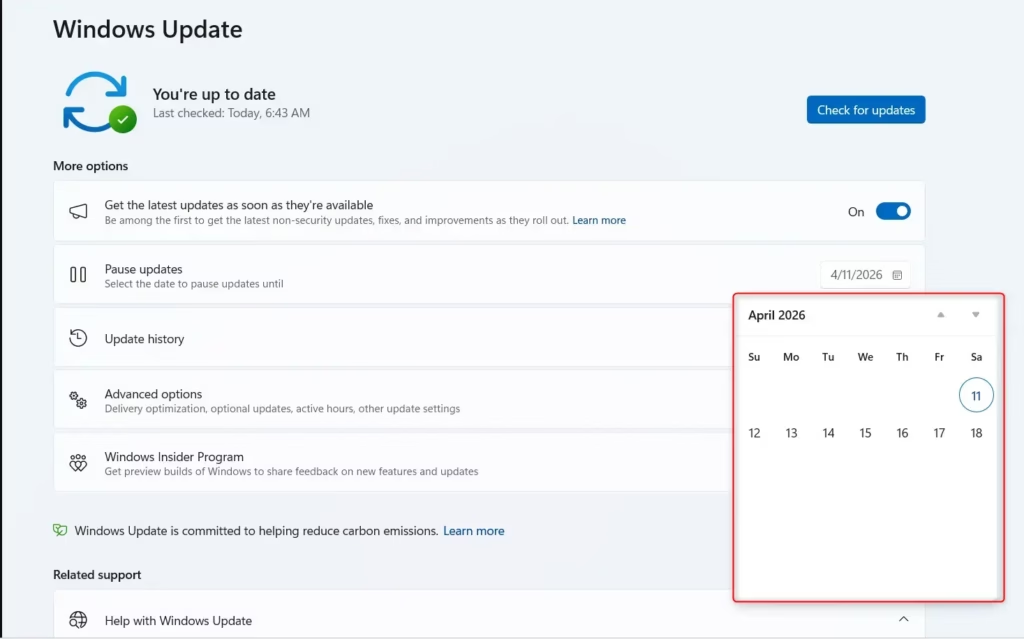
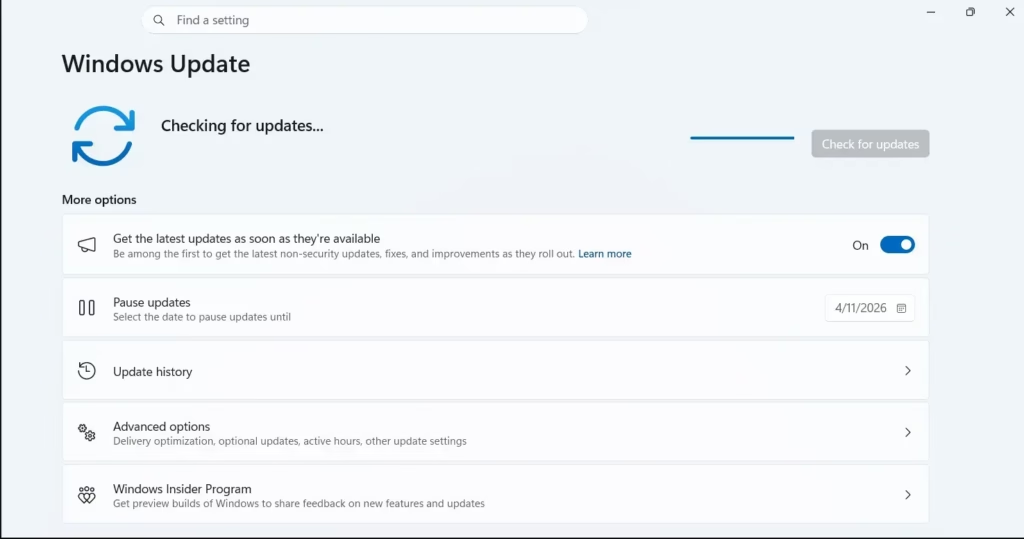
Pausing Windows 11 updates is a breeze from the PC’s Settings app. Open Settings, navigate to the Windows Update section, and select your desired pause duration. This is the most direct way to prevent new updates from downloading for a set time.
- Open Settings Settings by pressing the Windows key + I on your keyboard.
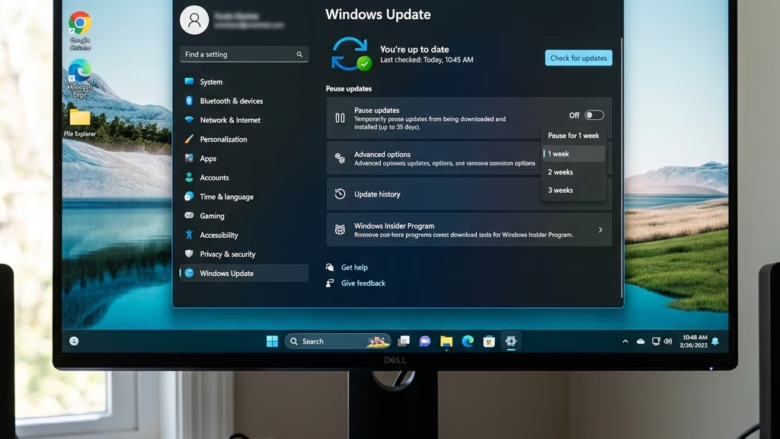
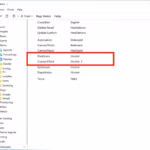
- Click on Windows Update on the left side of the window. Open Windows Update Settings
- Find the Pause updates section on the right. You can choose to pause for one week, or use the drop-down menu to pick a longer time. If you have already paused, you can click Extend to add more time.

Option 2Resume Updates in Settings
If you need to get updates again before your pause period ends, you can manually resume them in Windows 11 Settings. Clicking ‘Resume updates’ prompts your computer to immediately check for and download any available updates, including crucial security fixes. This ensures your PC stays protected against new threats.
- Open Settings and click on Windows Update. Open Windows Update Settings
- Click the Resume updates button on the right.

Your computer will now immediately check for any available updates.
Option 3Resume Updates using Registry
If you’re comfortable with advanced settings, you can resume Windows 11 updates using the Windows Terminal (a command-line interface). Open Windows Terminal as an administrator and type in specific commands to turn off the update pausing. This method allows you to manually restart the update process if the Settings option isn’t working for you.
Open Windows Terminal as an administrator and run the following commands:
reg add "HKLM\SOFTWARE\Microsoft\WindowsUpdate\UpdatePolicy\Settings" /v PausedFeatureStatus /t REG_DWORD /d 0 /f
reg add "HKLM\SOFTWARE\Microsoft\WindowsUpdate\UpdatePolicy\Settings" /v PausedQualityStatus /t REG_DWORD /d 0 /f
reg delete "HKLM\SOFTWARE\Microsoft\WindowsUpdate\UX\Settings" /v PauseFeatureUpdatesStartTime /f
reg delete "HKLM\SOFTWARE\Microsoft\WindowsUpdate\UX\Settings" /v PauseFeatureUpdatesEndTime /f
reg delete "HKLM\SOFTWARE\Microsoft\WindowsUpdate\UX\Settings" /v PauseQualityUpdatesStartTime /f
reg delete "HKLM\SOFTWARE\Microsoft\WindowsUpdate\UX\Settings" /v PauseQualityUpdatesEndTime /f
reg delete "HKLM\SOFTWARE\Microsoft\WindowsUpdate\UX\Settings" /v PauseUpdatesStartTime /f
reg delete "HKLM\SOFTWARE\Microsoft\WindowsUpdate\UX\Settings" /v PauseUpdatesExpiryTime /f
Summary
You can pause Windows 11 updates for up to 5 weeks to avoid interruptions. This can be easily managed through the Windows Update section in Settings. Remember that security updates are vital, so always resume them when you have a free moment to keep your system protected.
Can I pause 🪟 Windows 11 update in progress?
Yes, you can pause Windows 11 updates even if they are currently in progress. Navigate to Settings, select Windows Update, and choose the pause duration from the dropdown menu. While this stops new downloads, note that some critical security definitions may still install to ensure your system remains protected.
How many people refuse to upgrade to 🪟 Windows 11?
While exact real-time figures vary, a significant portion of the global user base continues to use Windows 10. Why might some people not upgrade to Windows 11? Many users delay upgrading due to strict hardware requirements, preference for the familiar Windows 10 interface, or concerns regarding software compatibility and the stability of new operating system features and updates.
How to resume a paused update?
To resume updates, open the Settings menu by pressing Windows key + I and select Windows Update from the sidebar. You will see a button labeled ‘Resume updates’ at the top of the screen. Clicking this will immediately force your computer to check for and download any pending software updates.
How to roll back 🪟 Windows 11 25H2 update?
You can roll back a recent Windows 11 25H2 update by going to Settings, then System, and clicking Recovery to find the option to go back to a previous version.
Was this guide helpful?

About the Author
Richard
Tech Writer, IT Professional
Richard, a writer for Geek Rewind, is a tech enthusiast who loves breaking down complex IT topics into simple, easy-to-understand ideas. With years of hands-on experience in system administration and enterprise IT operations, he’s developed a knack for offering practical tips and solutions. Richard aims to make technology more accessible and actionable. He's deeply committed to the Geek Rewind community, always ready to answer questions and engage in discussions.

No comments yet — be the first to share your thoughts!