How to Install XAMPP on Windows 11

XAMPP installs on Windows 11 without much trouble, even if you have never set up a web server before. This guide covers the download, the installer screens, the Control Panel and a quick test to confirm everything works.
Download the XAMPP installer from the official site, select the Windows version and your preferred PHP version, then run the installer file. Keep the default 📁C:\
What is XAMPP?
XAMPP is a free program that lets you run a web server on your own computer. A web server is the software that delivers websites to a browser. XAMPP bundles everything you need to build and test websites and apps that use PHP and databases. Once it is installed, you don’t need an internet connection to use it.
What Does XAMPP Stand For?
The name XAMPP is a list of its parts:
- X = Works on many types of computers (Cross-platform)
- A = Apache web server (shows websites)
- M = MariaDB database (stores your website data)
- P = PHP programming language (makes websites work)
- P = Perl programming language (another coding language)
In practice, Apache, MariaDB and PHP are the three parts you will use most. Perl is included, but many projects never touch it.
Why Use XAMPP?
Testing on your own computer is safer than working on a live site. Here is why it helps:
- You can’t break a live website, because nobody else can see your local copy.
- You can learn web development without paying for hosting.
- You can work offline, on a train or anywhere else.
Installation Steps
Step 1Download XAMPP
Start by downloading the installer from the official site.
- Go to the official XAMPP download page.
- Find the Windows version of the download.
- Choose the PHP version you want. If you are following a tutorial or testing a specific project, pick the PHP version that project needs. Otherwise the newest one is fine.
- Click the download button and wait for the installer file to finish downloading .
The file is large because it contains Apache, MariaDB, PHP and Perl. Depending on your connection, it may take a few minutes.
Step 2Run the Installer
- Open your Downloads folder.
- Double-click the XAMPP installer file.
- If Windows asks whether you want to allow the app to make changes, click Yes.
The installer window opens. You may also see a warning about User Account Control (UAC) and installing into Program Files. Read it, click OK, and carry on. The default folder you will choose later avoids that problem.
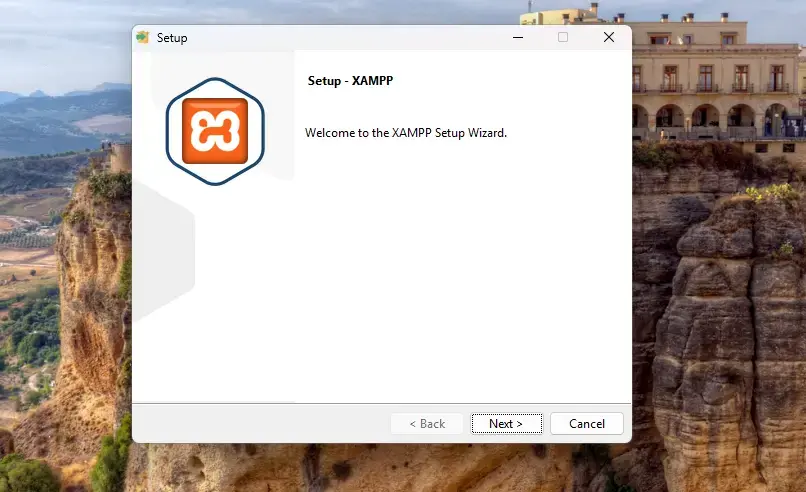
This is the first screen of the setup wizard. If you see a Bitnami or “Learn more” option, you can ignore it. Click Next to continue.
Step 3Choose Components
The installer lists the parts of XAMPP and lets you choose which ones to install.
- Look through the list of components.
- If you’re not sure what you need, leave the default choices as they are.
- Click Next.
Apache and PHP are the core pieces for any web project. If you want to use databases, keep MariaDB and phpMyAdmin selected as well. You can re-run the installer later if you need something you skipped.
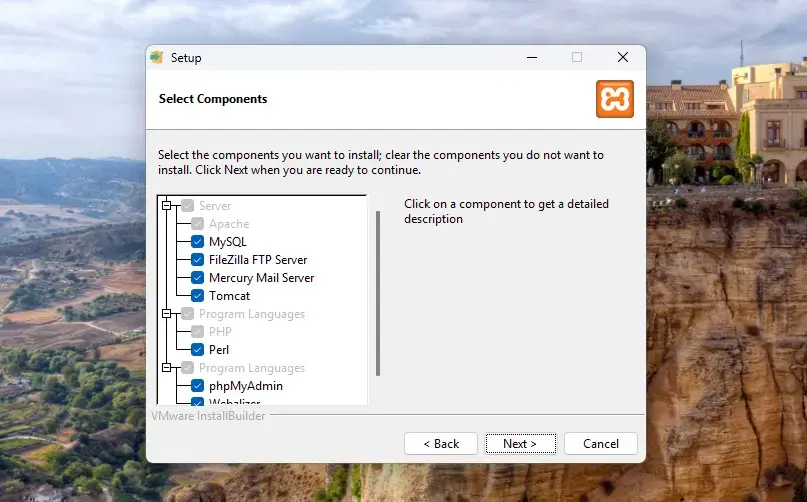
This screen shows the component list. Items with a tick will be installed.
Step 4Choose Installation Folder
Next, the installer asks where to put XAMPP.
- Check the folder shown. The default is
C:\xampp. - Keep this folder. It’s the best place for XAMPP, because it sits outside the protected Windows folders that cause permission problems.
- Click Next.
If you ever want to move XAMPP later, it is easier to uninstall and reinstall than to copy the folder.
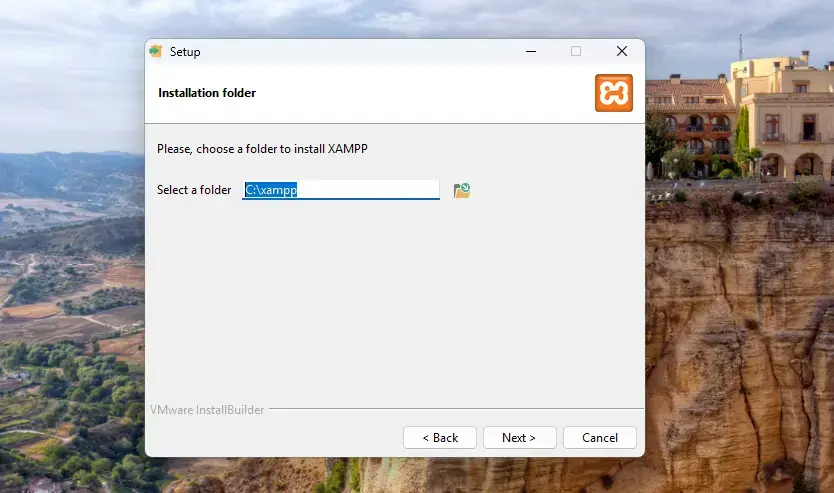
This screen shows the install folder. Make sure the path matches what you expect before you go on. The remaining screens, including language selection and the “Ready to Install” page, only need you to click Next.
Step 5Wait for Installation
Now the installer copies the program files and adjusts settings on your PC.
- Wait while the progress bar fills. This usually takes 3 to 5 minutes.
- Keep the installation window open the whole time.
Closing it early can leave you with a broken install. If that happens, uninstall XAMPP and run the installer again.
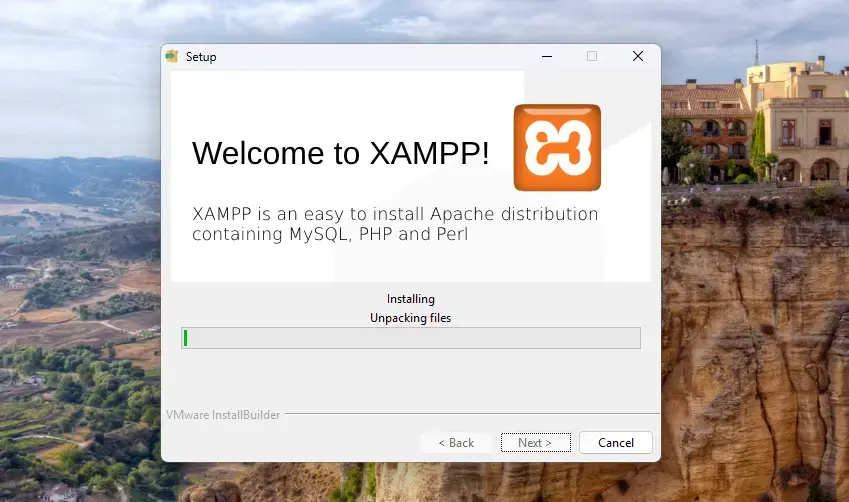
This screen shows the installation in progress. You don’t need to do anything here.
Step 6Allow Apache Through Firewall [Admin Privileges Required]
Partway through, Windows asks for permission. Apache needs to run on your computer, so Windows Defender Firewall shows a security alert.
- Read the alert. It names Apache HTTP Server.
- Click Allow access.
If you click Cancel by mistake, Apache may not respond properly. You can fix that later in Windows Security Firewall & network protection Allow an app through firewall.
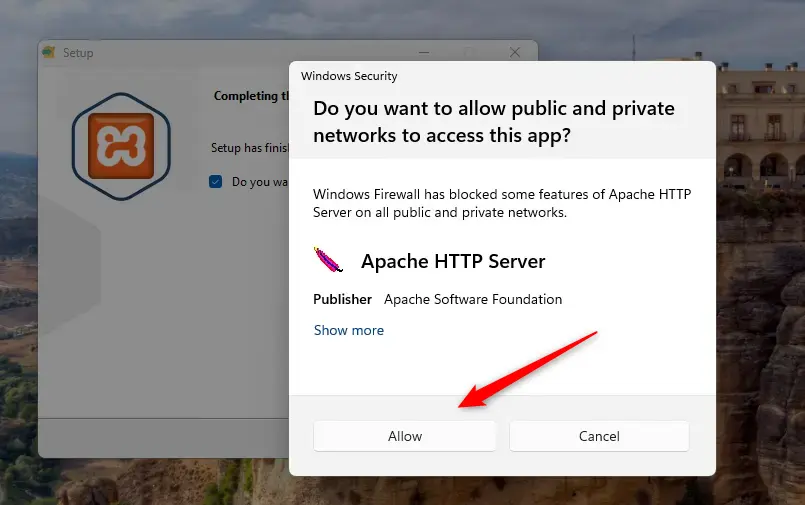
This is the Windows security alert. The alert may list both private and public networks. For local testing, private networks are the one that matters.
Step 7Finish and Open XAMPP
- When setup is done, click Finish.
- The XAMPP Control Panel opens automatically.
If the Control Panel does not open, find it in the Start menu by searching for XAMPP. If the installer offers a language choice on first launch, pick your language and continue.
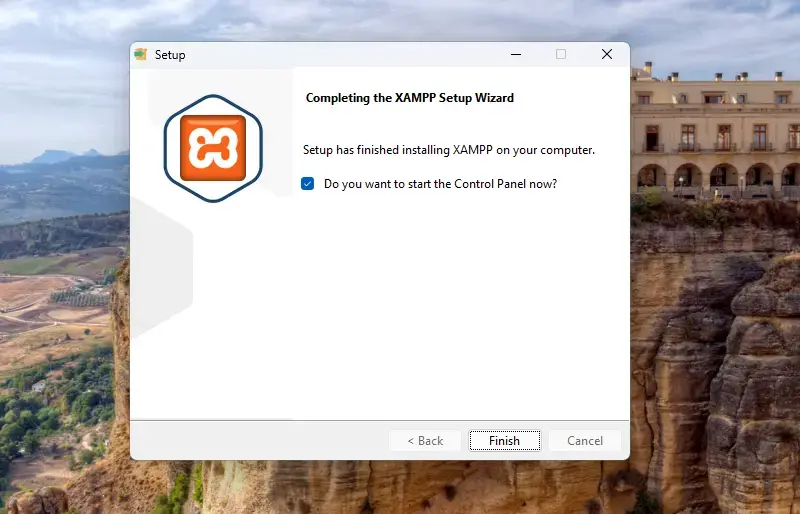
This is the final screen of the installer, with the Finish button.
Using the XAMPP Control Panel
The XAMPP Control Panel is where you manage all your website-building tools. Each service, such as Apache and MariaDB, has its own row with a Start button. Click it once to turn that service on. The button changes to Stop, and the module name turns green when it is running.
You only need to run what you are using. For a plain PHP page, Apache is enough. For a database-driven site, start both Apache and MariaDB.
If Apache fails to start, another program is often using the same port. Check the log window at the bottom of the Control Panel for the error message.
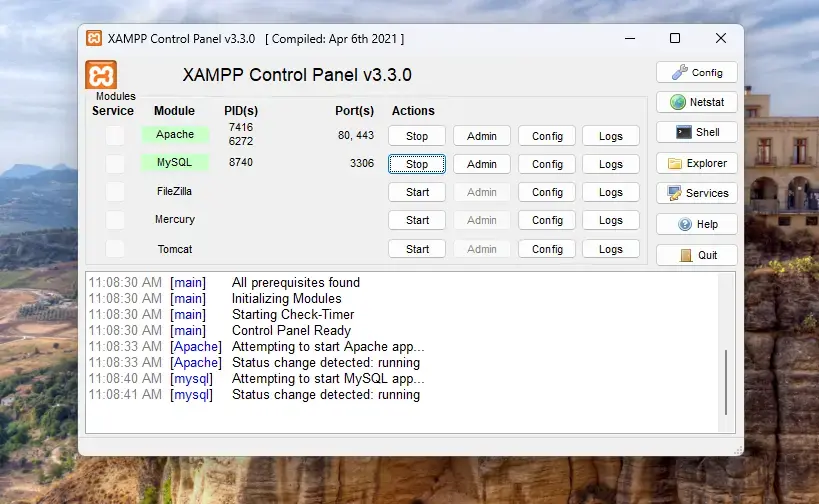
This is the Control Panel. The right-hand buttons include Config, Netstat and Shell.
You can also click the Shell button. This opens a command window. Type these commands to start or stop all servers:
xampp\xampp_start.exe
xampp\xampp_stop.exe
Where to Put Your Website Files
Your website files go in C:\xampp\htdocs. Anything you put here can be viewed in your web browser.
- Open the htdocs folder in File Explorer.
- Create a new folder inside it for each project, for example one for each site you build.
- Put your files in that folder.
The folder name becomes part of the address. A project folder called mysite would be reached at http://localhost/mysite in your browser, as long as Apache is running.
Test Your Web Server
Now check that the web server works.
- Make sure Apache shows as running in the Control Panel.
- Open your web browser.
- Type "http://localhost" into the address bar and press Enter.
If you see the XAMPP welcome page, your server is running correctly and your installation is ready. You can now start building and testing websites on your computer before they go live. If you see an error page instead, go back to the Control Panel and check that Apache is green.
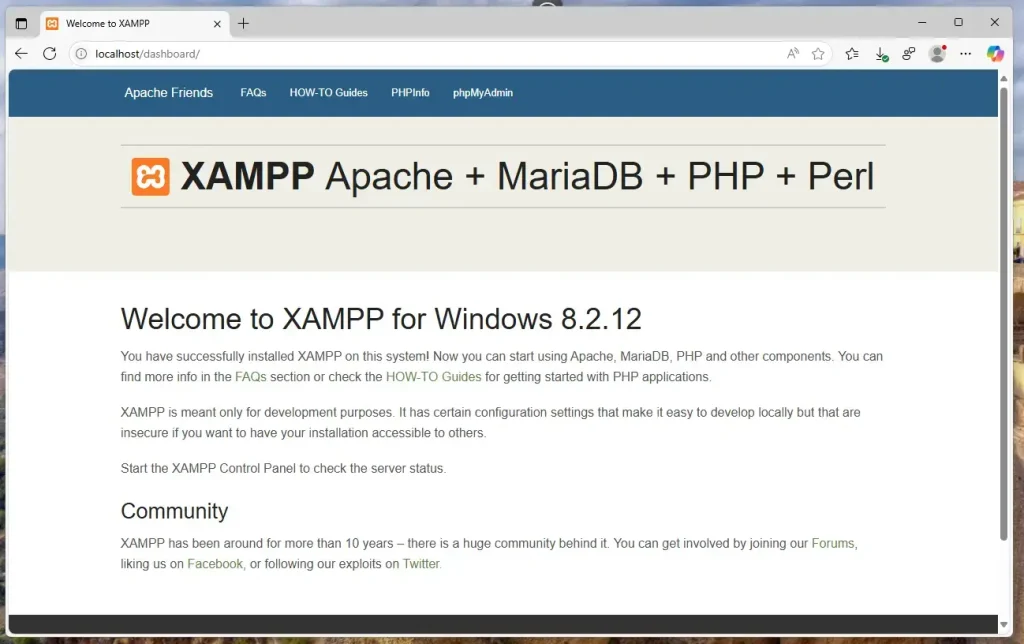
This is the XAMPP welcome page. Links across the top lead to the tools below.
Click PHPInfo. This shows details about PHP on your computer, such as the version and the loaded extensions.
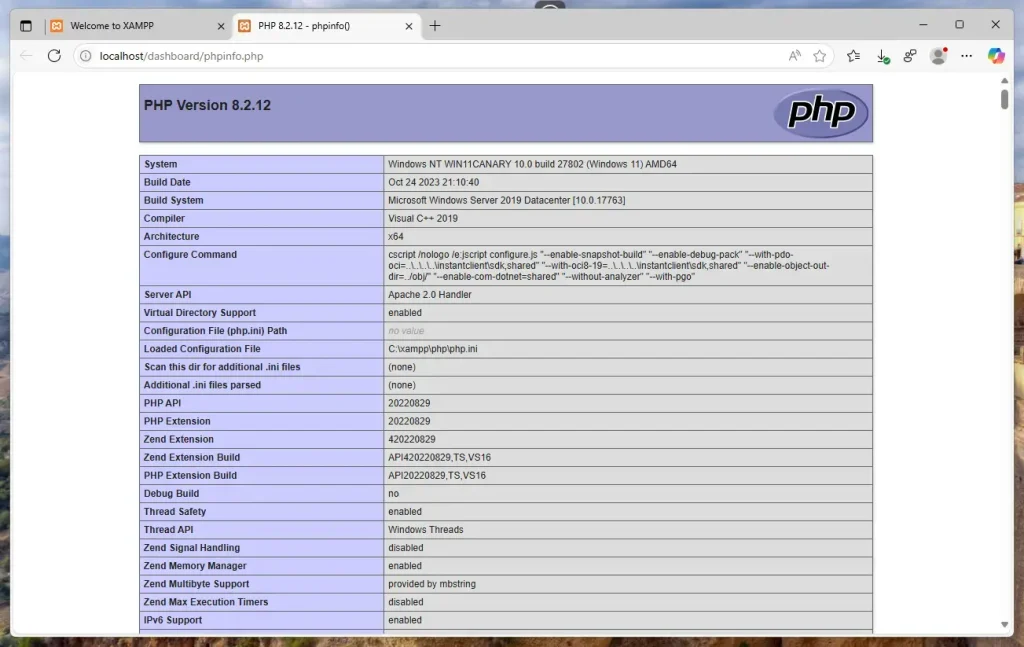
This is the PHP information page. It is handy when a project asks which PHP version or extension you have.
Click phpMyAdmin. This is where you manage your databases (MariaDB). It's easy to use, and you don't need to type commands. MariaDB must be running in the Control Panel for it to work.
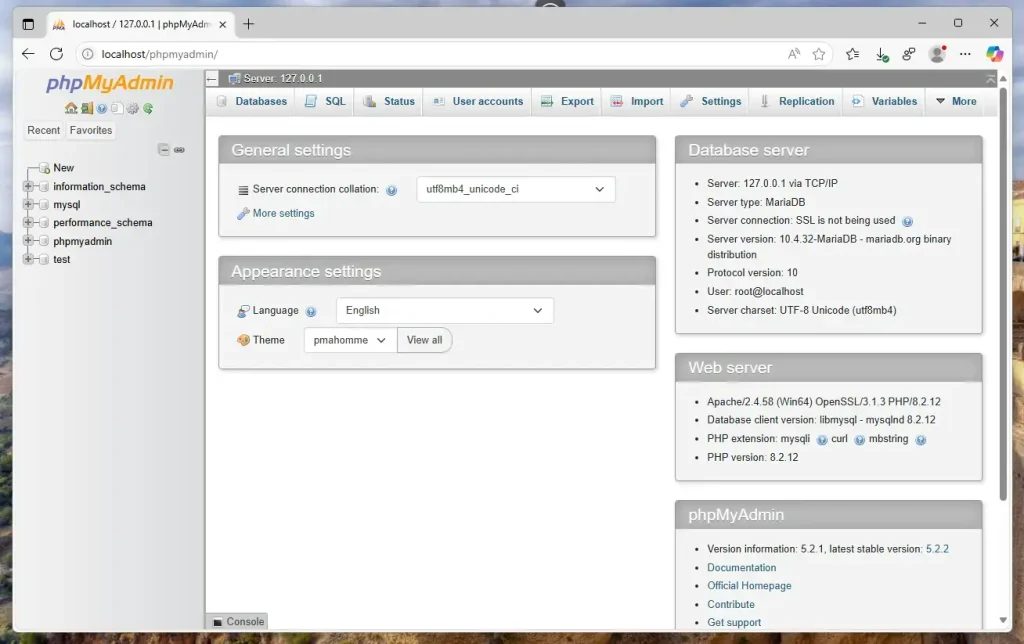
This is the phpMyAdmin screen. A default XAMPP setup has a root user with no password. That is fine for local testing on your own PC, but never copy those settings to a live server.
Summary
- XAMPP is a free program that runs a web server on your Windows 11 PC.
- It installs everything you need in one place.
- The Control Panel makes starting and stopping servers simple.
- You can manage PHP and databases with helpful web tools.
- XAMPP helps you build and test websites before sharing them online.
XAMPP lets you run a web server right on your Windows 11 computer. It bundles the tools you need to build and test websites in one package. Start Apache and MariaDB from the Control Panel, put your project files in htdocs, and open http://localhost in your browser to see the result. Use PHPInfo and phpMyAdmin to check PHP and manage your databases.
Have a question about this guide?
Answered by AI from this guide. Good questions may be added to this page — please don't include personal details.
Did this guide fix your problem?

About the Author
Richard
Tech Writer, IT Professional
Richard is a writer at Geek Rewind who turns complex IT tasks into clear, step-by-step guides. He draws on years of hands-on experience in system administration and enterprise IT operations, focusing on Windows, Linux and WordPress: the problems people actually run into, and the fixes that work. His server and WordPress guides come from systems he runs himself. Richard builds and maintains the platform behind Geek Rewind, from its Ubuntu servers and Nginx configuration to its custom WordPress plugins. Many new tutorials start with readers' questions, and he's always glad to answer them in the comments.
No comments yet — be the first to share your thoughts!