How to Restore Windows Firewall Settings
Restoring Windows Firewall settings returns the firewall to its original configuration, often fixing network problems.
The Windows Firewall acts as a digital gatekeeper, controlling which programs can access your network and the internet. If your apps can’t connect or your internet seems slow, resetting the firewall is a common fix.
This reset can help if malware has created unwanted exceptions, or if the built-in Microsoft Defender Firewall isn’t filtering network traffic correctly. For instance, resetting solves issues where a specific program, like a popular game or video conferencing app, suddenly stops working online.
Restore your Windows Firewall to its default settings by navigating to Windows Security > Firewall & network protection > Restore firewalls to default. Click “Restore defaults” and confirm to reset all rules. This action will remove custom configurations and require re-authorization for previously permitted apps.
Restore the firewall settings to the default in 🪟 Windows 11
As mentioned, if you want to resolve network connectivity issues, restoring the Windows firewall is a good step. Here’s how to do that:
Windows 11 centralizes most of its settings. You can manage everything from system configurations to user accounts and Windows updates within the System Settings pane.
To access System Settings, use the Windows key + I shortcut or click Start ==> Settings, as pictured below:

Alternatively, the search bar on your taskbar can find Settings. Type “Settings” and select it to open.
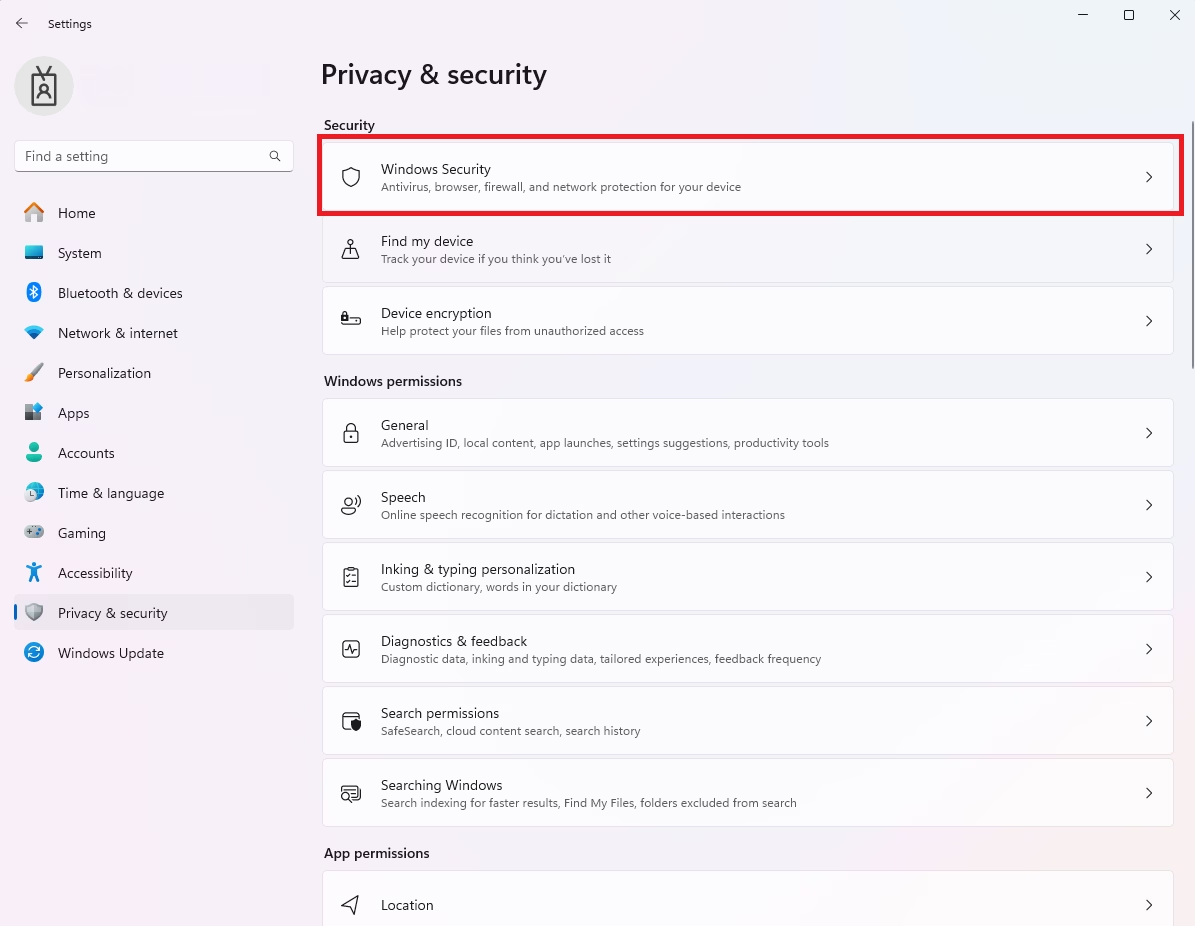
In Windows Settings, navigate to Privacy & Security. From the list on the right, select Windows Security.
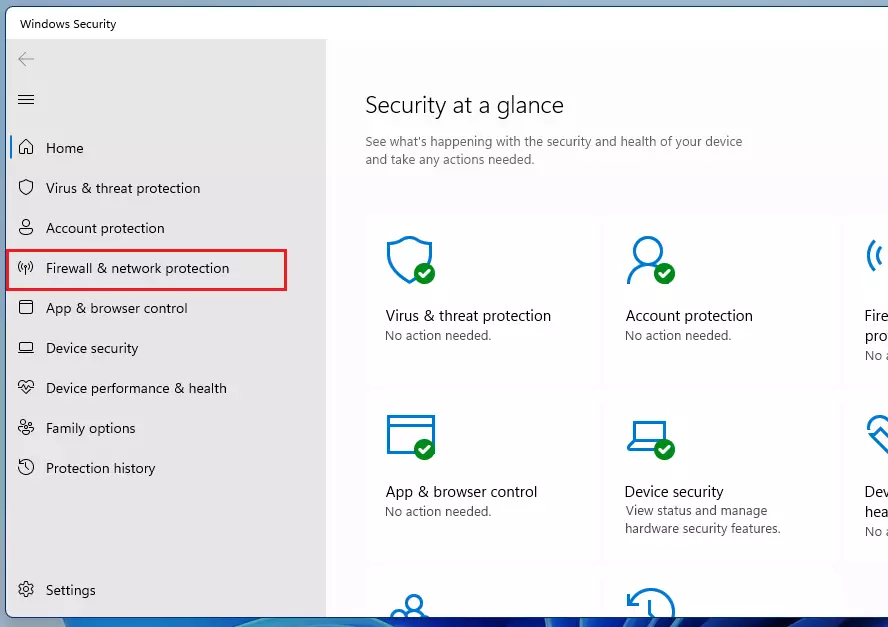
Then, click Firewall & network protection on the left side of the dashboard.
On the Firewall & network protection settings pane, scroll down and click the link labeled “Restore firewalls to default.“
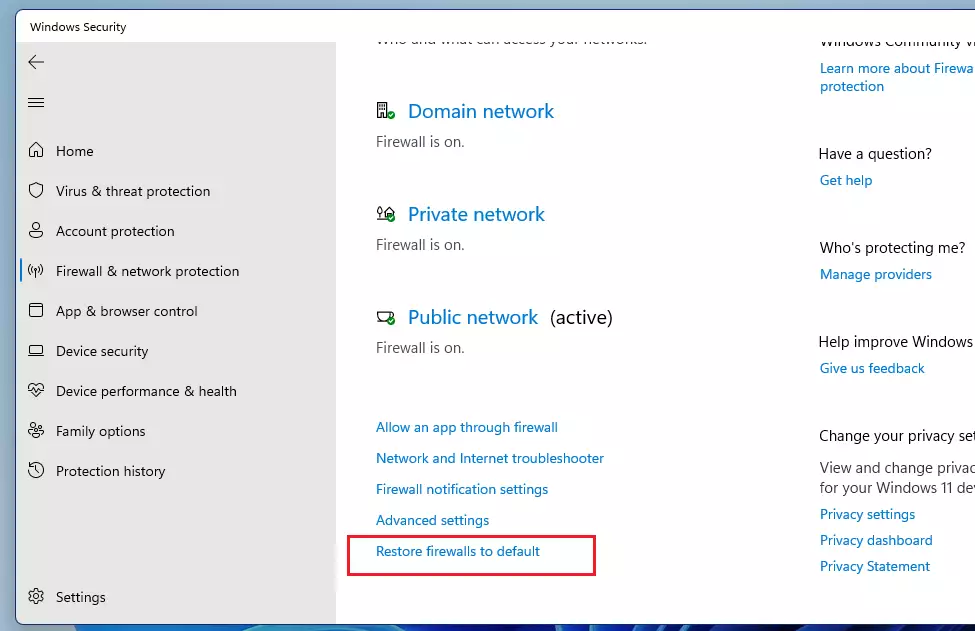
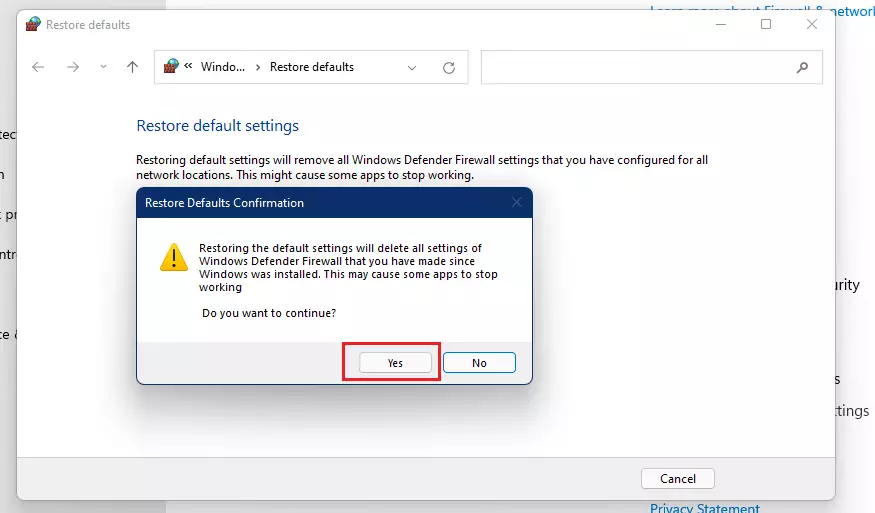
This action will open a new screen for restoring your Windows firewall settings. Click Restore defaults to proceed.

Confirm the action by clicking Yes on the pop-up window.
Restart your computer to complete the process.
Conclusion:
- Resetting the Windows firewall to its default settings can resolve various network connectivity issues.
- This process removes all custom firewall rules and applications previously granted access.
- Users must reconfigure any applications that require firewall access after the reset.
- Following the outlined steps will help ensure a smoother operation of your network settings.
- Regularly reviewing firewall settings can help maintain security and system performance.
Was this guide helpful?

About the Author
Richard
Tech Writer, IT Professional
Richard, a writer for Geek Rewind, is a tech enthusiast who loves breaking down complex IT topics into simple, easy-to-understand ideas. With years of hands-on experience in system administration and enterprise IT operations, he’s developed a knack for offering practical tips and solutions. Richard aims to make technology more accessible and actionable. He's deeply committed to the Geek Rewind community, always ready to answer questions and engage in discussions.


No comments yet — be the first to share your thoughts!