How to Install MySQL or MariaDB on Google Cloud Server


Installing MySQL or MariaDB on a Google Cloud server sets up a free database system that organizes website data like user accounts and WordPress posts on Ubuntu Linux. Both database engines work similarly for standard web projects, and the installation takes about 15 minutes to complete.
Install MySQL or MariaDB on your Ubuntu Google Cloud server by connecting via SSH and using apt-get commands. Update package lists with sudo apt-get update, then install your chosen database with sudo apt-get install mysql-server or sudo apt-get install mariadb-server.
How to connect to the Google Cloud server
Connecting to your Google Cloud server starts in the Google Cloud Console by clicking the SSH button next to your virtual machine instance. This opens a secure command-line window straight in your web browser, allowing you to run commands and install software without needing extra terminal apps installed on your computer.
Use Chrome, Firefox, Edge, or Safari 8 and later. Safari does not work in private browsing mode.
- Web browsers
- The latest version of Google Chrome
- Firefox
- Microsoft Edge
- Microsoft Internet Explorer 11 and later
- Safari 8 and later. Note that Safari is not supported in private browser mode.
- Virtual machine configurations
- All Linux VM images are natively available in Google Cloud.
No additional software or browser extensions are needed. Log in to the Google Cloud Console and navigate to Menu Compute Engine VM instances.
In the list of virtual machine instances, click SSH in the row of the instance you want to connect to.

Alternatively, open an SSH connection to an instance by clicking its name and selecting SSH from the instance details page.
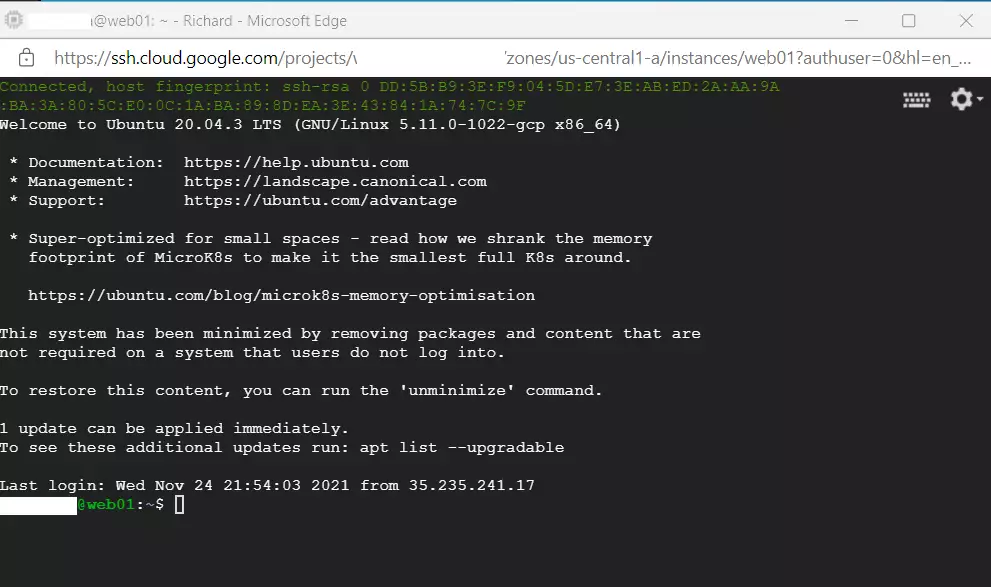
An SSH terminal window with the Ubuntu Linux instance created in the series's second post will open.
Run commands directly inside the Ubuntu Linux environment created on the Google Cloud server.
How to install a database server on Google Cloud Servers
Installing MySQL or MariaDB on a Google Cloud server running Ubuntu requires updating your package list and using the apt command-line tool. Once the database server is running, your website can store and retrieve posts, user accounts, and settings efficiently.
How to install MySQL or MariaDB on Ubuntu Linux
Content stores inside a database once the database server is installed and your domain name points to your Google Cloud server.
A website uses a web server, PHP language, and database server to function online. These three components connect their tasks: the web server handles visitor requests, PHP processes dynamic content, and the database stores website information.
Configuration of servers and packages starts now to get the website running.
Check out previous posts to catch up on earlier steps.
Conclusion:
With the database installed, your Google Cloud server is ready to handle real site traffic. Following the steps outlined in this guide, you can manage your database needs and keep content secure. Here are the key takeaways:
- Establishing a web and database server is essential for running dynamic websites and CMS platforms.
- Google Cloud offers user-friendly SSH access to connect to your virtual machines.
- MySQL or MariaDB can be installed easily using Ubuntu's default repositories and
apt-getcommands. - Each step in this series builds on the previous one, culminating in a fully operational website.
Watch for the next post, where we dive deeper into configuring servers and finalizing the website setup!
Was this guide helpful?

About the Author
Richard
Tech Writer, IT Professional
Richard, a writer for Geek Rewind, is a tech enthusiast who loves breaking down complex IT topics into simple, easy-to-understand ideas. With years of hands-on experience in system administration and enterprise IT operations, he’s developed a knack for offering practical tips and solutions. Richard aims to make technology more accessible and actionable. He's deeply committed to the Geek Rewind community, always ready to answer questions and engage in discussions.




No comments yet — be the first to share your thoughts!