How to Enable or Disable Translucent Selection Rectangle on Desktop in Windows 11

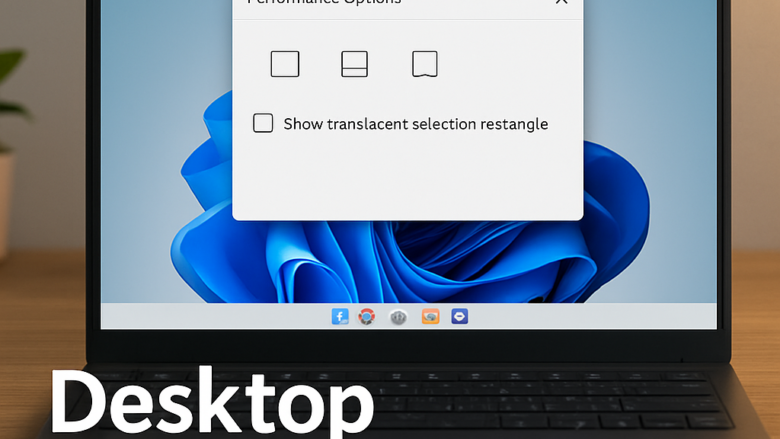
The translucent selection rectangle is the see-through blue box that appears when you drag your mouse across the Windows 11 desktop. It lets you highlight and select several files or icons at once. If you prefer a plain outline without the solid fill, you can turn the fill off in the Performance Options window.
This setting is aimed at the desktop. It does not change how selection boxes look inside File Explorer or other apps. The same setting works on Windows 11 Home and Pro. You can undo it at any time by repeating the steps and reversing the change.
Press Win+R, type SystemPropertiesPerformance.exe and click OK. Click the Visual Effects tab, find Show translucent selection rectangle, and check or uncheck it. Click OK to apply the change immediately without restarting.
Option 1Use Performance Options
You open it from the Run dialog and change one checkbox on the Visual Effects tab. You do not need administrator rights for this method on a normal account.
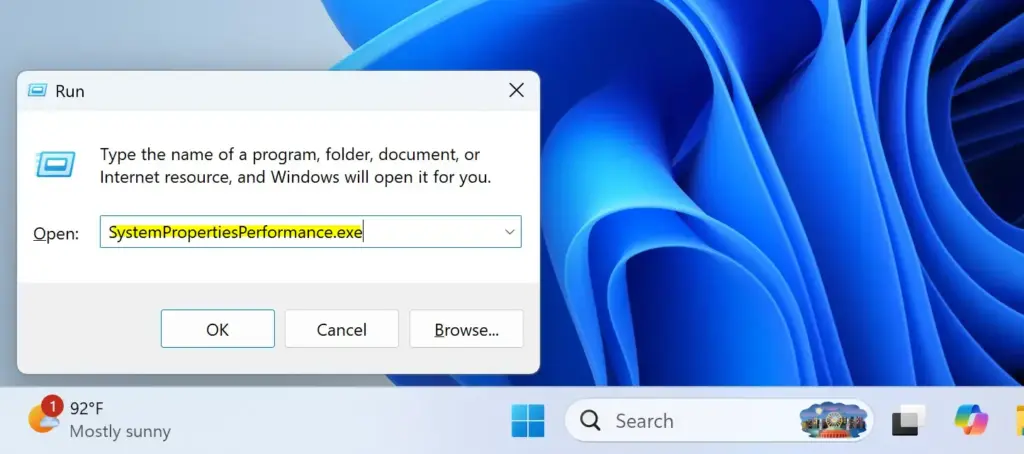
- Press Win+R on your keyboard. A small Run window opens in the lower-left corner of the screen.
- Type
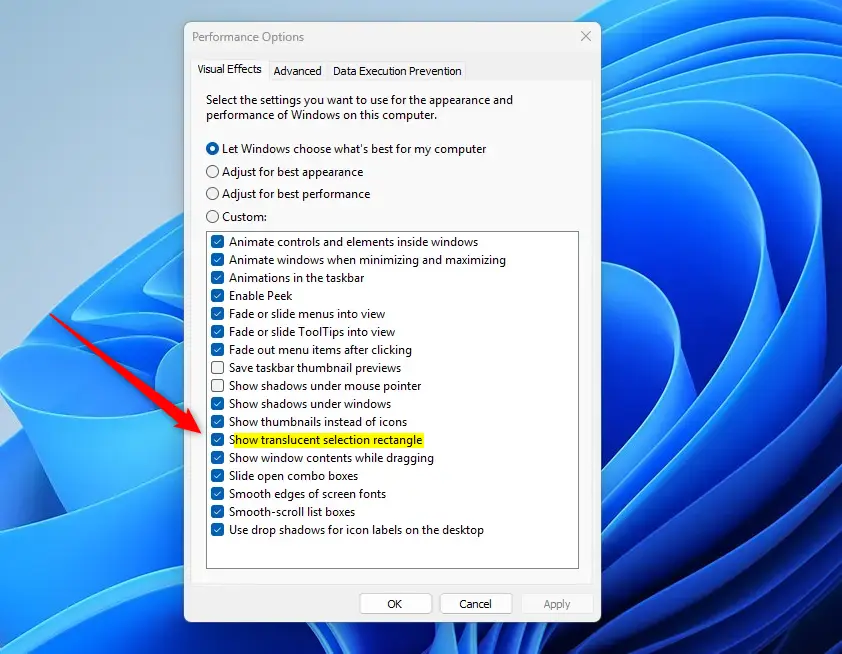
SystemPropertiesPerformance.exeinto the box and click OK. The Performance Options window opens. - Click the Visual Effects tab at the top. You will see a list of checkboxes for animations and display effects.
- Scroll through the list until you find Show translucent selection rectangle. The list is long, so you may need to scroll a fair way.
- Select the checkbox to turn the effect on. This is the default setting.
- Clear the checkbox to turn the effect off.
- Click OK at the bottom to save your changes. The window closes.
The change applies straight away, so no restart is needed. To test it, click an empty spot on the desktop and drag across a few icons. With the effect on, you see a shaded blue box. With it off, you see only a thin outline.
Once you change any checkbox on this tab, Windows switches the option at the top to Custom. That is normal. If you later choose Adjust for best performance, Windows clears most of these checkboxes, including this one. You would then need to tick it again yourself.
Option 2Use Registry Editor (Advanced)
This is useful if you manage several PCs or the Performance Options window is blocked for you. Incorrect registry edits can cause system instability, so follow the steps exactly. Consider exporting the key first (File Export) so you have a backup.
The setting comes down to one value in the Registry. This method may not work if administrator restrictions are in place. Some work or school PCs lock the Registry or reset the setting through policy.
To enable the translucent selection rectangle, the value must be set to 1.
To disable it, set the value to 0.
Here are the steps:
- Press Windows key + R on your keyboard to open the Run dialog.
- Type
regeditinto the box and click OK. The Registry Editor opens. If a User Account Control prompt appears, you may be asked for administrator permission. Click Yes or enter an admin password. - In the left-hand pane, carefully navigate to the following location. Click the arrow beside each folder to open it, and check that you are on the right folder before you move on:
HKEY_CURRENT_USER\Software\Microsoft\Windows\CurrentVersion\Explorer\Advanced - In the right-hand pane, find the entry named
ListviewAlphaSelect. - Double-click
ListviewAlphaSelect. A small edit window opens with a Value data box. - To turn the feature ON, type
1in the Value data box. - To turn the feature OFF, type
0in the Value data box. - Click OK. The edit window closes, and the new value shows in the right-hand pane.
- Close the Registry Editor.
- Restart your computer, or sign out and sign back in, so the change takes effect. Registry edits are usually not picked up by the desktop until you do this.
If the result is not what you wanted, go back to the same value and enter the other number. Then sign out and back in again.
Summary
For most people, the Visual Effects settings are the best way to turn the see-through selection box on or off for the desktop in Windows 11. It takes a few clicks and the change applies at once. The Registry Editor does the same job and suits more advanced users, but be careful there, because a wrong edit can cause problems.
Did this guide fix your problem?

About the Author
Richard
Tech Writer, IT Professional
Richard is a writer at Geek Rewind who turns complex IT tasks into clear, step-by-step guides. He draws on years of hands-on experience in system administration and enterprise IT operations, focusing on Windows, Linux and WordPress: the problems people actually run into, and the fixes that work. His server and WordPress guides come from systems he runs himself. Richard builds and maintains the platform behind Geek Rewind, from its Ubuntu servers and Nginx configuration to its custom WordPress plugins. Many new tutorials start with readers' questions, and he's always glad to answer them in the comments.
No comments yet — be the first to share your thoughts!