How to Change Desktop Icon Horizontal and Vertical Spacing in Windows 11

Desktop icon spacing in Windows 11 controls the exact pixel distance between items on your screen. The default grid measurement uses 75 pixels for horizontal space and 1125 pixels for vertical space.
Adjusting these numbers through the Registry Editor (a tool that lets you view and change low-level Windows settings ) lets you fit more shortcuts or stop long file names from overlapping.
Open the Registry Editor and go to 🗝️HKEY_CURRENT_USER\
Option One
Change Desktop Icon Horizontal Spacing
- Open the Registry Editor by typing regedit in your search bar and opening the program. Note: This step requires administrator privileges.
- Go to the following location on the left side of the screen:
You can change desktop icon horizontal spacing in Windows 11 by editing a value in the Registry Editor. Adjusting this setting lets you control the side-to-side distance between your shortcut icons to fit more items on your screen or spread them out. Open the Registry Editor by typing regedit in the taskbar search box and pressing Enter to start.
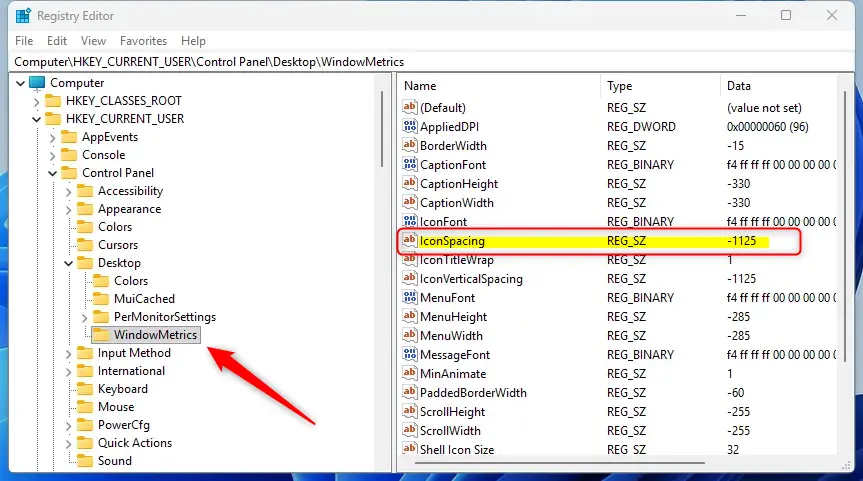
- On the right side of the screen, double-click on the IconSpacing value.
- Type a number between -480 and -2730, and then click OK.
The smallest gap is -480, and the largest gap is -2730. Include the minus sign before the number.
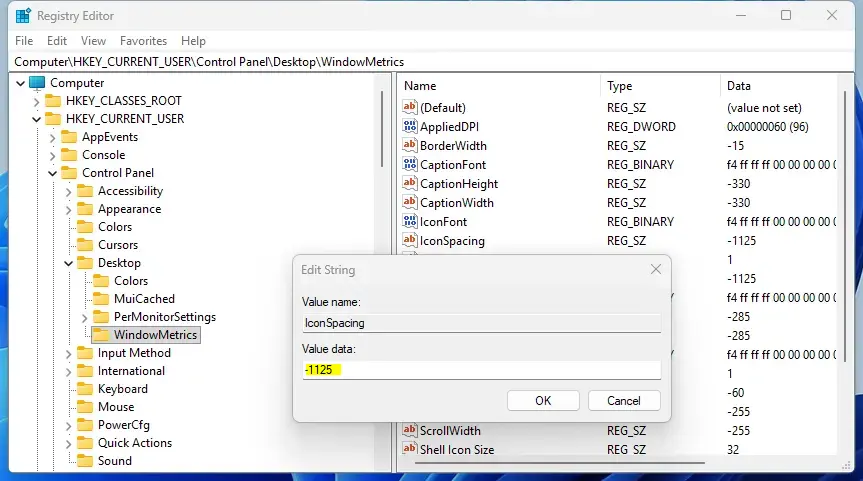
- Sign out of your account and sign back in to see your changes.
Option Two
Change Desktop Icon Vertical Spacing
- Open the Registry Editor by typing regedit in your search bar and opening the program. Note: This step requires administrator privileges.
- Go to the following location on the left side of the screen:
You can change desktop icon vertical spacing in Windows 11 by modifying a specific key in the Registry Editor. This setting controls the up-and-down distance between your shortcut icons so you can arrange your desktop layout just how you like it. Open the Registry Editor by typing regedit in your search bar and pressing Enter to begin.
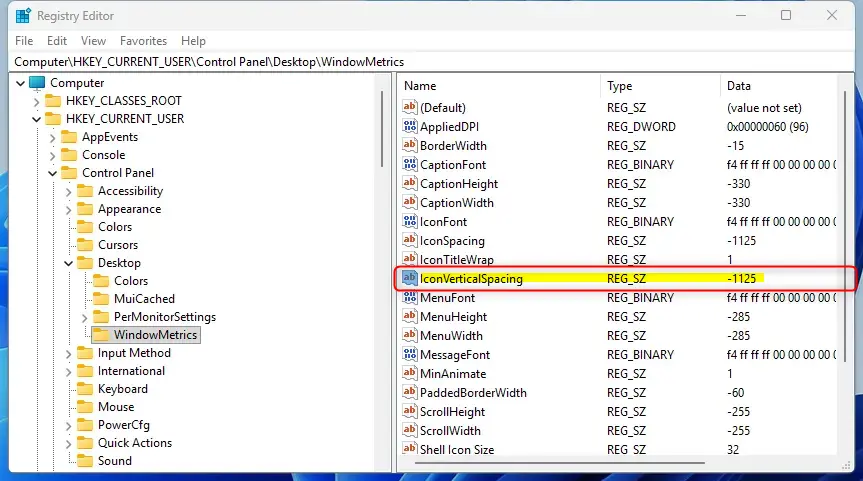
- On the right side of the screen, double-click on the IconVerticalSpacing value.
- Type a number between -480 and -2730, and then click OK.
The smallest gap is -480, and the largest gap is -2730. Include the minus sign before the number.
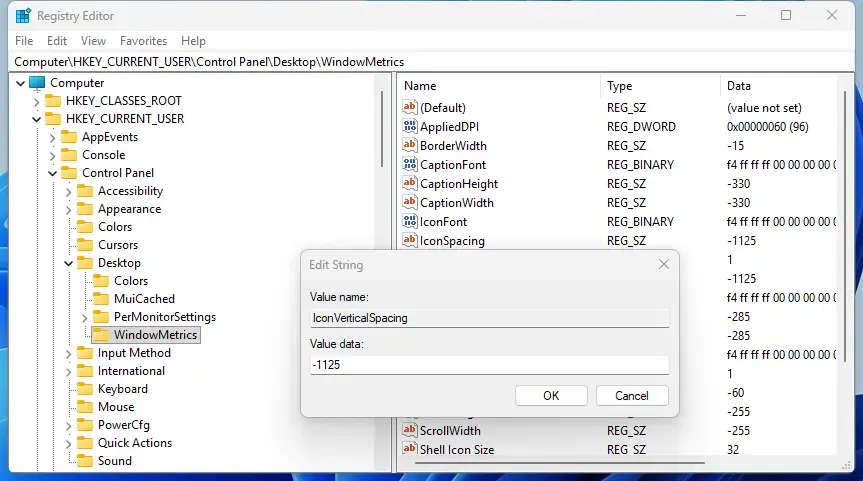
- Sign out of your account and sign back in to see your changes.
Restarting the user session applies the new layout.
Summary
Registry edits provide granular control over desktop appearance beyond default settings.
Was this guide helpful?

About the Author
Richard
Tech Writer, IT Professional
Richard is a writer at Geek Rewind who turns complex IT tasks into clear, step-by-step guides. He draws on years of hands-on experience in system administration and enterprise IT operations, focusing on Windows, Linux and WordPress: the problems people actually run into, and the fixes that work. His server and WordPress guides come from systems he runs himself. Richard builds and maintains the platform behind Geek Rewind, from its Ubuntu servers and Nginx configuration to its custom WordPress plugins. Many new tutorials start with readers' questions, and he's always glad to answer them in the comments.




No comments yet — be the first to share your thoughts!