How to Enable or Disable Reserved Storage in Windows 11


Reserved storage in Windows 11 sets aside about 7 GB of disk space for system updates, temporary files, and apps. This dedicated space ensures your PC has enough room to download and install updates without failing.
You can turn reserved storage on or off to reclaim disk space on a small solid-state drive. Disabling this feature frees up those gigabytes right away, but it can cause update errors if your drive runs low on free space later.
The feature is the same on Home and Pro, and the steps below work on both. It is normally on for PCs that shipped with Windows 11 and for clean installs. A PC upgraded from Windows 10 may not have it switched on at all, so check the current state before you change anything.
Right-click the Start button , select Windows Terminal (Admin), and run Get-WindowsReservedStorageState in PowerShell or Command Prompt. The output shows True if reserved storage is enabled or False if disabled.
What is Reserved Storage?
Reserved storage Windows 11 is a built-in feature that sets aside about 7 GB of your hard drive space specifically for system updates, temporary files, and app caches. This dedicated space helps your PC install updates smoothly without running out of room, while keeping your personal files safe from clutter.
In practice, it gives you these benefits:
- Run better by keeping temporary files from using up your personal storage.
- Install updates without needing extra free space.
- Keep storage space usage more predictable and stable.
If you run low on space, Windows will try to clear some of this reserved storage automatically. You can see how much is set aside under Settings System Storage Show more categories System & reserved. The reserved figure is listed there.
Should You Disable Reserved Storage?
This is mostly worth doing on a small drive, such as a 64 GB or 128 GB SSD, where 7 GB is a big share of the total. On a drive with plenty of room, I would leave it on. But keep in mind:
- Disabling it means Windows might need you to free up space manually before updates.
- It might affect how smoothly updates install. Large feature updates need the most room, so they are the ones most likely to fail on a nearly full drive.
- You can turn it back on at any time with the same method you used to turn it off.
How Much Space Does Reserved Storage Use?
Reserved storage Windows 11 normally uses about 7 GB of disk space right after a fresh install. However, the exact amount of space used can grow over time depending on how many optional Windows features you have turned on and how many different display languages are installed on your computer.
- Optional Features: If you have extra Windows features installed, Reserved Storage might grow to support them.
- Installed Languages: If you use multiple languages, Reserved Storage might increase.
You can reduce space used by removing optional features or languages you don’t need. This is a gentler option than turning the feature off completely:
- Remove optional features: Settings Apps Optional Features
- Remove languages: How to remove languages in Windows 11. The language list is under Settings Time & language Language & region.
The reserved amount does not always shrink right after you remove something. Restart the PC and check the Storage page again.
Before You Start
You need to be signed in as an Administrator to change Reserved Storage settings. Check if you have admin rights. If you are on a standard account, you will get an access denied error or a prompt for an administrator password when you open the terminal.
To check, open Settings Accounts Your info. Your account name should say Administrator underneath it.
How to Check if Reserved Storage is On or Off
- Right-click the Start button and choose Windows Terminal (Admin). On some builds the entry is labeled Terminal (Admin). Click Yes if User Account Control asks for permission. A terminal window opens.
- If you see a dropdown at the top, pick Windows PowerShell or Command Prompt. Either one works for this check.
- Type one of the following commands and press Enter:
Using PowerShell:
Get-WindowsReservedStorageStateUsing Command Prompt:
DISM /Online /Get-ReservedStorageStateYou will see if Reserved Storage is Enabled or Disabled. If the command returns an error instead, check that the terminal really is running as administrator. The title bar should say so.
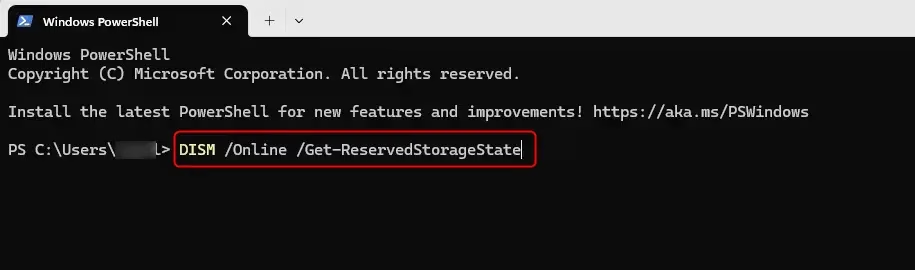
How to Enable or Disable Reserved Storage
Option 1Using Command Prompt
- Open Windows Terminal (Admin) and select Command Prompt. The prompt should show a path under C:\Windows\System32.
- To enable Reserved Storage, type and press Enter:Code
DISM /Online /Set-ReservedStorageState /State:Enabled - To disable Reserved Storage, type and press Enter:Code
DISM /Online /Set-ReservedStorageState /State:Disabled - Wait for the command to finish and read the message it prints. If it reports an error, Windows is most likely busy with an update or has a restart pending. Restart the PC, then run the command again.
- Close the terminal when done.
- Restart your PC so the change takes full effect, then check the state again with the status command from the previous method.
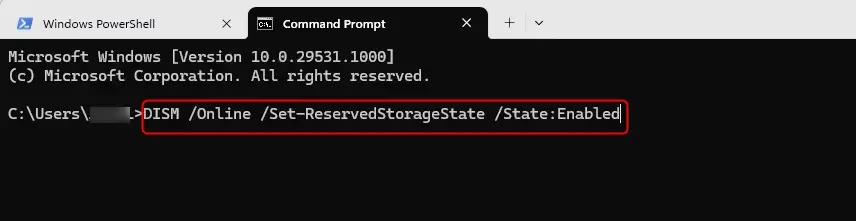
Option 2Using PowerShell
- Open Windows Terminal (Admin) and select Windows PowerShell. The tab title should show it is running as administrator.
- To enable Reserved Storage, type and press Enter:PowerShell
Set-WindowsReservedStorageState -State Enabled - To disable Reserved Storage, type and press Enter:PowerShell
Set-WindowsReservedStorageState -State Disabled - Wait for the command to finish and read the result. If you get an error, check for pending updates or a pending restart, restart the PC, and try again.
- Close the terminal when done.
- Restart your PC, then run the status check again to confirm the new state.
Option 3Using Registry Files
Using Registry Editor allows you to change reserved storage Windows 11 settings by running specific commands or manually modifying registry keys. This method gives you direct control over turning the feature on or off when standard settings options are not available on your PC.
A wrong edit in the registry can cause problems that are hard to trace. To undo a change later, apply the enable text below.
To Enable Reserved Storage (default):
reg add "HKEY_LOCAL_MACHINE\SOFTWARE\Microsoft\Windows\CurrentVersion\ReserveManager" /v ActiveScenario /t REG_DWORD /d 0 /f
reg add "HKEY_LOCAL_MACHINE\SOFTWARE\Microsoft\Windows\CurrentVersion\ReserveManager" /v MiscPolicyInfo /t REG_DWORD /d 1 /f
reg add "HKEY_LOCAL_MACHINE\SOFTWARE\Microsoft\Windows\CurrentVersion\ReserveManager" /v PassedPolicy /t REG_DWORD /d 1 /f
reg add "HKEY_LOCAL_MACHINE\SOFTWARE\Microsoft\Windows\CurrentVersion\ReserveManager" /v ShippedWithReserves /t REG_DWORD /d 1 /f
To Disable Reserved Storage:
reg add "HKEY_LOCAL_MACHINE\SOFTWARE\Microsoft\Windows\CurrentVersion\ReserveManager" /v ActiveScenario /t REG_DWORD /d 0 /f
reg add "HKEY_LOCAL_MACHINE\SOFTWARE\Microsoft\Windows\CurrentVersion\ReserveManager" /v MiscPolicyInfo /t REG_DWORD /d 2 /f
reg add "HKEY_LOCAL_MACHINE\SOFTWARE\Microsoft\Windows\CurrentVersion\ReserveManager" /v PassedPolicy /t REG_DWORD /d 0 /f
reg add "HKEY_LOCAL_MACHINE\SOFTWARE\Microsoft\Windows\CurrentVersion\ReserveManager" /v ShippedWithReserves /t REG_DWORD /d 0 /f
- Open Notepad and paste the text above for the option you want.
- Click File Save as. Set Save as type to All files, so Notepad does not add a .txt extension.
- Save the text above as a
.regfile, then double-click it to apply it. - Click Yes at the User Account Control prompt and again at the registry warning, then wait for the message that the keys were added.
- Restart your PC.
Summary
Reserved storage Windows 11 is an automatic system feature that keeps your computer running smoothly by holding back hard drive space for critical updates. While it takes up a small chunk of your drive, understanding how reserved storage works helps you decide whether to keep it turned on or turn it off.
- Keeps your PC stable: Temporary files don’t fill up your personal storage.
- Makes updates easier: Windows uses reserved space first for updates.
- You control it: You can turn Reserved Storage on or off if you want.
- Requires admin rights: Only administrators can change these settings.
Managing Reserved Storage well can help your Windows run smoothly and keep your updates hassle-free. If you turn it off, keep an eye on your free space and leave room for the next big update.
Learn More from Microsoft
- How Reserved Storage Works in Windows - Microsoft Support
- Windows 10 and Reserved Storage | Microsoft Community
- Managing Reserved Storage in Windows 10 | Microsoft Community

Was this guide helpful?

About the Author
Richard
Tech Writer, IT Professional
Richard is a writer at Geek Rewind who turns complex IT tasks into clear, step-by-step guides. He draws on years of hands-on experience in system administration and enterprise IT operations, focusing on Windows, Linux and WordPress: the problems people actually run into, and the fixes that work. His server and WordPress guides come from systems he runs himself. Richard builds and maintains the platform behind Geek Rewind, from its Ubuntu servers and Nginx configuration to its custom WordPress plugins. Many new tutorials start with readers' questions, and he's always glad to answer them in the comments.




No comments yet — be the first to share your thoughts!