How to Create a System Restore Point in Windows 11

This article explains how to create a system restore point in Windows 11, allowing you to restore or recover your system from disasters or unexpected errors.

System Restore in Windows 11 creates restore points, allowing your computer to be restored to a prior working state. It’s like going back in time when you need it the most.

Creating a restore point in Windows 11 can be beneficial if your computer experiences any issues or errors. This feature allows you to revert your system to a previous stable state, effectively undoing any recent changes or updates that may have caused the problem.

This can save you time and effort by automating the troubleshooting and resolution of the problem. Additionally, you can create a restore point before making any major changes or updates to your system, providing an extra layer of protection and peace of mind.

Create a System Restore Point in Windows 11

If you know the changes you want to make may lead to loss of data or your System is unstable, you can create a restore point before going ahead with the changes.

Windows 11 helps restore your PC to a good state, and the steps below show you how to do that.

To create a restore point in Windows 11, click Start and type the System. Cpl. Then select from the result page to open as shown below:

Alternatively, press the Windows key + R on your keyboard to open the Run app. Then type the commands below and press Enter to open.

sysdm.cpl

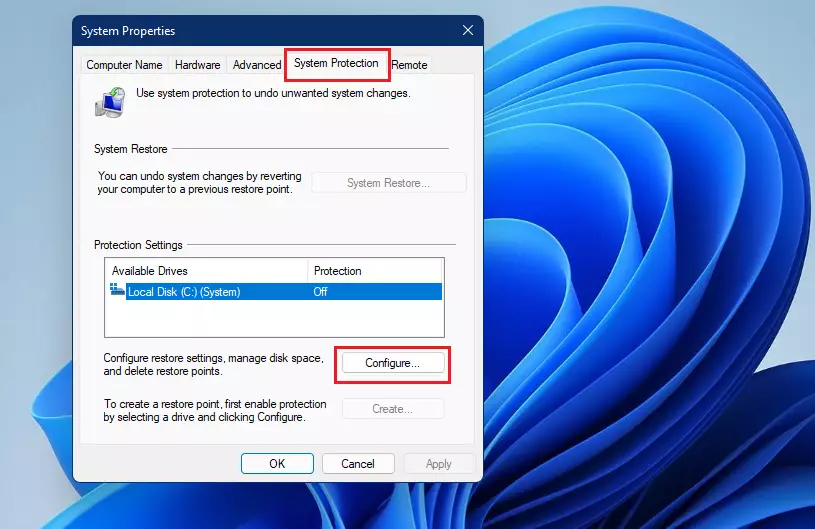
This will open the System Properties pane. From there, select the System Protection tab.

If you see Protection Off for the Local Disk (C:) (System) drive, click the Configure button as shown below.

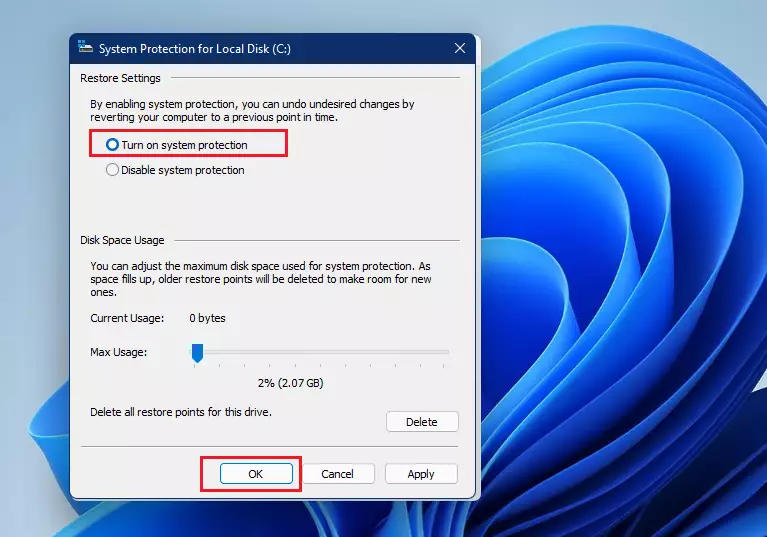
Turn on system protection and click OK to save your changes. Doing this will enable System Protection on the local system disk drive.

You could also adjust the maximum disk space used for system protection. For normal usage, the default settings should just be fine.

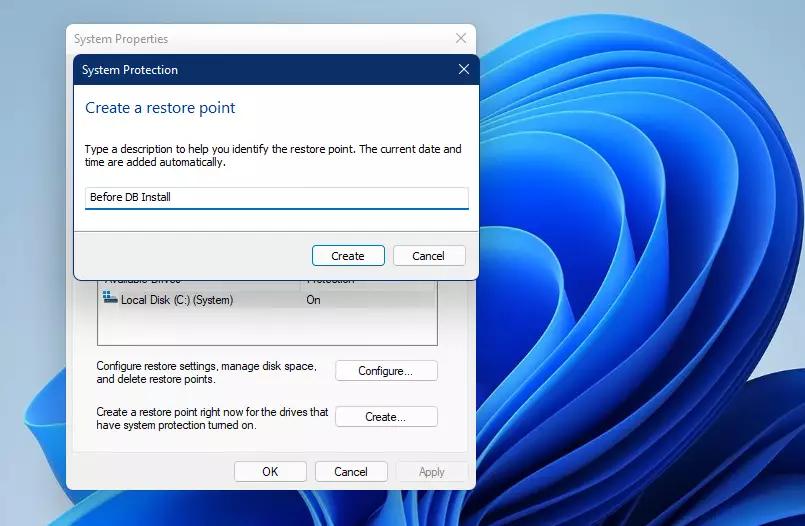
With System Protection turned on, click the Create button below to create a restore point.

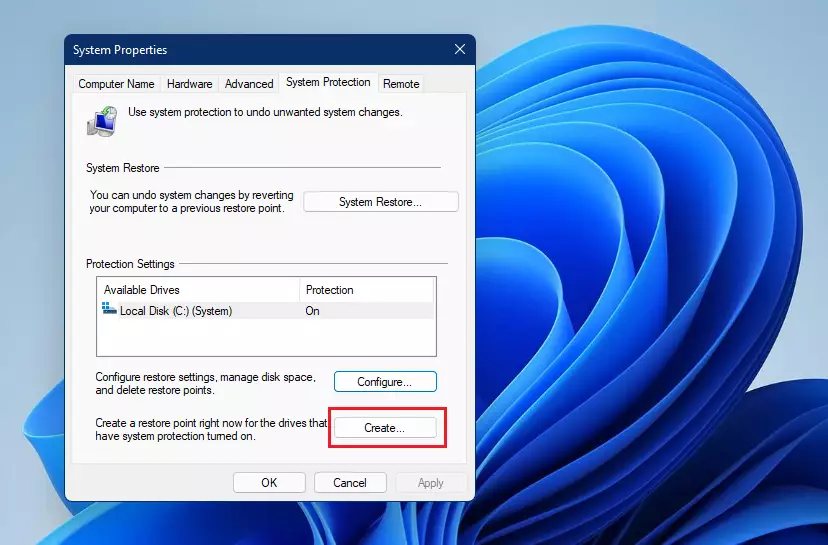
Enter a name for the restore point and click Create. This will create a System Restore point for your PC that you can revert to if the system becomes unstable.

How to Restore from System Restore Points

Now that a system restore point has been created, you can easily follow the steps below to restore your system to an earlier state.

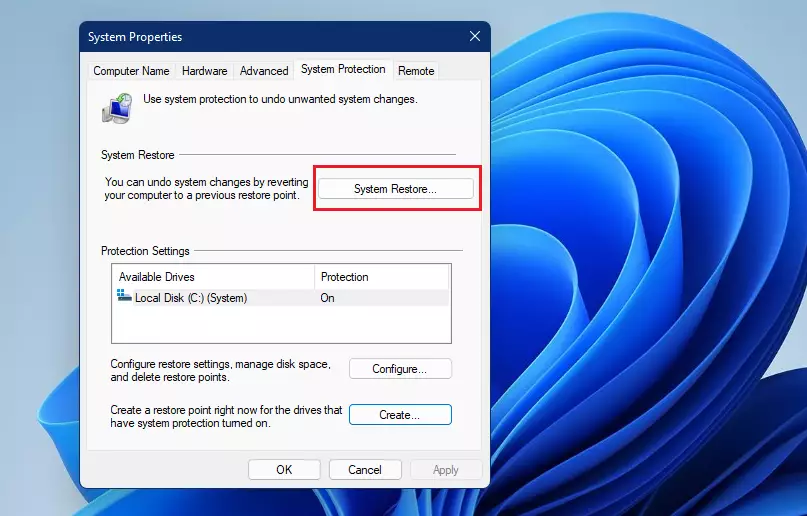
Go to the System Protection tab and click System Restore, as the image below highlights. You can then revert or undo system changes by reverting your computer to a previous restore point.

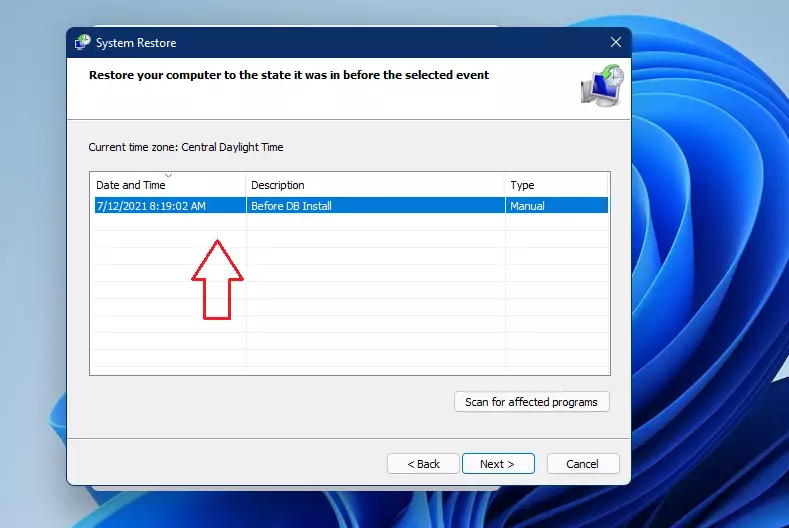
Click Next, select the restore point you wish to restore, and click Next.

Then click Finish to begin the restoration.

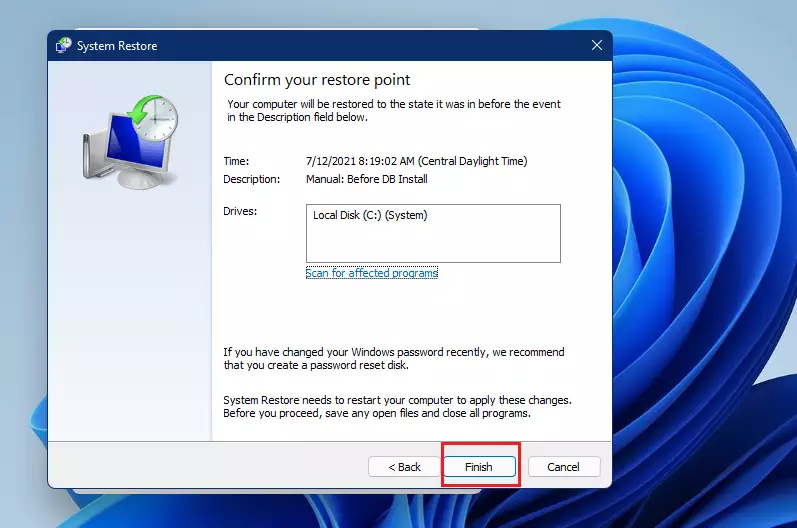
Depending on the speed of your computer, this may take some time to complete. Windows will also reboot your PC to restore it successfully.

That should do it!

Conclusion:

  • Creating a system restore point in Windows 11 is an essential preventive measure.
  • It allows you to revert your system to a stable state, making troubleshooting easier.
  • Regularly making restore points before significant changes can save time and prevent data loss.
  • The process is straightforward and can be completed in just a few steps.
  • Utilizing system restore enhances your PC’s reliability and offers peace of mind during updates or installations.

Categories:

Tags:

You May Also Like

30 responses to “How to Create a System Restore Point in Windows 11”

  1. […] a drive is added to System protection, Windows creates restore points so one can revert unneeded changes and go back to a previous good state on the […]

  2. […] to back up your registry before making any changes or create a System Restore point as a […]

  3. […] to back up your registry before making any changes or create a System Restore point as a […]

  4. […] to back up your registry before making any changes or create a System Restore point as a […]

  5. […] to back up your registry before making any changes, or create a System Restore point as a […]

  6. […] to back up your registry before making any changes, or create a System Restore point as a […]

  7. […] to back up your registry before making any changes, or create a System Restore point as a […]

  8. […] to back up your registry before making any changes, or create a System Restore point as a […]

  9. […] to back up your registry before making any changes, or create a System Restore point as a […]

  10. […] to back up your registry before making any changes, or create a System Restore point as a […]

  11. […] to back up your registry before making any changes, or create a System Restore point as a […]

  12. […] to back up your registry before making any changes, or create a System Restore point as a […]

  13. […] to back up your registry before making any changes, or create a System Restore point as a […]

  14. […] to back up your registry before making any changes, or create a System Restore point as a […]

  15. […] restore point can be quite helpful in situations where you’ll want to revert to an earlier version to […]

  16. […] the Registry can cause problems if done incorrectly, so please back up your registry first or create a system restore point before you […]

  17. […] Before you do this, back up your registry or create a system restore point to keep your PC […]

  18. […] mistakes here can cause problems on your computer. It’s best to back up your registry or create a restore point before you […]

  19. […] the registry can cause problems if not done correctly. Make sure to back up your registry or create a system restore point […]

  20. […] Before you start, back up your registry or create a System Restore point. This helps protect your computer if something goes […]

  21. […] Changing registry settings can affect your computer. It’s a good idea to back up your registry or create a restore point before you […]

  22. […] careful — changing the registry incorrectly can cause problems. Always back up your registry or create a system restore point before you […]

  23. […] Before you start, back up your registry or create a System Restore point so you can undo changes if […]

  24. […] Changing the Registry can affect your system, so it’s important to back up your Registry or create a System Restore point before making […]

  25. […] Changing the Windows Registry is for advanced users. Be sure to back up your registry or create a restore point before you […]

  26. […] How to Create a Restore Point in Windows 11 […]

  27. […] Learn more about how to create restore points in Windows 11. […]

  28. […] to learn more? Check out how to make your own restore point or change how often Windows creates restore […]

  29. […] restore point is like taking a snapshot of your computer’s important files and settings at a certain time. If […]

Leave a Reply to How to Turn On Windows Hello Anti-Spoofing in Windows 11 – Geek Rewind Cancel reply

Your email address will not be published. Required fields are marked *

Exit mobile version