How to Connect Windows 11 to Ubuntu: A Guide to XRDP


XRDP is a remote desktop server for Linux. It lets you see and control one computer from another. In this guide it connects your Windows 11 PC to an Ubuntu machine, so you can run Linux apps in a window on your main screen. The setup works best with Ubuntu 20.04 LTS or newer on the host system.
You can open files, use desktop tools, and manage your files without a second monitor or keyboard on your desk. The Windows side needs no extra software. It uses Remote Desktop Connection, the Remote Desktop Protocol (RDP) client built into Windows, and that client is included in Windows 11 Home as well as Pro.
To connect Windows 11 to Ubuntu with XRDP, open a terminal on Ubuntu and run sudo apt update, then sudo apt install xrdp. Next, check that the service shows active with sudo systemctl status xrdp. Then on Windows 11, open Remote Desktop Connection, enter the Ubuntu machine’s IP address, and sign in with your Ubuntu account.
Why use xrdp?
This setup lets you manage files, run apps, or troubleshoot a remote system without leaving your Windows desk. It is handy for an Ubuntu box in another room, a spare PC in a closet, or a home server you rarely sit in front of.
What happens when done?
The work has three parts. First you install xrdp on Ubuntu. Then you adjust a few settings so the remote session opens properly. Finally you connect from Windows 11.
Before you start, check these things:
- You can sign in to Ubuntu with an account that has administrator (sudo) rights.
- Both computers are on the same network. Remote access from outside your home or office network is a separate topic and needs extra security work.
- You know the IP address of the Ubuntu machine. On Ubuntu, open Settings , go to Network (or Wi-Fi ), and click the gear icon next to your connection. The address is listed there. Your router’s list of connected devices also shows it.
When you finish these steps, you will have a direct window to your Ubuntu desktop right on your Windows 11 computer.
For more about xrdp, including its documentation and project details, please visit its homepage.
Installing xrdp on Ubuntu
Installing xrdp on Ubuntu means opening a terminal and running two commands to download the remote desktop software. You update the package list first, so Ubuntu knows about the latest available version. Then you install the service so the computer can accept remote connections. You need an internet connection and administrator rights.
- On the Ubuntu machine, open a terminal. Press Ctrl+Alt+T, or search for Terminal in the Activities overview.
- Run the two commands below, one after the other. Enter your password if Ubuntu asks for it. Nothing shows on screen as you type a password, which is normal.
sudo apt update
sudo apt install xrdp
If the installer asks you to confirm, type Y and press Enter. When the terminal returns to a prompt, the install is done.
After installing, check that the service is running. The xrdp service normally starts on its own once it is installed.
- Run this command in the terminal:
sudo systemctl status xrdp
If the output opens in a pager and the prompt does not come back, press Q to leave it.
You should see that the service is active and running. Here's what that output looks like:
xrdp.service - xrdp daemon
Loaded: loaded (/lib/systemd/system/xrdp.service; enabled; vendor preset: enabled)
Active: active (running)
Look for the word active in the status line. If it says inactive or failed, the service did not start. In that case, repeat the install step and check the terminal for error messages.
Configuring xrdp
Configuring xrdp for your Windows 11 Ubuntu XRDP connection involves two changes. You add your user account to the correct security group, and you update a startup script. These quick changes fix the common black screen error, so you can see your desktop properly when you log in remotely. Run every command in the terminal on the Ubuntu machine.
First, add your user account to the security group xrdp needs (requires admin privileges):
sudo adduser xrdp ssl-cert
The group change takes effect the next time you sign in, which happens when you connect remotely.
Next, fix a common issue where the screen shows up black. Edit the startup script (requires admin privileges):
sudo nano /etc/xrdp/startwm.sh
The file opens in a text editor inside the terminal. Use the arrow keys to move around.
Add these two lines to the end of the file. Type them exactly as shown, on separate lines:
unset DBUS_SESSION_ADDRESS
unset XDG_RUNTIME_DIR
To undo this change later, open the same file again and delete these two lines.
Save the file and exit. If the editor is nano, press Ctrl+O and then Enter to save, then press Ctrl+X to exit. Now restart the service to apply the changes (requires admin privileges). You do not need to restart the whole computer.
sudo systemctl restart xrdp
Finally, make sure your firewall allows the connection (requires admin privileges). Remote Desktop uses its own network port, and if the firewall blocks it, Windows will time out when it tries to connect.
sudo ufw allow from 10.0.2.0/24 to any port 3389
sudo ufw reload
If you never turned the Ubuntu firewall on, these commands may not be needed. Running them does no harm.
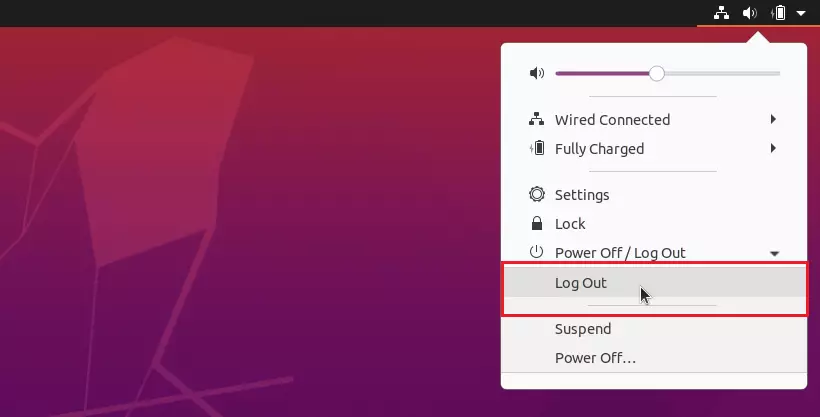
You cannot be logged in at the computer itself and through remote desktop at the same time. If you stay logged in, the remote session will often fail or show a blank screen.
Connecting from 🪟 Windows 11
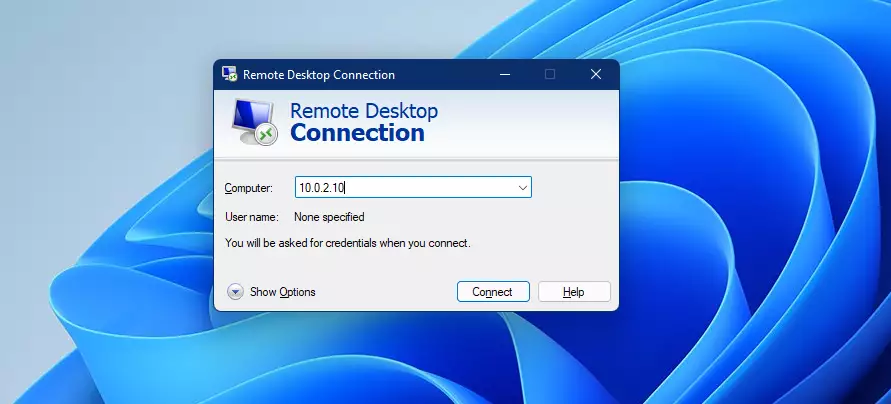
With Ubuntu ready, you can connect from your Windows 11 PC.
- Click the Start button and type Remote Desktop Connection.
- Click the Remote Desktop Connection app in the results. A small window opens with a Computer field.
- Type the IP address of your Ubuntu machine into the Computer field.
- Click Connect.
If the connection fails or times out, check that the IP address is correct, that both computers are on the same network, and that the firewall step on Ubuntu was done.
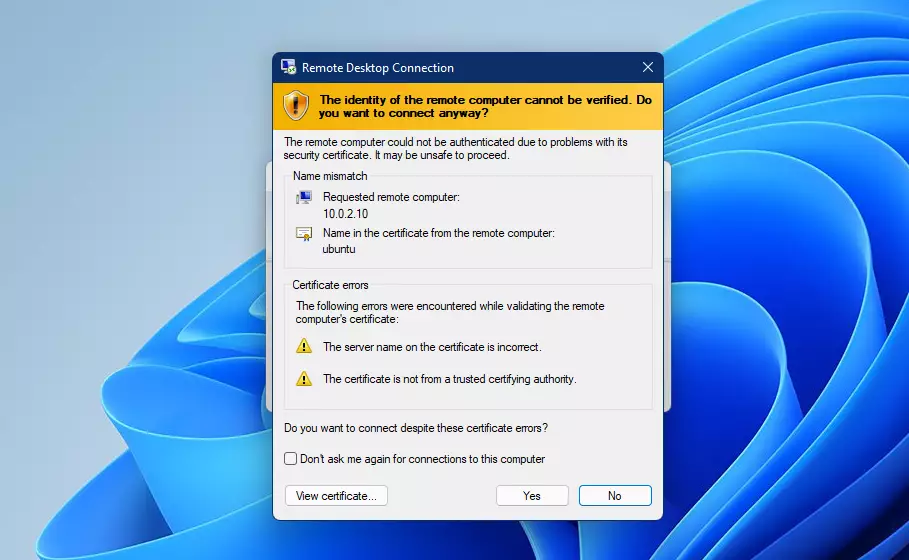
If you see a security warning about a certificate, click Yes to proceed. The warning appears because the Ubuntu machine uses a certificate that Windows does not recognize. On your own home or office network, this is expected.
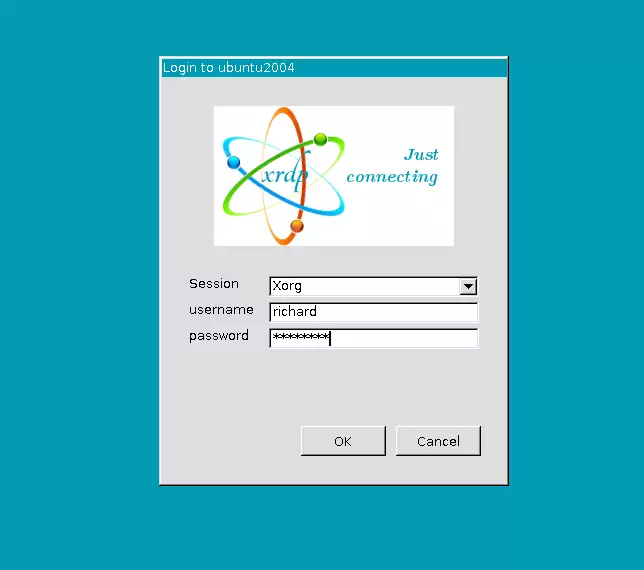
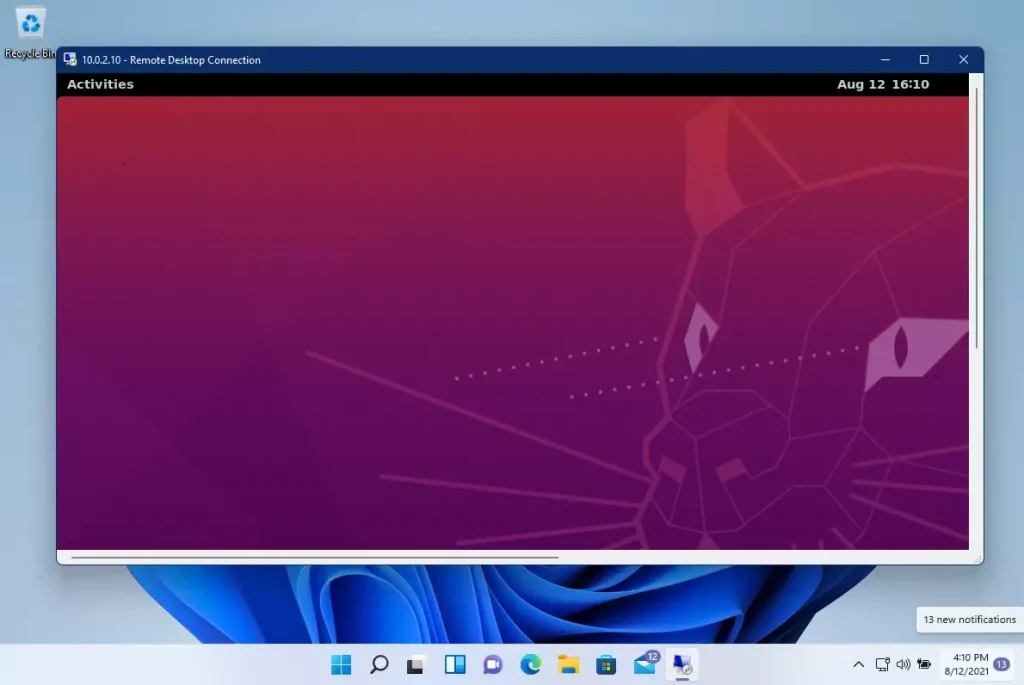
Enter your Ubuntu username and password when prompted. A login window from xrdp should appear. Type the same username and password you use to sign in at the Ubuntu machine, then confirm. After a few moments, your Ubuntu desktop should open in the remote window.
If you only see a black screen, go back to the configuration section and check that the two lines were added to the end of the startup script. Also confirm that you are logged out of Ubuntu on the machine itself.
Summary
Connecting Windows 11 to Ubuntu using XRDP gives you remote control of your Ubuntu desktop right from your PC. Once xrdp is installed and configured, the only things you need each time are the Ubuntu machine's IP address, your Ubuntu login, and a logged-out Ubuntu session.
Have a question about this guide?
Answered by AI from this guide. Good questions may be added to this page — please don't include personal details.
Did this guide fix your problem?

About the Author
Richard
Tech Writer, IT Professional
Richard is a writer at Geek Rewind who turns complex IT tasks into clear, step-by-step guides. He draws on years of hands-on experience in system administration and enterprise IT operations, focusing on Windows, Linux and WordPress: the problems people actually run into, and the fixes that work. His server and WordPress guides come from systems he runs himself. Richard builds and maintains the platform behind Geek Rewind, from its Ubuntu servers and Nginx configuration to its custom WordPress plugins. Many new tutorials start with readers' questions, and he's always glad to answer them in the comments.
Followed the same steps but I get an error.
connecting to sesman ip 127.0.0.1 port 3350 sesman connect ok sending login info to session manager please wait login successful for display 10 started connecting connection problem giving up some problem
Hello! I’ve encountered the same error as well. I’ve tried all ways and means, but it is still not connecting. Please help. Thank you
Hi,
I followed the exact instruction but getting the following error:
connecting to sesman ip 127.0.0.1 port 3350
sesman connect ok
sending login info to session manager, please wait…
xrdp_mmprocess_login_response:login failed
Is there a way to access Linux from Windows 10, but without logging out from Ubuntu?
I have followed the steps once while i was logged in Ubuntu through Powershell and then with closed. In both cases it doesn’t open GUI Desktop and xorg window just closes no error.
This was very helpful and worked perfectly. Thank you!