How to Change Night Light Strength in Windows 11


Night light strength in Windows 11 changes how warm your screen colors look so your eyes hurt less at night. The feature shifts your display to softer shades like yellow and orange to cut down on blue light. You get a slider that goes from 0 to 100 so you can pick the exact warmth level you want.
You can change this setting fast by opening Settings, clicking System, and picking Display. Move the slider left or right until your screen feels comfortable to look at in the dark.
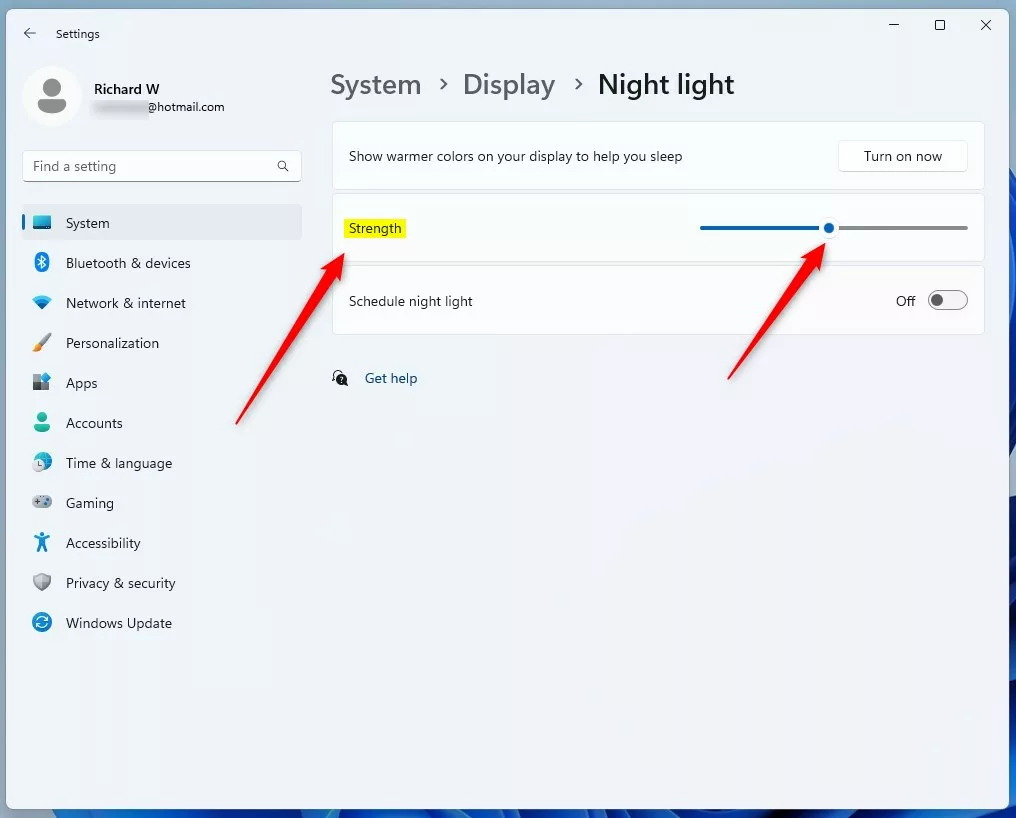
Open Settings , go to System, then Display, and click Night light. Use the Strength slider to adjust the color warmth, moving it right for more orange or left for cooler tones.
What Happens When You Adjust Night Light?
When you change the color temperature slider, your display shifts from cool blue tones to warmer orange or yellow tones. This reduces the harshness of the screen. Your computer will remember these settings and apply them whenever the feature is active.
How to Access Night Light via Quick Settings
You can quickly turn Night light on or off in Windows 11 by opening the Quick Settings menu from your taskbar. Clicking the network, volume, or battery icons in the bottom right corner opens this panel, where you will find a dedicated button to toggle the screen tint instantly without opening the main Settings app .
- Click the Network, Volume, or Battery icon in the bottom right corner of your taskbar .
- Look for the Night light button.
- Click it to turn the feature on or off instantly.
How to Adjust Night Light Strength in 🪟 Windows 11
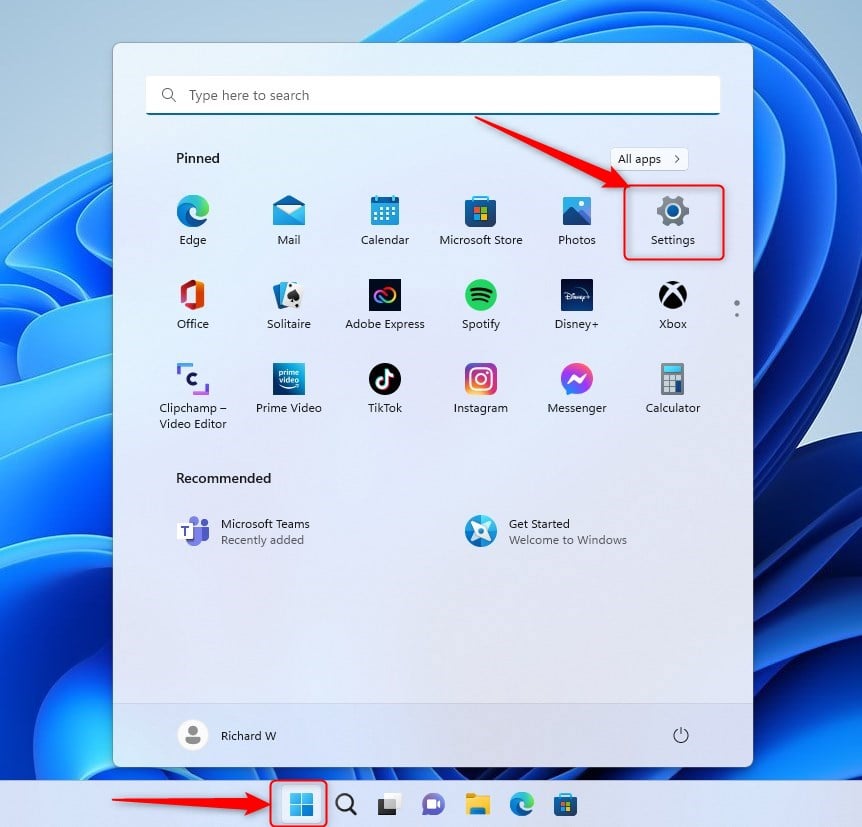
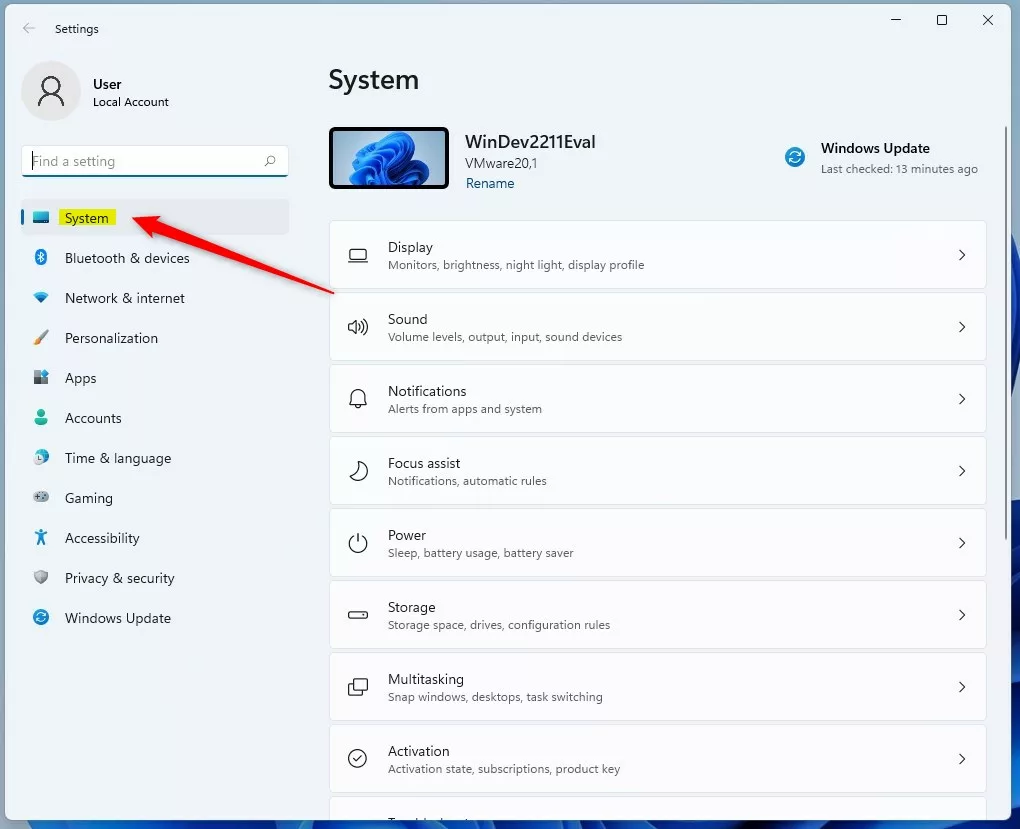
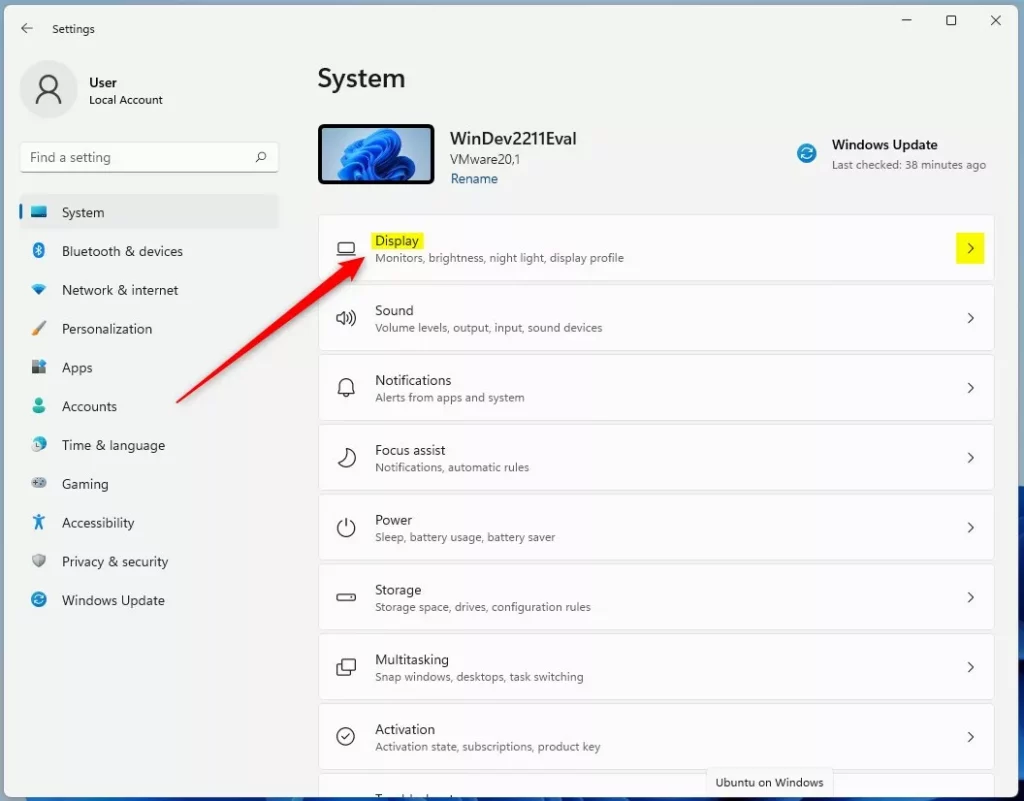
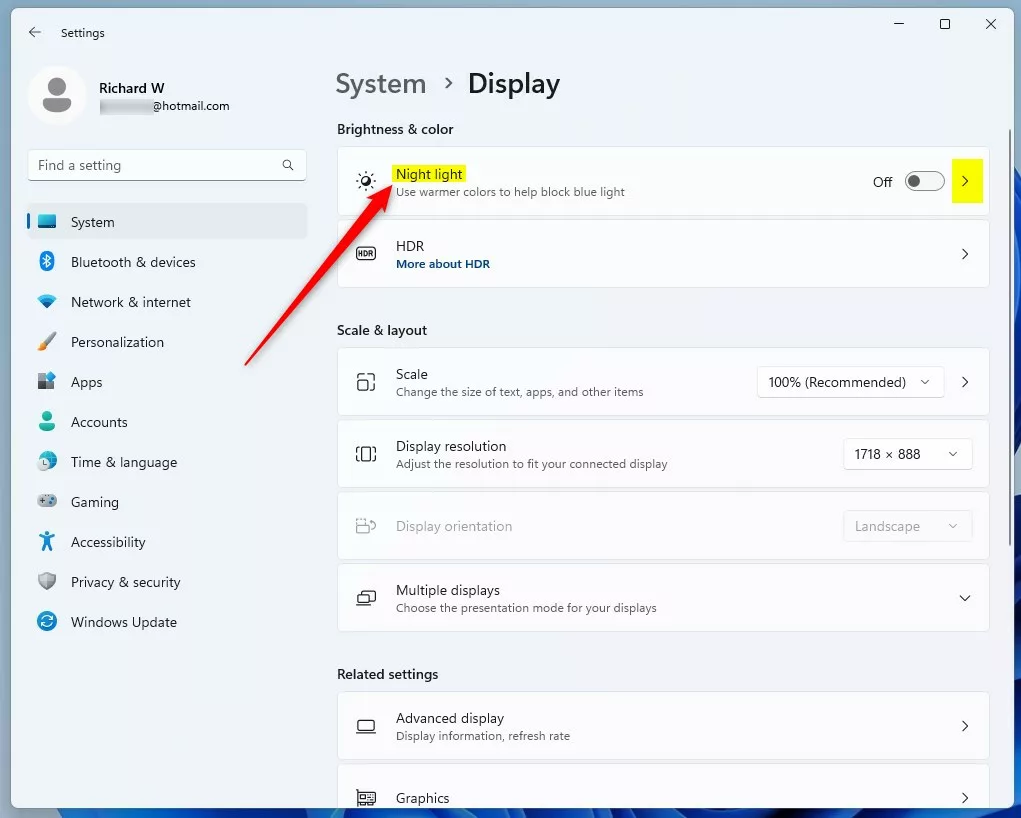
To adjust night light Windows 11 settings and make your display warmer, open the main Settings app and go to Display. Moving the Strength slider on the Night light menu lets you change the color temperature so the screen is easier on your eyes during late-night work sessions.
- Open Windows Settings by pressing Win+I.
- Click System on the left sidebar.
- Select the Display tile.
- Click the Night light text to open the menu.
- Use the Strength slider to change the color warmth. Moving it right makes the screen more orange. Moving it left makes it cooler.
How to Schedule Night Light
This ensures your eyes are protected without manual effort.
- Go to Settings System Display Night light.
- Toggle the Schedule night light switch to On.
- Choose Sunset to sunrise or set your own custom hours.
Troubleshooting Night Light Issues
Fixing problems when your Windows 11 Night light switch is greyed out or not working usually requires updating your graphics drivers or checking physical monitor connections. Old display drivers often block color temperature controls, while certain docking stations prevent the feature from functioning properly.
- Update GPU Drivers: Outdated graphics drivers can cause display issues. Visit your manufacturer's website to download the latest versions.
- Check Docking Stations: Some external monitors connected via docking stations do not support Windows Night Light. Try connecting the monitor directly to your PC.
- Registry Reset: If the feature is greyed out, you may need to reset the registry. [Requires Admin Privileges] Open the Registry Editor by typing regedit in the Start menu. Navigate to HKEY_CURRENT_USER\Software\Microsoft\Windows\CurrentVersion\CloudStore\Store\DefaultAccount\Cloud and delete the folders related to $$windows.data.bluelightreduction.bluelightreductionstate. Restart your computer.
Summary
Adjusting the Night light feature in Windows 11 helps reduce blue light, which can improve your sleep and lessen eye fatigue, making your screen more comfortable to view.
Was this guide helpful?

About the Author
Richard
Tech Writer, IT Professional
Richard is a writer at Geek Rewind who turns complex IT tasks into clear, step-by-step guides. He draws on years of hands-on experience in system administration and enterprise IT operations, focusing on Windows, Linux and WordPress: the problems people actually run into, and the fixes that work. His server and WordPress guides come from systems he runs himself. Richard builds and maintains the platform behind Geek Rewind, from its Ubuntu servers and Nginx configuration to its custom WordPress plugins. Many new tutorials start with readers' questions, and he's always glad to answer them in the comments.

No comments yet — be the first to share your thoughts!