How to Move Your OneDrive Folder in Windows 11


Moving your OneDrive folder to a new location on your Windows 11 PC frees up valuable space on your main C: drive without losing access to your files. The default setup places your cloud files at 📁C:\
This quick process stops your primary drive from running out of storage when your cloud sync grows too large for Windows 11 to handle comfortably.
Unlink your OneDrive account, move the folder to a new drive using File Explorer , then sign back into OneDrive and select the new folder location. This process ensures your files sync from the updated location without needing to re-download everything.
Moving the OneDrive Folder
You can move your OneDrive folder in Windows 11 by first unlinking your computer from your account through the OneDrive settings menu. Open the settings panel, select the Account tab, and click the option to unlink your PC. Once your account is disconnected, you are ready to relocate your files in File Explorer .

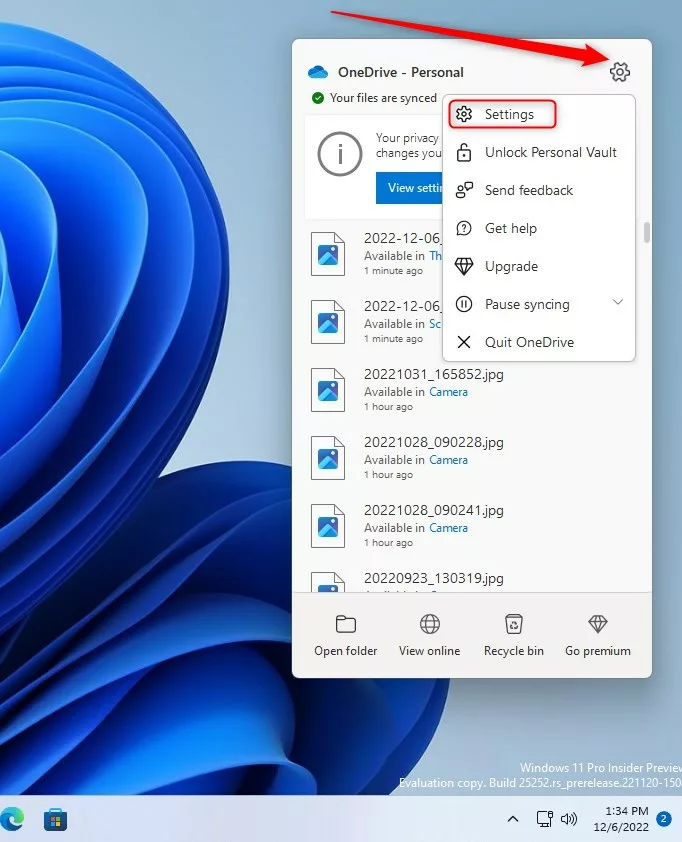
Click the gear icon for Help & Settings and choose Settings.
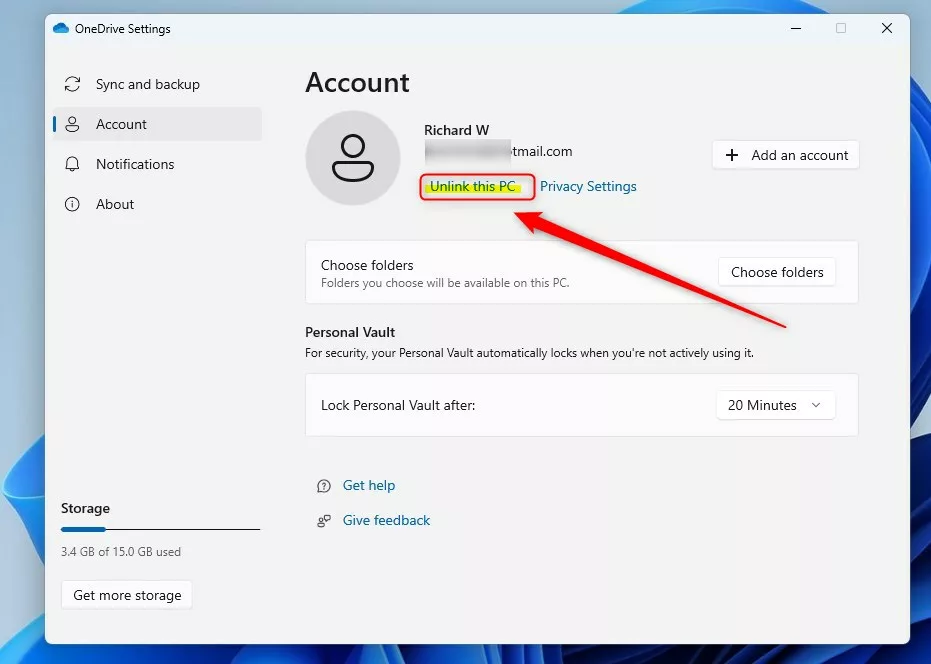
Under the Account tab, click “Unlink this PC.”
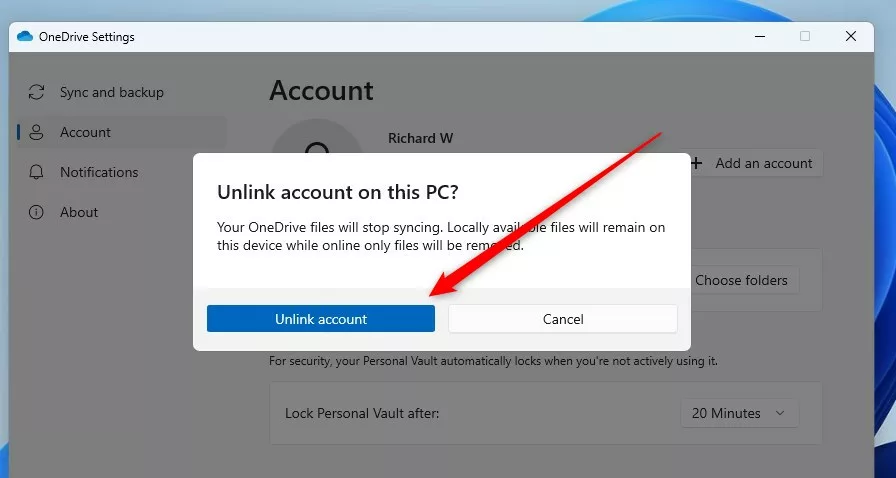
Confirm that you want to unlink your account.
Next, find your OneDrive folder in File Explorer, which is usually located at C:\Users\username\OneDrive. Once you've found it, right-click the folder and select Cut.
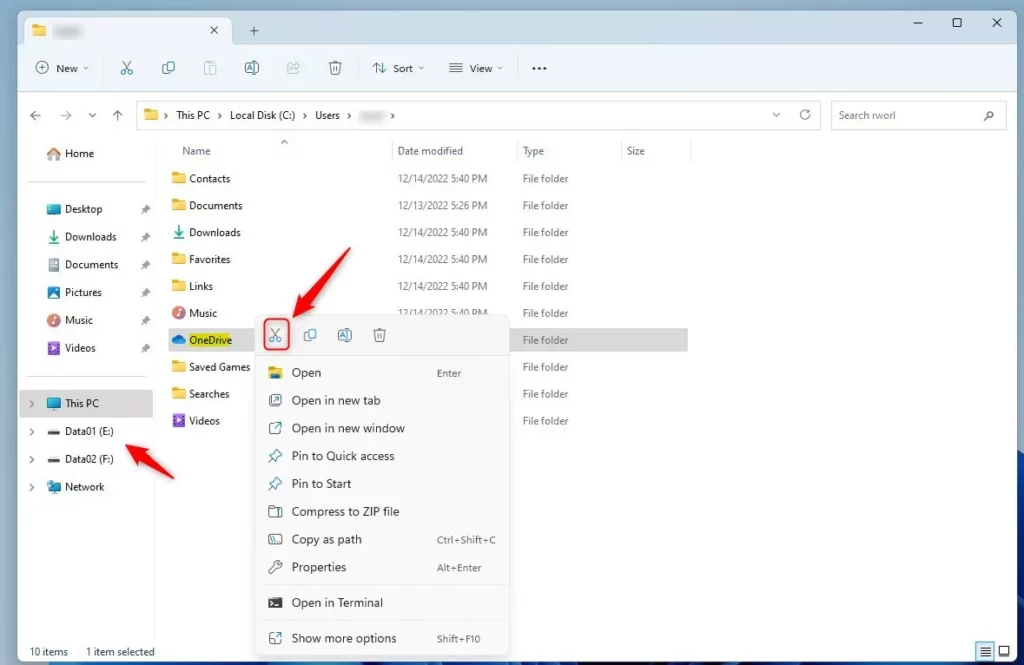
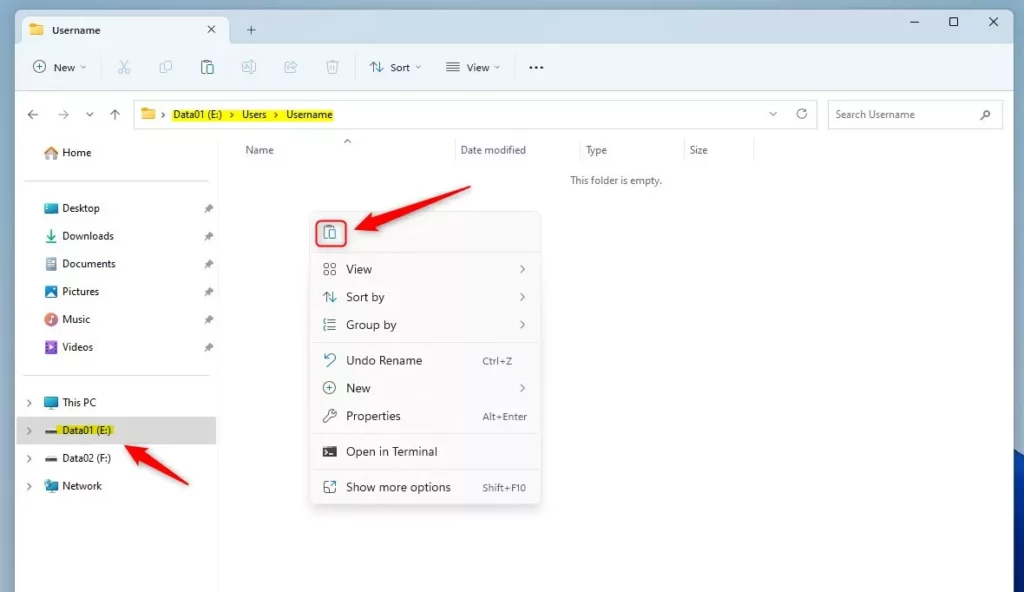
Go to the new drive where you want the folder to live (such as E:\Users\username\). Right-click and choose Paste.
Relinking Your Folder
You must relink your account to finish moving the OneDrive folder by signing back into the setup screen and picking your new storage path. When the configuration prompt appears, click the link to change the folder location rather than proceeding with the default path, then select your new destination folder to resume syncing.


When the setup asks where to put your folder, click the "Change location" link instead of clicking Next.

Find the new folder location on your E: drive and select "Use this folder."

Confirm the new path and click Next.

Choose which folders you want to sync and click "Start syncing."
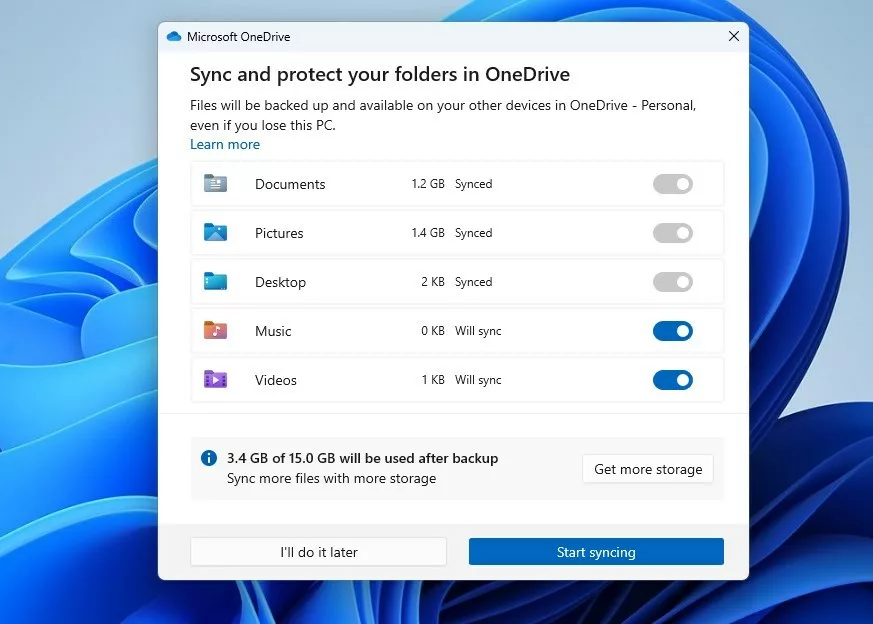
Keep following the on-screen instructions until OneDrive shows it's ready.

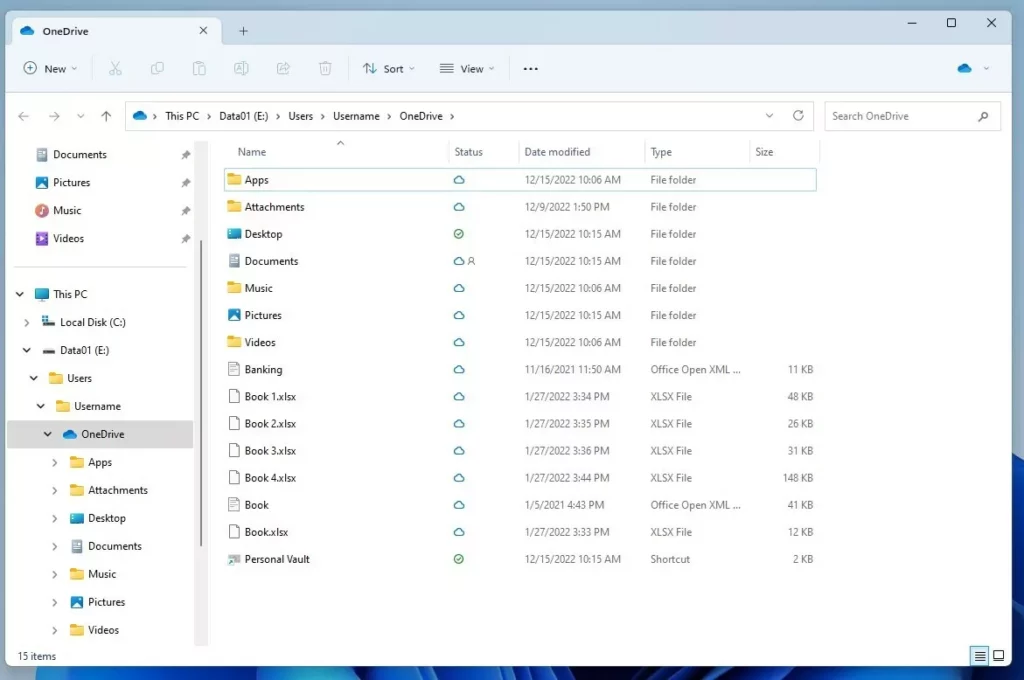
Your files are now being synced from the new location.
Troubleshooting and Performance
Encountering a "OneDrive folder already exists" error when trying to move your OneDrive folder? The most reliable fix is to ensure the new folder location is completely empty.
Summary
Unlink your PC from your account, use File Explorer to move the folder, and sign back into OneDrive to connect it.
Moving your OneDrive folder may require administrator rights if your OneDrive folder is located in protected system areas, such as C:\Program Files.
Reference: Microsoft.com
Can I move my OneDrive folder to an external hard drive?
Ensure the external drive stays connected to your PC at all times, otherwise OneDrive pauses syncing. If the drive is disconnected, OneDrive will pause syncing and may show errors until the drive is plugged back in and recognized by Windows.
Do I need to re-download all my files after moving the folder?
No, you do not need to download everything again. By moving the files manually with File Explorer before relinking, the OneDrive sync client will perform a "discovery" process (which checks your existing files against the cloud version to ensure they match), saving you significant time and bandwidth.
Was this guide helpful?

About the Author
Richard
Tech Writer, IT Professional
Richard, a writer for Geek Rewind, is a tech enthusiast who loves breaking down complex IT topics into simple, easy-to-understand ideas. With years of hands-on experience in system administration and enterprise IT operations, he’s developed a knack for offering practical tips and solutions. Richard aims to make technology more accessible and actionable. He's deeply committed to the Geek Rewind community, always ready to answer questions and engage in discussions.



No comments yet — be the first to share your thoughts!