
This article explains how to change the Voice used for Copilot responses on Windows 11.
Copilot in Windows is generative AI assistance that allows users to interact with the chatbot using natural language to change system settings and work across multiple applications.
With Copilot installed, you can enable or disable it, open Copilot when Windows starts, Pin or Unpin the Copilot side panel, Resize the Copilot side panel, delete chat history in Copilot, create a desktop shortcut, modify Copilot key, enable or disable Copilot model training, and more.
The new Copilot app has a feature that lets you “Talk to Copilot” using your Voice. When you click on the “mic” or talk with Copilot, it responds in the same language spoken using one of the Grove, Wave, Meadow, or Canyon voices.
You can change the Voice used by Copilot; the steps below will walk you through it.
Change the Voice for Copilot on Windows 11
As mentioned, users can change the Voice for Copilot on Windows 11.
Here’s how to do it.
First, open Copilot at copilot.microsoft.com or the Copilot app on Windows.
Then, sign in to Copilot if you haven’t already done so.
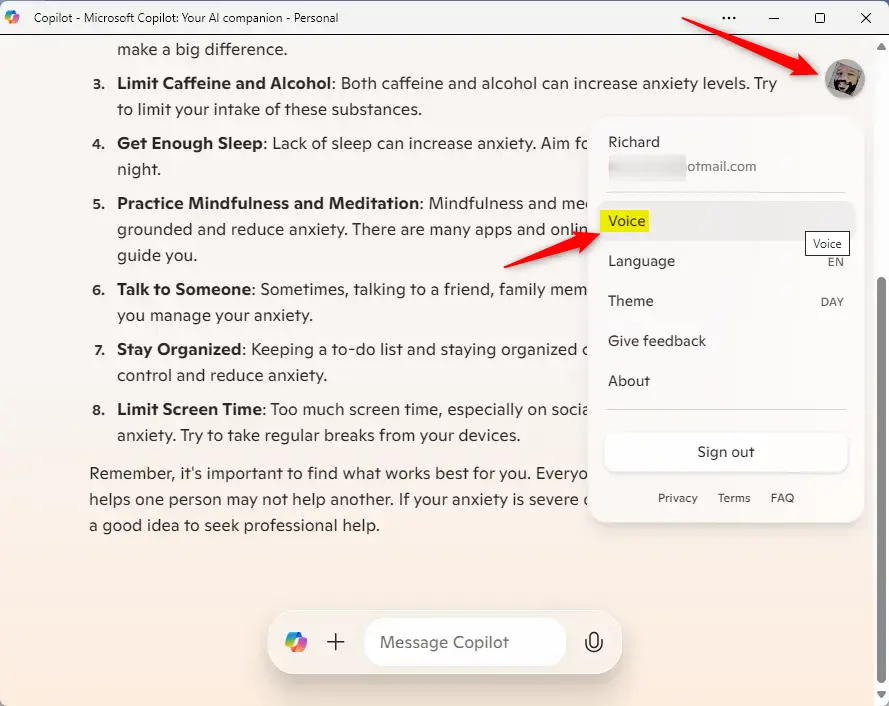
Once signed in, click the Settings (profile picture) button at the top right corner and select Voice on the menu.
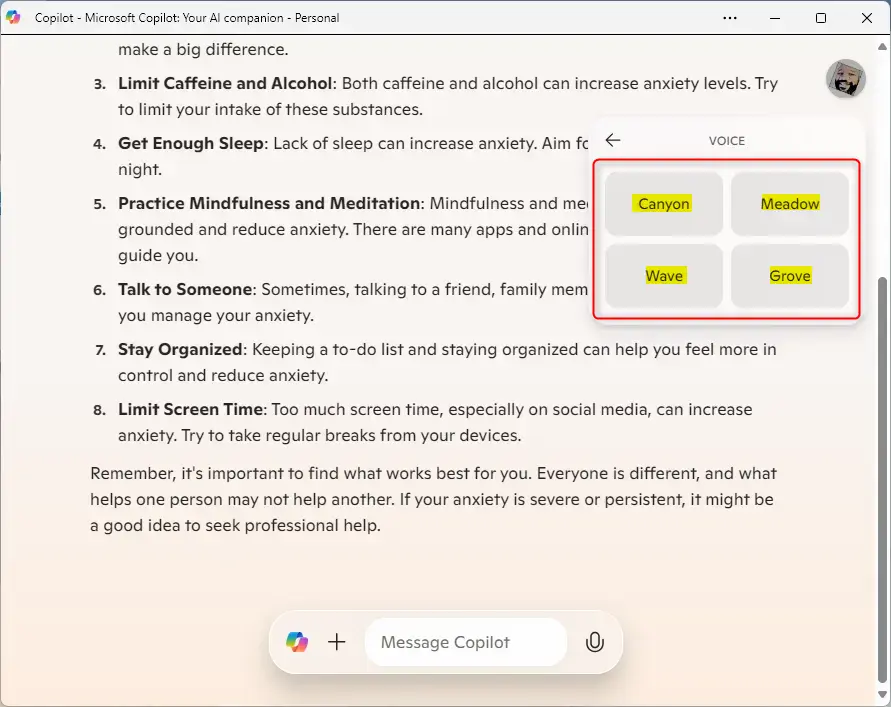
Next, select one of the voice profiles displayed:
- Grove
- Wave
- Meadow (default)
- Canyon
That should do it!
Conclusion:
In summary, changing the Voice used for Copilot on Windows 11 is straightforward. Here are the key points to remember:
- Ease of Access: Users can easily change the voice settings within the Copilot app.
- Voice Options: Four distinct voice profiles are available: Grove, Wave, Meadow (default), and Canyon.
- User-Friendly Interface: The settings menu is intuitive and allows quick navigation to voice options.
- Personalization: Adjusting the Voice can enhance user experience, making interactions more personalized.
- Continuous Updates: Watch for additional features and voice options as Microsoft enhances the Copilot experience.
Leave a Reply