How to Resize Windows 11 Copilot Side Pane

Resizing the Windows 11 Copilot side pane changes how wide the chat window appears on your desktop. Copilot is an AI assistant that answers questions and handles tasks through a chat box on your screen. Some Windows 11 builds lock the Copilot panel to a fixed width and give you no handle to drag with the mouse. Which behavior you get depends on your Windows build and the Copilot version installed.
If your pane has no draggable edge, you can work around the limit by changing your display scale. This makes Windows redraw the sidebar at a different apparent width, so your chats are easier to read. Display scale affects everything on screen, not just Copilot, so treat it as a workaround rather than a true resize.
- Open Settings System Display
- Under Scale & layout, find the Scale setting.
- Pick a different percentage from the list. The text, apps and the Copilot pane all change size at once.
- Reopen Copilot and check the width. If it still looks wrong, close and reopen any app that did not redraw.
To undo the change, return Scale to the value Windows marked as recommended. Most apps pick up the new scale straight away. A few may need a restart, and signing out and back in refreshes the rest.
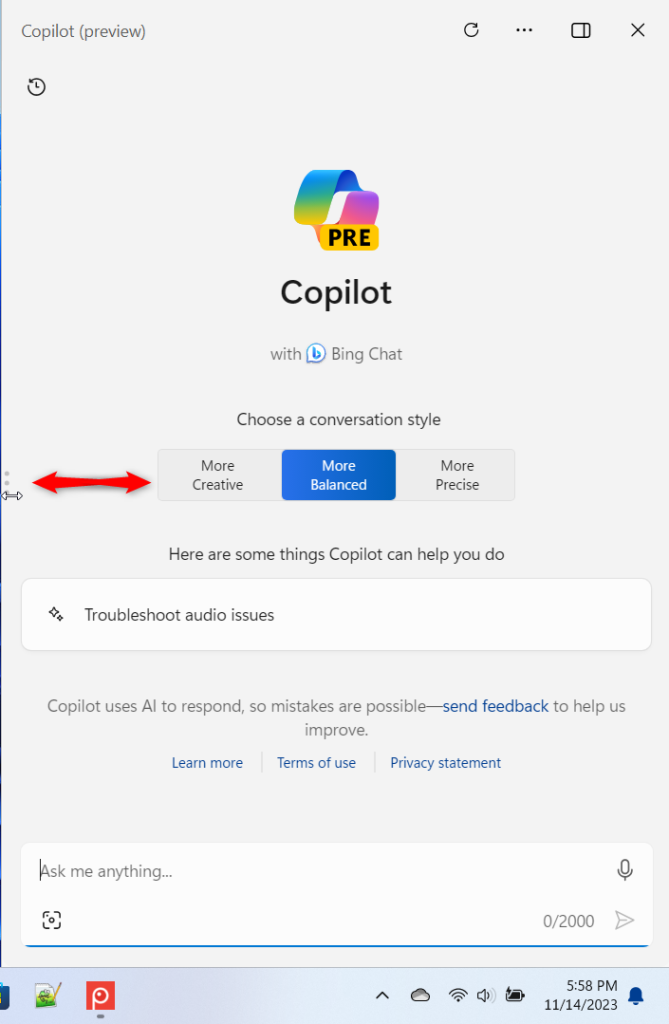
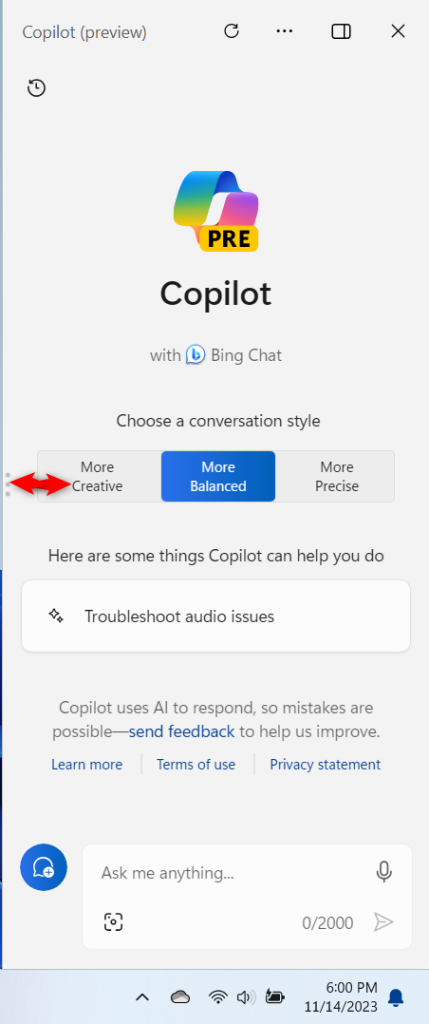
In supported Windows 11 apps, move your mouse to the inner edge of the Copilot pane until the cursor becomes a double-headed arrow, then click and drag left or right to resize. If no arrow appears, open Settings System Display, change the Scale percentage under Scale & layout, and reopen Copilot to adjust its apparent width.
How to resize the side pane in supported applications
In supported Windows 11 applications, you can resize the Copilot side pane directly with the mouse. Move the pointer to the inner edge of the panel. When the cursor turns into a double-headed arrow, click and drag the border left or right to make the pane wider or narrower. If the arrow never appears, that app or build does not allow resizing, so use the display scale workaround above.
- Open your application workspace. Use an app that supports a resizable side pane, and make sure its window is not too small to show the pane.
- Locate the side pane interface. It should be visible and docked to one side of the window. If you cannot see it, open it from the app first.
- Move your mouse pointer to the inner edge of the pane. This is the border between the pane and the main content area. Move slowly, because the grab area is thin.
- Wait for the cursor to change into a double-headed arrow. This arrow tells you the edge can be dragged. If it does not appear, nudge the pointer a pixel or two to either side.
- Click and drag the edge to your preferred width. Hold the left mouse button down, move left or right, then release. The pane should resize as you drag and stay at the new width when you let go.
If the pane stops at a minimum or maximum width, that is a limit set by the app. You cannot drag past it.

Why adjust your workspace layout?
Expanded side panes display more information on screen while reducing the need to scroll. Long answers, tables and code are easier to read when they are not squeezed into a narrow column. Wider layouts also keep complex workflows organized and efficient, especially on a large or high-resolution monitor where there is plenty of space to spare.
On a small laptop screen, a very wide pane can crowd out your main content. Pick a width that leaves enough room to work.
What happens when you are done?
Subsequent launches restore the side pane to the exact width selected during the previous session. You do not need to resize it every time you open the app.
Whether the setting is saved depends on the app. To go back to the default width, drag the edge back to where it started.
Summary
Desktop variants remain locked in size, but enterprise environments like Dynamics 365 offer customizable interface panes. If you need a resizable pane for daily work, check whether the app you use is one of the supported ones. Official Microsoft release documentation tracks upcoming interface updates for specific software versions, so read it to see whether a newer version adds resizing for the desktop pane.
Have a question about this guide?
Answered by AI from this guide. Good questions may be added to this page — please don't include personal details.
Did this guide fix your problem?

About the Author
Richard
Tech Writer, IT Professional
Richard is a writer at Geek Rewind who turns complex IT tasks into clear, step-by-step guides. He draws on years of hands-on experience in system administration and enterprise IT operations, focusing on Windows, Linux and WordPress: the problems people actually run into, and the fixes that work. His server and WordPress guides come from systems he runs himself. Richard builds and maintains the platform behind Geek Rewind, from its Ubuntu servers and Nginx configuration to its custom WordPress plugins. Many new tutorials start with readers' questions, and he's always glad to answer them in the comments.
[…] on or off, enable or disable Copilot using content from Edge, refresh Copilot prompts, resize the Copilot side pane, and […]
[…] or off, enable or disable Copilot using content from Edge, refresh Copilot prompts, resize the Copilot side pane, delete recent activity, and […]
[…] disable it, open Copilot when Windows starts, Pin or Unpin the Copilot side panel, Resize the Copilot side panel, delete chat history in Copilot, create a desktop shortcut, hide the […]