How to Change Camera Resolution in Windows 11
Camera resolution in Windows 11 controls how much detail appears in your videos and photos.
Changing your camera’s resolution in Windows 11 is a simple way to boost video quality and get sharper images. The latest Windows 11 update, build 27758, includes “Advanced Camera Options” which let you adjust settings like resolution.
Higher resolutions provide more clarity, making your video calls and recordings look much better.
Open Settings, go to Bluetooth & devices, then Cameras, select your camera, and click Advanced camera options. Use the Media type drop-down to choose your desired resolution. Click Apply to save.
How to Set Your Camera Resolution in 🪟 Windows 11
Setting your Windows 11 camera resolution is simple and can make your video calls and recordings look clearer. Choosing a higher resolution means better picture quality, while a lower one saves storage space and internet data. This guide will show you exactly where to find the settings to adjust your camera’s picture quality.
- Open Settings: Click the Start menu (Windows icon at the bottom left) and select Settings. Or press
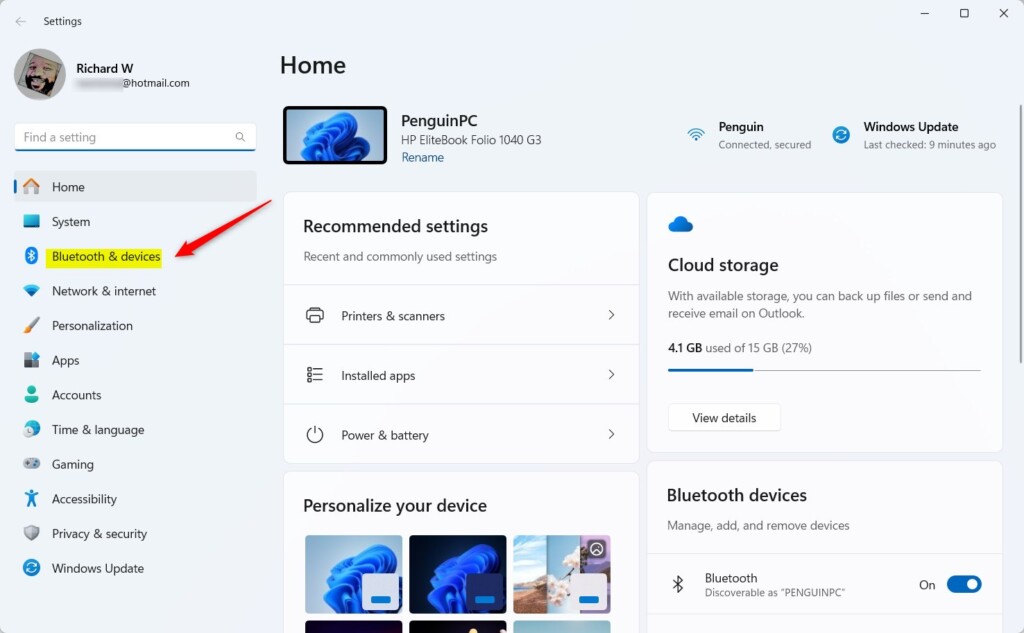
Windows key + Ion your keyboard to open Settings quickly. - Go to Bluetooth & devices: In the Settings window, click on Bluetooth & devices from the left side menu.
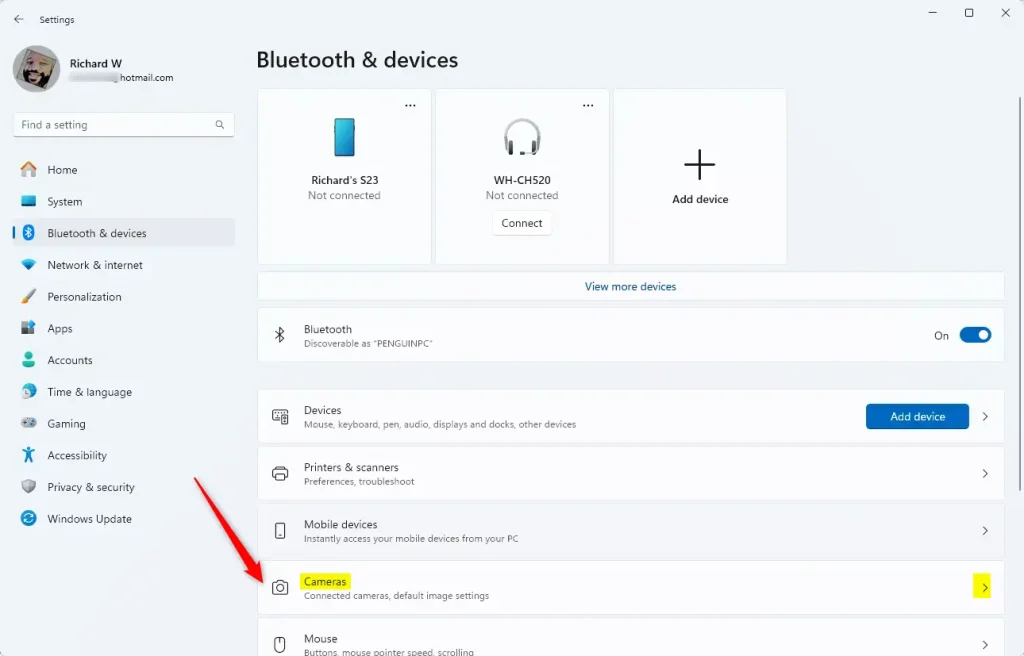
- Open Camera settings: On the right side, find and click the Cameras tile.
- Pick your camera: Look for Connected cameras. Select the camera you want to adjust.
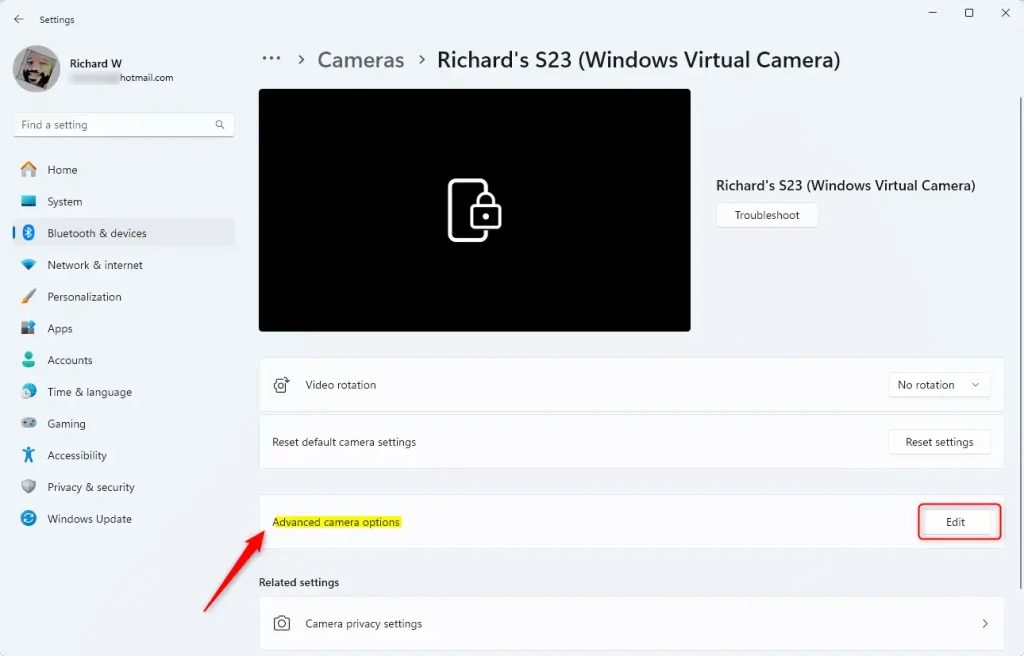
- Open Advanced camera options: Click the Advanced camera options tile. Then click the Edit button.
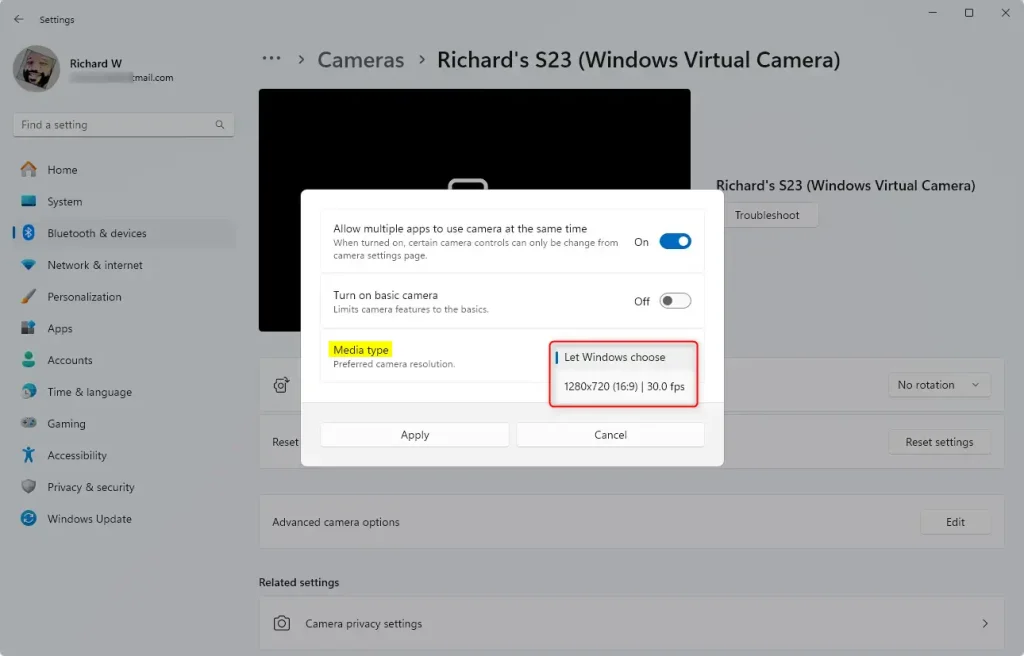
- Allow multiple apps (if needed): Make sure the option Allow multiple apps to use camera at the same time is turned on. This lets you change the media type resolution.
- Choose resolution: Use the drop-down menu under Media type. Pick the resolution you want. The default is Let Windows choose, which works well for most people.
- Save changes: Click Apply to save your settings. Then close the window.
That’s it! Your camera will now use the resolution you picked.
Why Change Your Camera Resolution?
Changing your camera resolution in Windows 11 offers clear benefits for your video calls and recordings. A higher resolution makes you look sharper and clearer to others, improving the overall video quality. If you need to save storage space or have a slower internet connection, a lower resolution is a great option.- Better video quality: Higher resolution means clearer and sharper pictures or videos. Everyone on your call will see you better.
- Save space: Lower resolution uses less storage and less internet bandwidth during video calls. This is helpful if you have a slow connection.
- Customize for apps: Different apps might work better with different resolutions. You can adjust based on what you’re using.
More Tips
- Keep your camera drivers up to date. Updated drivers help your camera perform its best.
- Try different resolutions to see what looks best on your screen and camera.
- Use privacy settings to control which apps can access your camera. This keeps you safe.
References
For more details about Windows 11 camera updates, visit the official Windows Insider Blog.
Summary
Adjusting your camera resolution in Windows 11 is a quick process that can improve your video calls and recordings.
How do I adjust the camera resolution on 🪟 Windows 11?
To adjust your camera resolution on Windows 11, go to Settings and then select Bluetooth & devices, followed by Cameras.
Was this guide helpful?

About the Author
Richard
Tech Writer, IT Professional
Richard, a writer for Geek Rewind, is a tech enthusiast who loves breaking down complex IT topics into simple, easy-to-understand ideas. With years of hands-on experience in system administration and enterprise IT operations, he’s developed a knack for offering practical tips and solutions. Richard aims to make technology more accessible and actionable. He's deeply committed to the Geek Rewind community, always ready to answer questions and engage in discussions.


No comments yet — be the first to share your thoughts!