How to Change Device Name in Android Nearby Share on Windows 11
Changing your Android Nearby Share device name on Windows 11 updates how your PC appears on your phone.
Nearby Share lets you wirelessly send files between your Android phone and Windows 11 PC. Usually, it shows your computer’s default Windows name, which can be confusing if you have several devices.
Giving your PC a personal name makes it easy to spot on your phone’s share menu. This helps you pick the right computer quickly and adds a bit of privacy.
Access Nearby Share settings in Windows and click “Rename” under the Device name tile. Enter your new name and save. This personalized name will then appear on your Android device’s share menu.
How to change your device name
Changing your device name in Nearby Share makes it simpler to find your computer when you’re sending files. You can change the device name right within the app’s settings.
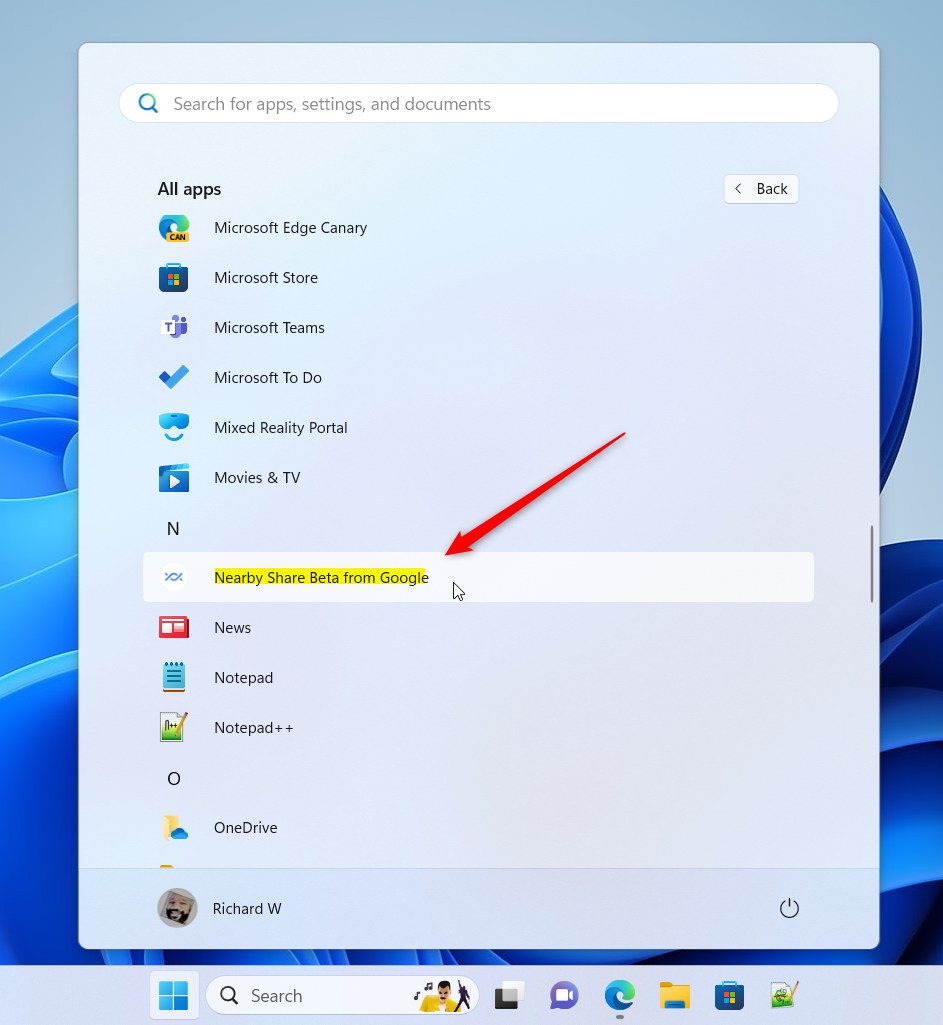
Open the Nearby Share app by clicking the Start menu and finding the Nearby Share icon in your app list. This starts the process of renaming your Windows 11 device, making it easier to identify during file sharing.
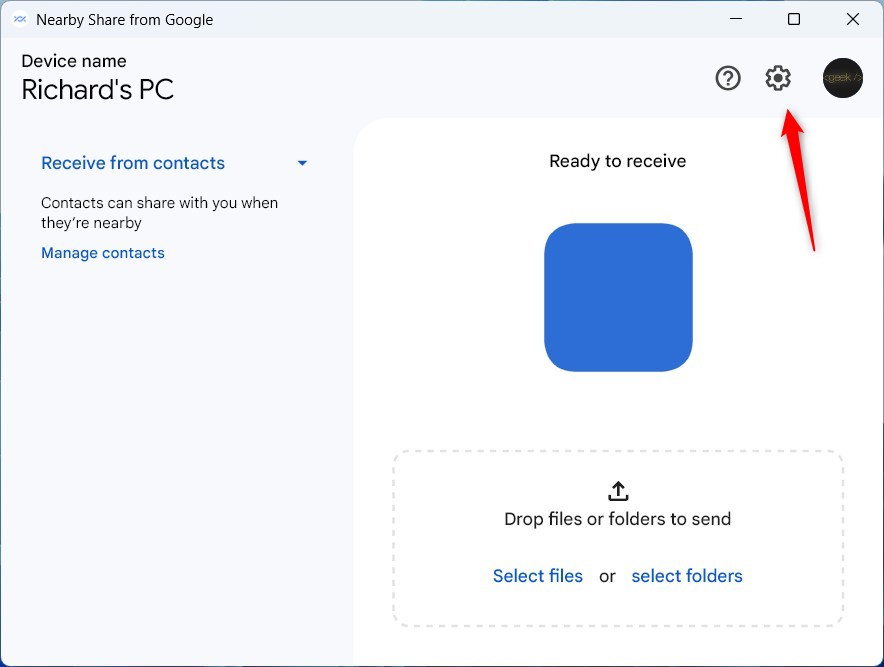
2. Click the Settings button (the gear icon) at the top right of the app window.
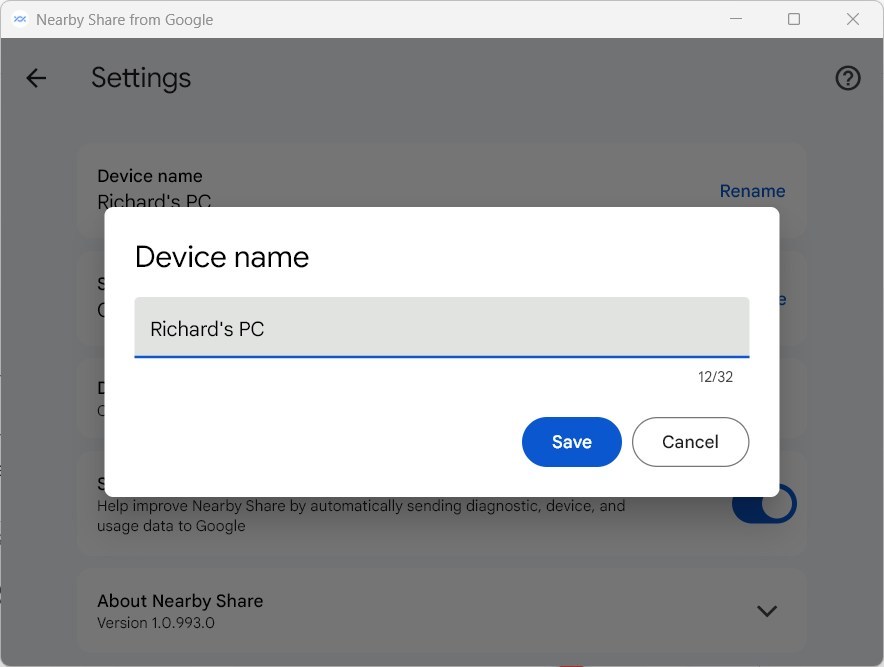
3. Find the Device name tile and click the Rename link.
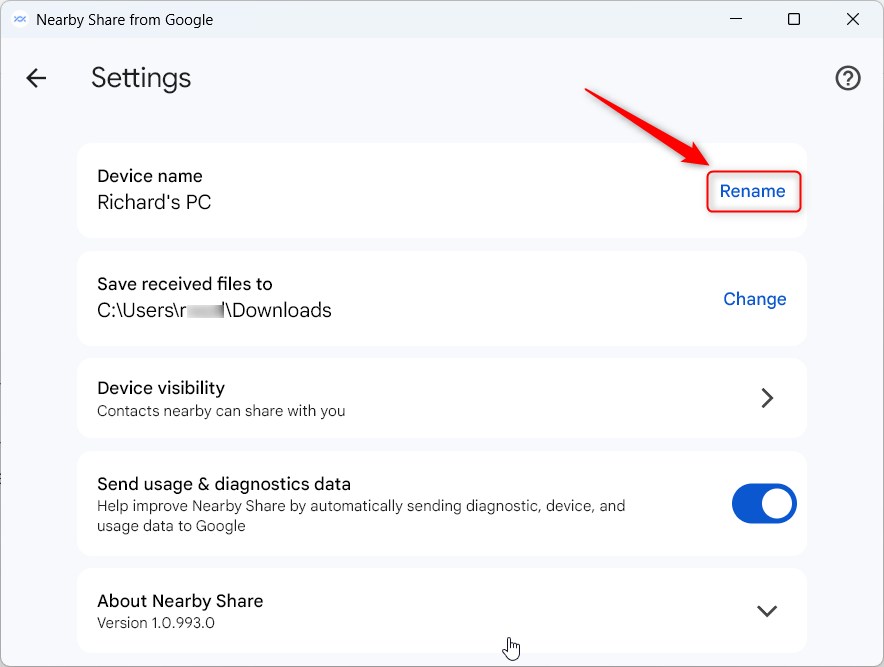
4. Type in your new name and save your changes.
Troubleshooting: When the Name Does Not Update
The Windows network profile and discovery services sometimes do not immediately show a changed device name due to saved data. If your PC still shows the old name, follow these steps to refresh these services.
Restarting Discovery Services (Admin Required)
[ADMIN PRIVILEGES REQUIRED] Open the Start menu and type ‘Services,’ then press Enter. Find ‘Function Discovery Resource Publication,’ right-click it, and select ‘Restart.’ This ensures Windows broadcasts your updated, user-friendly name to nearby devices.
Clearing Bluetooth and Wi-Fi Cache
Registry and System Name Sync
Nearby Share usually uses your Windows system name. This name is stored in the Windows registry, specifically at 🗝️HKEY_LOCAL_MACHINE\SOFTWARE\Microsoft. Syncing the Nearby Share device name with your Windows system name ensures these two names remain the same, preventing confusion.
Summary
Changing your device name in Nearby Share makes it easier to spot your computer when sharing files and keeps things organized.
Why does my PC show the wrong name in Nearby Share?
Your PC might show the wrong name in Nearby Share if the app or your phone has an old name saved, often fixed by restarting services.
Does changing my computer name automatically update Nearby Share?
Changing your computer name in Windows doesn’t always automatically update Nearby Share, as the app keeps its own settings.
Was this guide helpful?

About the Author
Richard
Tech Writer, IT Professional
Richard, a writer for Geek Rewind, is a tech enthusiast who loves breaking down complex IT topics into simple, easy-to-understand ideas. With years of hands-on experience in system administration and enterprise IT operations, he’s developed a knack for offering practical tips and solutions. Richard aims to make technology more accessible and actionable. He's deeply committed to the Geek Rewind community, always ready to answer questions and engage in discussions.
No comments yet — be the first to share your thoughts!