How to Block App Access to Account Info in Windows 11 Privacy Settings

Account info access in Windows 11 controls which programs can see your username, profile picture, and contact details. Email and calendar tools need this information to work. Many games and utilities, though, ask for it as soon as you install them, and most people click through the prompt without reading it.
Stopping apps from reading your profile takes a few clicks in the Settings app. You can block everything at once, or block only the apps you do not trust and leave the rest alone. The steps are the same on Windows 11 Home and Pro, and you do not need to restart the computer.
Open Settings , click Privacy & security in the left menu, scroll to App permissions and click Account info, then toggle the main Account info access switch to Off. This blocks all apps from reading your username, profile picture, and contact details with no restart required.
How to Open Privacy and Security Settings in 🪟 Windows 11
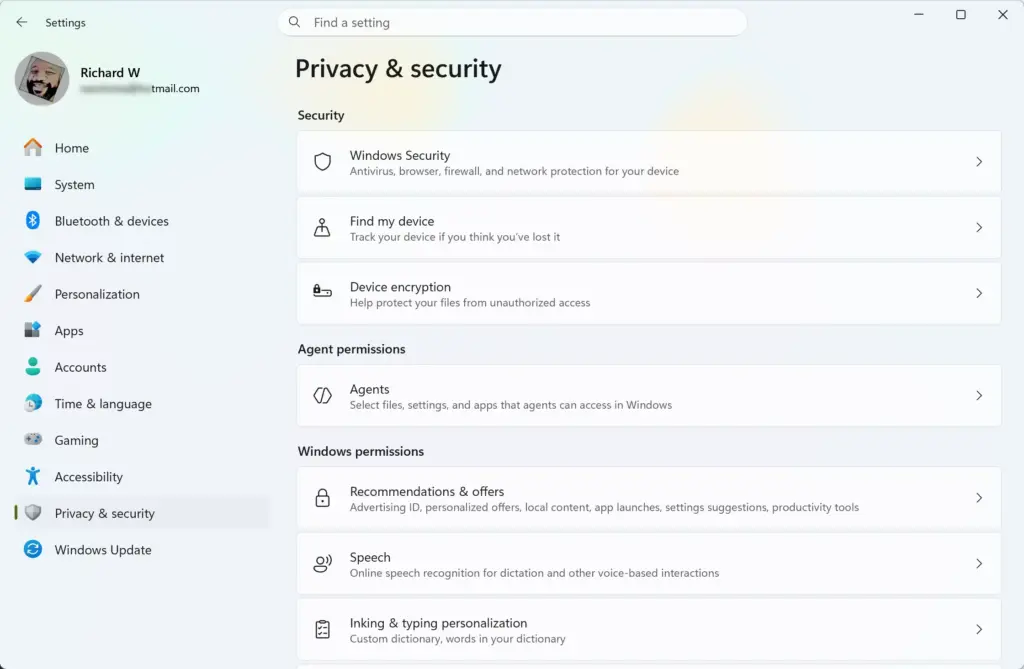
Press the Win and I together to launch the Settings app, then click the Privacy & security tab in the left sidebar. All your personal data controls are on that tab. If you prefer the mouse, follow these steps:
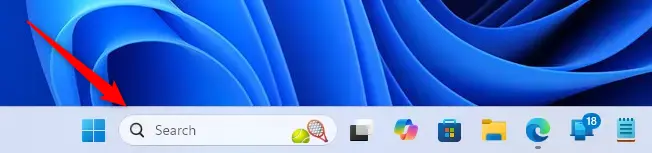
- Click the Start button, the Windows logo in the taskbar .
- Type Settings into the search box and click the result with the gear-shaped icon. You can also click the gear icon if it is pinned to your Start menu . The Settings window should now be open.
- Look at the menu on the left side of the Settings window.
- Scroll down the menu until you see Privacy & security and click it. The right-hand pane now shows your privacy options.
This screen covers everything from camera and microphone access to location history. Windows groups these under headings such as Windows permissions and App permissions. Account info is one of the entries under App permissions, and the next section covers it.
Step-by-Step: How to Block App Access to Account Info
Programs can then no longer read your name, picture, and email address.
Here is how to do it:
- Open the Windows Settings app. Press the Windows key and I together if you want the quick route.

- Click Privacy & security in the left menu.
- Scroll down to the section called App permissions and click Account info. The list of permissions is long, so you may need to scroll a fair way.
- Find the switch next to Account info access at the top of the page. When it is On, apps are allowed to ask for your info.
- Click the switch to turn it Off. The change takes effect straight away, and it blocks all apps on your computer from accessing your account details. You do not need to save anything or restart.
To undo this, come back to the same page and flip the switch to On. Once it is back on, the per-app switches become usable again.
Turning off the main switch is the quickest way to protect your personal data. It is also a blunt tool. If you want some apps to keep working while others are blocked, manage individual app permissions instead, as described next.
How to Block Individual Apps While Leaving Others Allowed
To block one app and leave the others allowed, scroll down the Account info page to the list of apps and turn the switch to Off next to each app you want to stop from seeing your profile details.
Follow these steps to manage individual app permissions:
- Open the Settings app.
- Click Privacy & security.
- Under App permissions, click Account info.
- Make sure the main Account info access switch at the top is turned On. If it is off, the per-app switches below it are greyed out and you cannot change them.
- Scroll down the page to the list of apps. Only apps that have asked for this permission appear here, so a newly installed app may not be listed until it first requests your account info.
- Look through the list for any app you do not trust or no longer use.
- Click the toggle switch next to that app to turn it Off. The toggle should now read Off for that app.
Repeat the last two steps for any other apps you want to block. To reverse a change, return to this list and switch the app back On.
Managing permissions this way gives you control over each program. Your trusted apps keep working normally, and the ones you blocked can no longer see your personal data.
What Happens When You Block App Access?
Blocking app access to your account info stops programs from reading your profile name, picture, and email details. Your games and system tools keep working normally, and there is no risk to your computer.
A common worry is whether this will break anything. The short answer is no. Blocking account info access is safe. Here is what you can expect:
- Better Privacy: Apps can no longer collect your profile name, picture, or email details without your knowledge.
- Fewer Targeted Prompts: Programs will stop asking for permission to view your user profile.
- Minor App Adjustments: Some apps may ask you to sign in manually instead of automatically using your Windows account name. This is normal, and it is better for your privacy.
If you turn off access and an important program stops working correctly, return to Settings, then Privacy & security, then Account info, and turn access back on for that app. If you had switched off the main Account info access switch, turn that on first. Then close and reopen the app so it can ask again.
Summary
Protecting your personal details on Windows 11 is easy once you know where the setting is. This guide showed you how to open Settings, turn off account info access for all programs at once, and block individual apps while keeping your trusted software running. It is worth checking the app list again every few months, especially after you install new software.
Have a question about this guide?
Answered by AI from this guide. Good questions may be added to this page — please don't include personal details.
Did this guide fix your problem?

About the Author
Richard
Tech Writer, IT Professional
Richard is a writer at Geek Rewind who turns complex IT tasks into clear, step-by-step guides. He draws on years of hands-on experience in system administration and enterprise IT operations, focusing on Windows, Linux and WordPress: the problems people actually run into, and the fixes that work. His server and WordPress guides come from systems he runs himself. Richard builds and maintains the platform behind Geek Rewind, from its Ubuntu servers and Nginx configuration to its custom WordPress plugins. Many new tutorials start with readers' questions, and he's always glad to answer them in the comments.
No comments yet — be the first to share your thoughts!