How to Backup and Restore Microsoft Defender Firewall in Windows 11
Backing up and restoring Microsoft Defender Firewall settings in Windows 11 lets you save your custom security rules. Microsoft Defender Firewall is Windows’ built-in security feature that guards your computer by controlling what network traffic is allowed in and out.
Saving your firewall setup, like custom rules you create for specific programs, is handy. It means you can quickly put them back after getting a new PC or if you need to undo some changes you made for testing.
This process helps you keep your computer’s protection exactly how you want it without having to re-enter every rule manually. You can create a backup file of your current firewall rules and then easily import them back whenever needed.
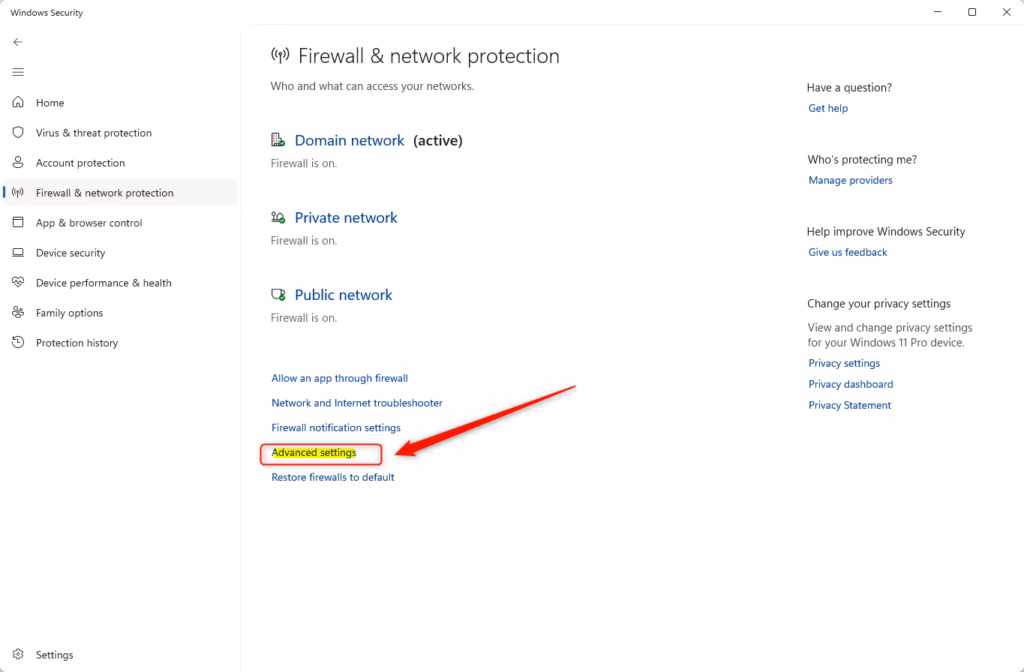
To backup your Windows 11 firewall settings, open Windows Security, go to Firewall & network protection, then Advanced settings, and click Export Policy. To restore, return to Advanced settings and click Import Policy, then select your backup file.
Method 1Using Windows Security App
Backing up Microsoft Defender Firewall settings in Windows 11 is achievable using the Windows Security app. This method lets you save your current firewall rules to a file without needing complicated commands, making it a convenient way to keep a copy of your settings.
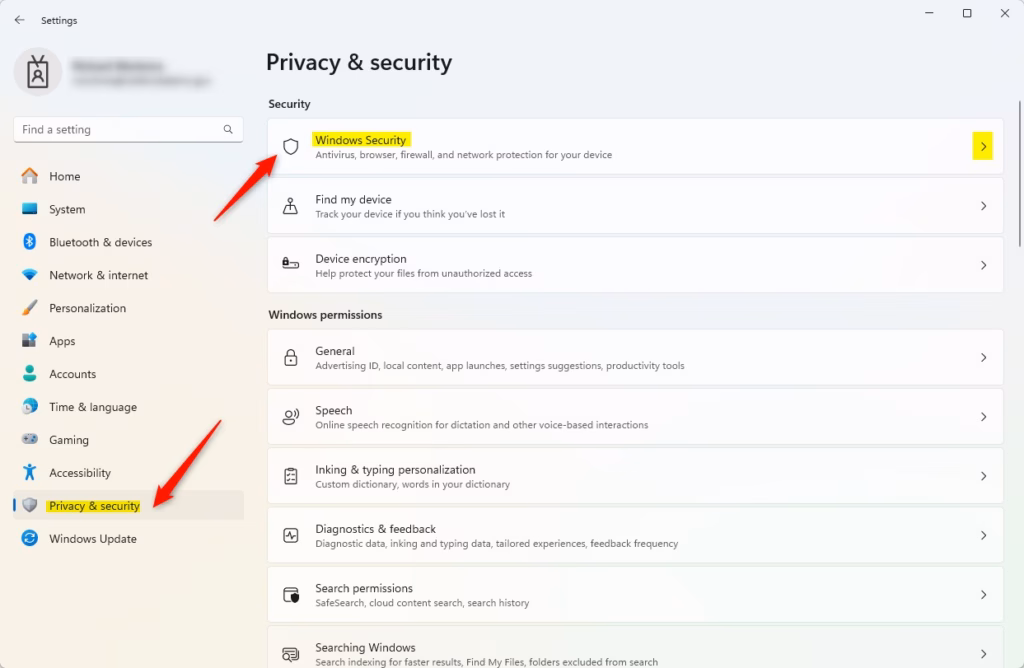
- Click the Start button on your taskbar .
- Select Settings from the menu.

- Click Privacy & security on the left side.
- Find the Windows Security tile and click it.
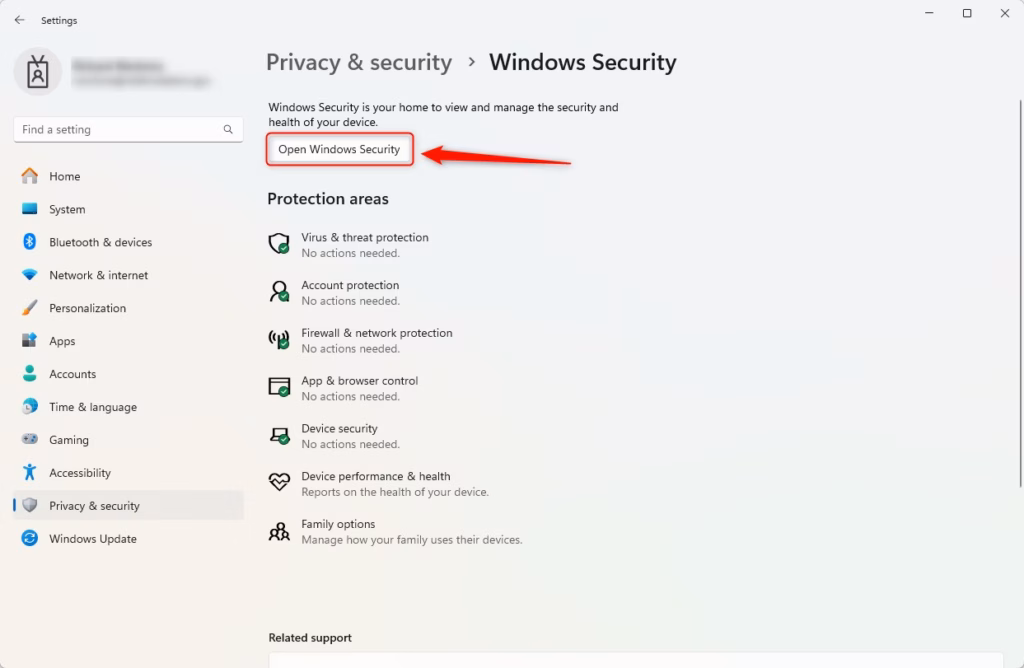
- Click the Open Windows Security button.
- In the Windows Security app, select Firewall & network protection. You can also use this shortcut: Firewall & network protection.
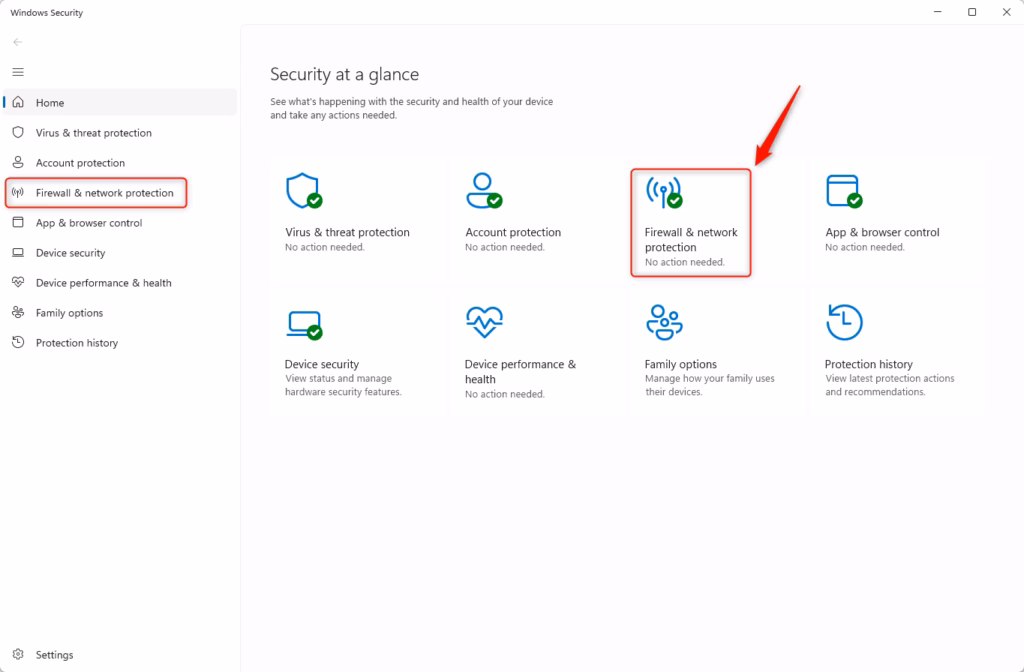
- Scroll down and click the Advanced settings link at the bottom.
To Back Up Your Settings:
- In the window that opens, click Export Policy.
- Choose where you want to save your backup file.
- Give the file a name (it will be a .wfw file).
- Click Save.
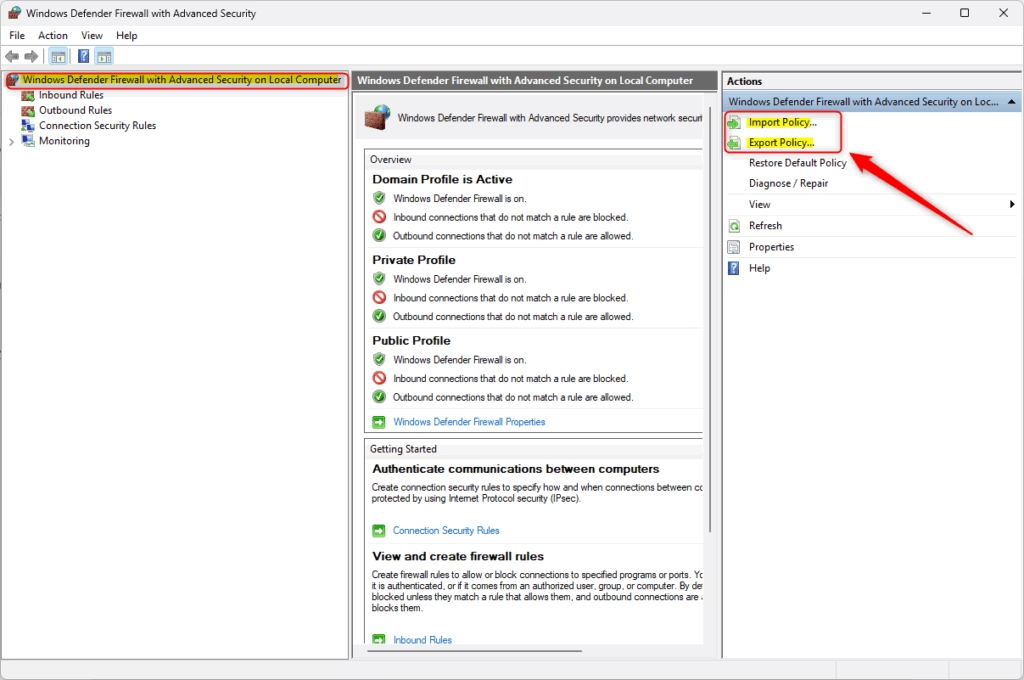
To back up your Microsoft Defender Firewall settings, find the 'Export Policy' button in the Windows Security app. Clicking this lets you choose a location on your computer and name the file (it will have a .wfw extension) to save your current firewall rules.
To Restore Your Settings:
- Go back to the Advanced settings window.
- Click Import Policy.
- Find your backup file and open it.
- Your firewall settings will be restored.
Method 2Using Command Prompt or PowerShell
Administrator privileges are required for this method.
- Open the Windows Terminal app as administrator.
- Choose either the Command Prompt or PowerShell tab.
To Back Up Your Settings:
Using Command Prompt:
netsh advfirewall export "%userprofile%\Desktop\FirewallBackup.wfw"Using PowerShell:
netsh advfirewall export "$Env:USERPROFILE\Desktop\FirewallBackup.wfw"This command creates a backup file named "FirewallBackup.wfw" directly on your Desktop. Essentially, your firewall settings are saved into a single file for future use.
To Restore Your Settings:
Execute this command in either Command Prompt or PowerShell:
netsh advfirewall import "C:\Users\User\Desktop\FirewallBackup.wfw"⚠️ Note: Remember to replace "C:\Users\User\Desktop\FirewallBackup.wfw" with the exact path to your backup file.
And that's it!
Summary
Backing up Microsoft Defender Firewall in Windows 11 is a smart security step, offering several convenient options. The user-friendly Windows Security app, with its 'Export Policy' button, offers an easy backup method, while Command Prompt and PowerShell provide a command-line option for your firewall settings.
- Windows Security App: Use the Export and Import Policy buttons. This is easier for most people.
- Command Prompt or PowerShell: Use special commands to back up and restore your settings. This method requires administrator privileges.
Backing up Microsoft Defender Firewall settings allows users to quickly restore the firewall configuration if issues arise. This backup process also aids in setting up a new computer with pre-configured firewall rules.
How to backup Windows Firewall settings?
And then to check we can see that we've got the backup. Wfw. File on our desktop. Now we've got the backup file if we want to restore.
Does Microsoft Defender have a built-in firewall?
Windows Defender Firewall is software built into Windows that controls network traffic – allowing or blocking it from passing to or from your computer.
Where can I find my Microsoft Defender Firewall?
1) Make sure Microsoft Defender Firewall is enabled. If it's not already enabled, you can turn it on via Settings Privacy & security Windows Security Firewall & network protection
Was this guide helpful?

About the Author
Richard
Tech Writer, IT Professional
Richard, a writer for Geek Rewind, is a tech enthusiast who loves breaking down complex IT topics into simple, easy-to-understand ideas. With years of hands-on experience in system administration and enterprise IT operations, he’s developed a knack for offering practical tips and solutions. Richard aims to make technology more accessible and actionable. He's deeply committed to the Geek Rewind community, always ready to answer questions and engage in discussions.


No comments yet — be the first to share your thoughts!