How to Automatically Disable Wi-Fi on Windows 11 with Ethernet
Automatically disable Wi-Fi on Windows 11 when you connect an Ethernet cable with this guide.
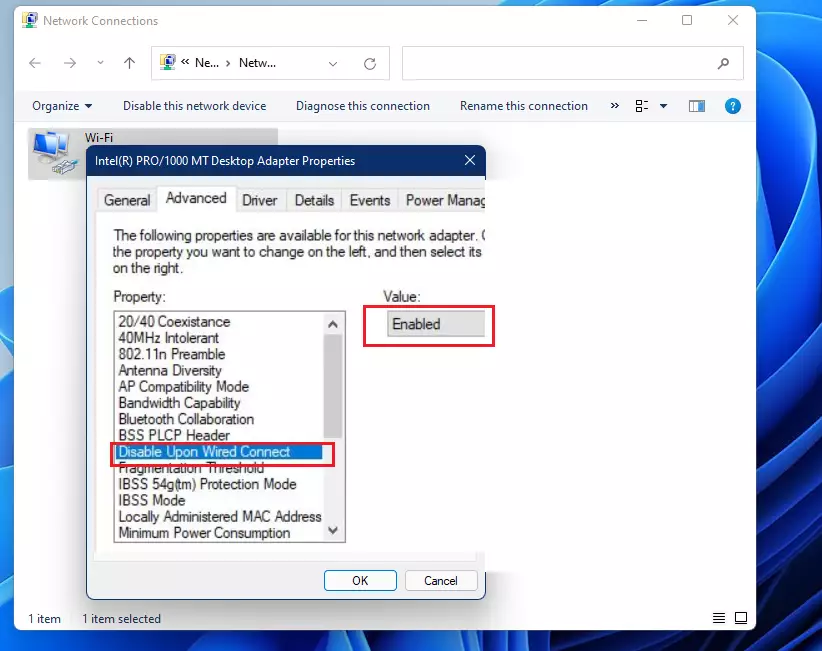
To automatically disable Wi-Fi on Windows 11 when using Ethernet, enable the “Disable Upon Wired Connect” setting in your Wi-Fi adapter’s properties or use PowerShell commands. This ensures your computer prioritizes the wired connection and saves battery.
Why disable Wi-Fi when using Ethernet?
When you plug in an Ethernet cable, your computer automatically uses that wired connection for internet access. However, your Wi-Fi often stays active in the background, potentially draining your battery and causing connection hiccups. Keeping Wi-Fi off while wired helps your computer run more efficiently.
What happens when done?
Windows 11 automatically disables your Wi-Fi when it detects a wired Ethernet cable. This automatic shutdown saves battery life and ensures you use the more reliable Ethernet connection without confusion.
Quick Summary: To automatically disable Wi-Fi on Windows 11 when using Ethernet, you can adjust your network adapter settings in Device Manager or use PowerShell scripts. This ensures your computer prioritizes the stable wired connection, saves battery, and prevents network conflicts.
Method 1Using Network Adapter Settings (Requires Admin)
You can automatically disable Wi-Fi on Windows 11 when you plug in an Ethernet cable by changing a specific setting within your network adapter’s properties. This method requires administrator rights on your computer to make the necessary adjustments to your network settings.
Open System Settings by pressing Windows key + I, or by clicking Start then Settings.

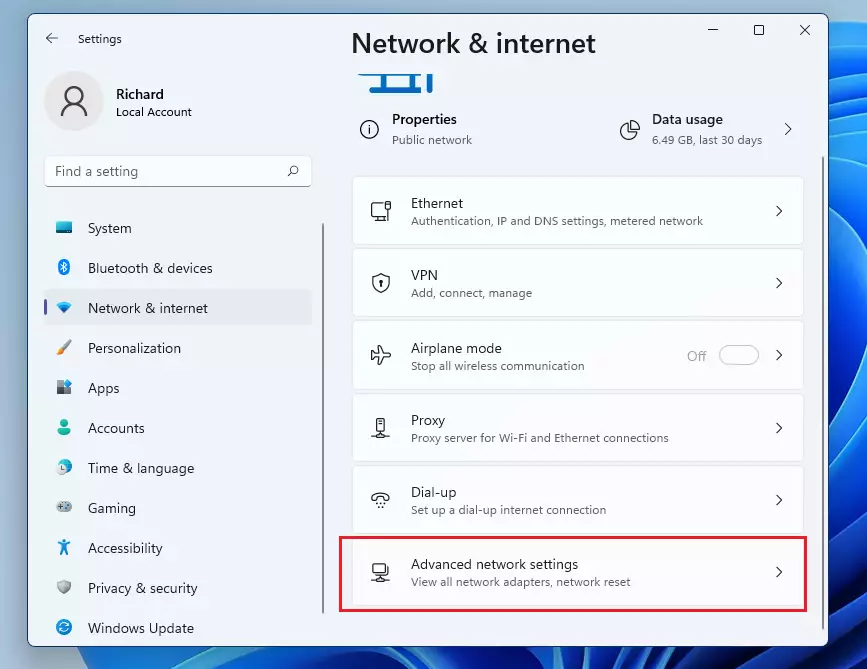
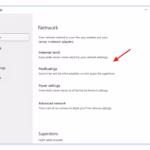
Once the Settings window appears, click on Network & internet. Next, choose Advanced network settings from the right-hand side.
On the following screen, click More network adapter options.

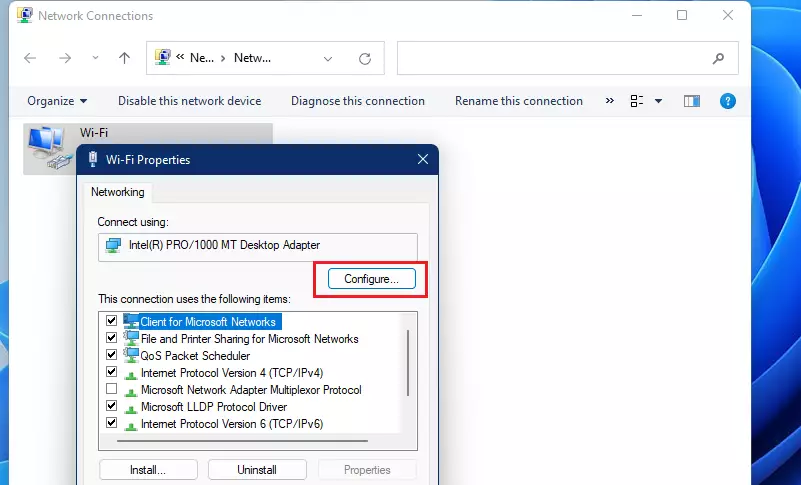
The Network Connections window shows your computer’s network adapters. Right-click the Wi-Fi adapter icon and select Properties to access its configuration options.

Then, click the Configure button in the window that appears.
Click OK to save your changes and close the windows.
Method 2Automating with PowerShell
If you’re comfortable with more technical steps, you can automatically disable Wi-Fi on Windows 11 when an Ethernet cable is connected using PowerShell commands.
Disable-NetAdapter -Name "Wi-Fi" -Confirm:$false
To re-enable it , use:
Enable-NetAdapter -Name "Wi-Fi"
More details on managing these settings are available in the official Microsoft documentation.
Why does 🪟 Windows 11 automatically turn Wi-Fi back on?
Windows 11 automatically turns Wi-Fi back on when you disconnect Ethernet to make sure you don’t lose your internet connection, as its main goal is to keep you online.
Summary
To automatically disable Wi-Fi on Windows 11 when using Ethernet, you can either use the network adapter settings or PowerShell scripts. This helps save battery and ensures your computer uses the more stable wired connection.
How do I permanently disable Wi-Fi on 🪟 Windows 11?
Wi-Fi can be permanently disabled by opening Device Manager, locating your wireless network adapter, right-clicking it, and selecting Disable device. This stops the hardware from functioning until it’s manually re-enabled. This is useful if you never intend to use wireless connections on your desktop computer.
Does disabling Wi-Fi improve Ethernet connection stability?
Yes, disabling Wi-Fi when using an Ethernet cable improves connection stability. It stops Windows from switching between networks and ensures all your internet traffic uses the more reliable wired connection.
Was this guide helpful?

About the Author
Richard
Tech Writer, IT Professional
Richard, a writer for Geek Rewind, is a tech enthusiast who loves breaking down complex IT topics into simple, easy-to-understand ideas. With years of hands-on experience in system administration and enterprise IT operations, he’s developed a knack for offering practical tips and solutions. Richard aims to make technology more accessible and actionable. He's deeply committed to the Geek Rewind community, always ready to answer questions and engage in discussions.


No comments yet — be the first to share your thoughts!