How to Auto-Collapse the App Bar: Keep It Visible or Let It Hide in Teams

Auto-collapsing the app bar in Microsoft Teams hides the left-side menu automatically, which frees up screen space on smaller monitors. The app bar holds shortcuts such as Chat and Calendar. You can turn this behavior on or off in a few clicks from the Teams settings, and the steps below show where.
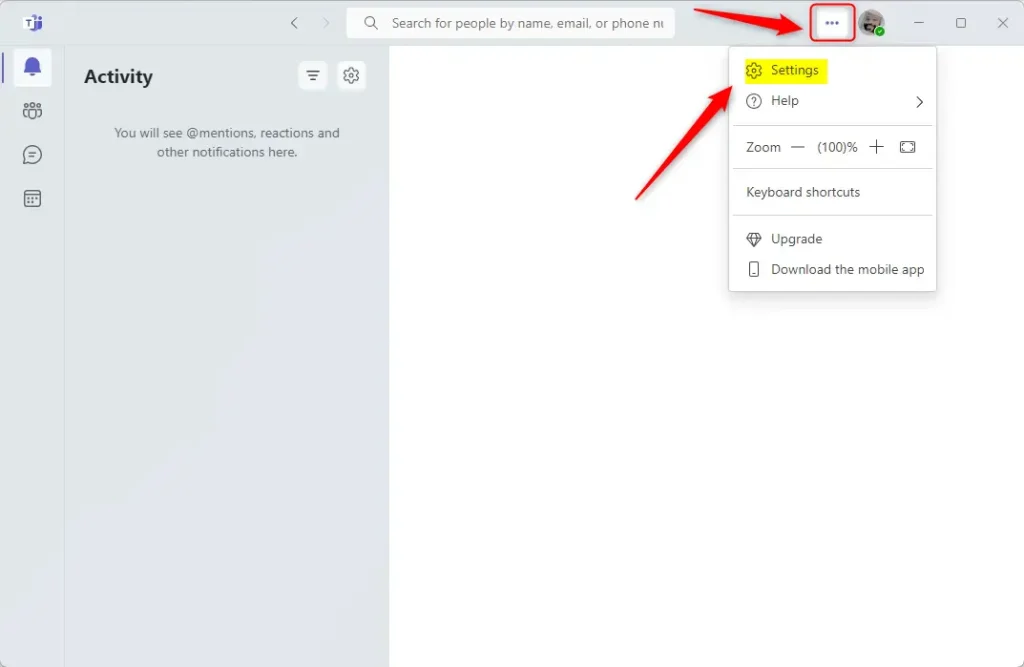
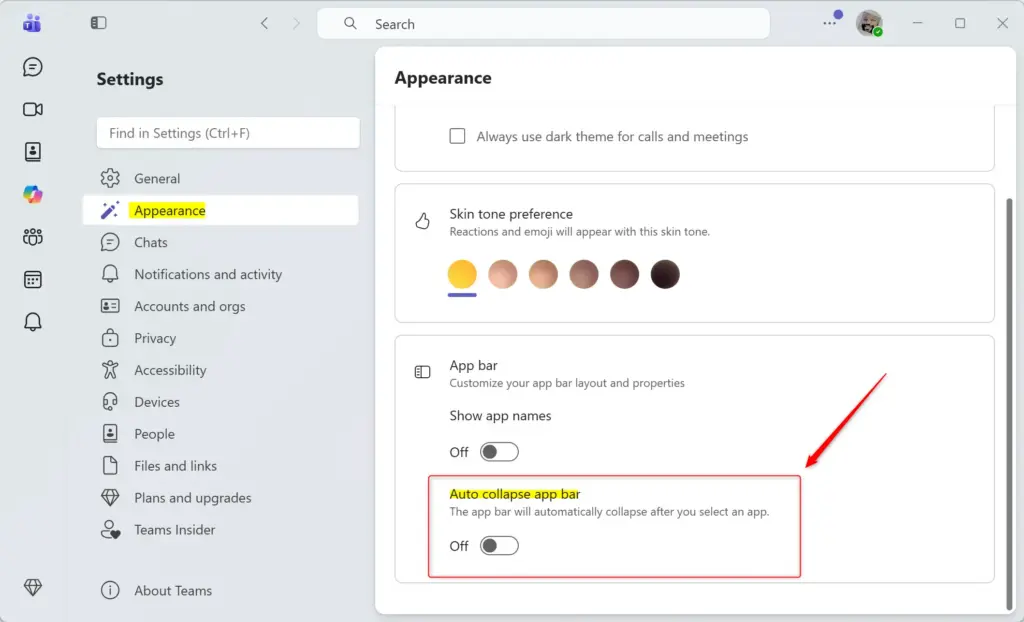
Click your profile picture or the three dots in the top right corner of Teams, select Settings, click Appearance, and toggle Auto collapse app bar on or off. Turn it on to keep the app bar visible when resizing; turn it off to let it hide automatically on smaller windows.
Auto-Collapse the App Bar: Keep It Visible or Let It Hide
Resizing the Teams window is what usually triggers the collapse behavior. Make the window narrower and the app bar is the first thing to react. If the bar suddenly vanishes or reappears while you drag the window edge, this setting is the cause, not a bug.
Why change this setting?
Your chats and content then take up more of the screen. This is most useful when you run several windows at once or work on a compact display, such as a 13-inch laptop with Teams snapped to half the screen.
What happens when you change this setting?
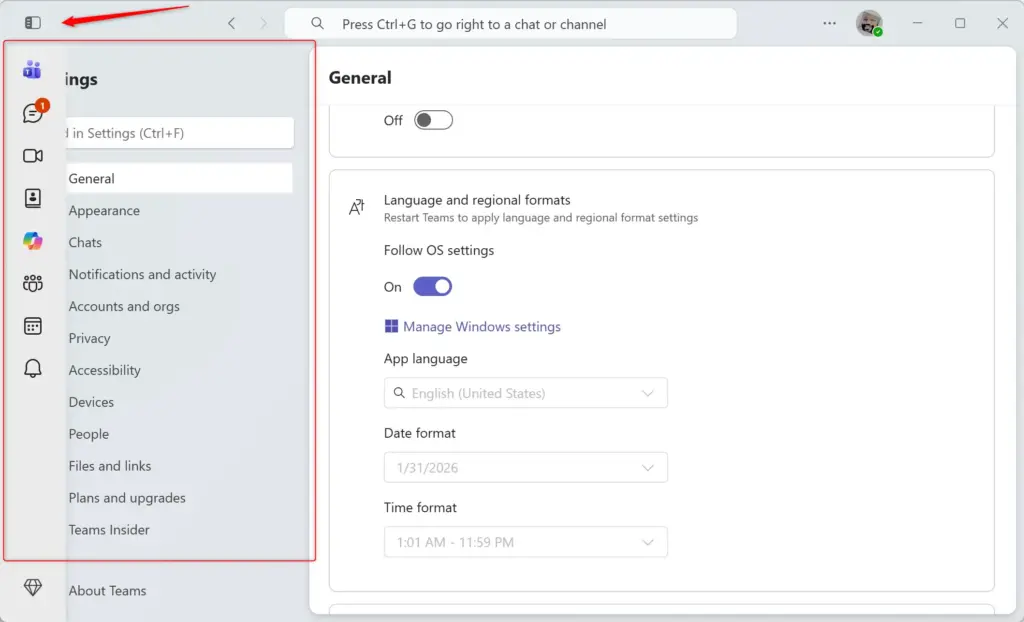
The auto-collapse setting controls how the vertical navigation menu behaves when you resize your Teams window. With the option enabled, the app bar hides itself as the window gets smaller, which gives you more room for chats and meetings. With it turned off, the app bar stays locked to the side of the window at all times.
The setting is available to all users. It is a personal preference, so it does not need an admin, and the steps are the same on Home and Pro editions of Windows 11.
- Click your profile picture in the top right corner of Teams. Some Teams versions put Settings and more (the three dots) next to the picture instead. Either way, choose Settings. The Settings window opens.
- Click Appearance in the list on the left. The appearance options appear on the right.
- Find the switch labeled Auto collapse app bar. The exact wording can differ slightly between Teams versions, so look for the option that mentions the app bar.
- Set the switch the way you want it:
- If it is ON, the app bar will try to stay visible even when you make your Teams window smaller.
- If you turn it OFF, the app bar will hide itself when the window is too small to show it properly.
- Close Settings and drag the edge of the Teams window to make it narrower. Check that the app bar behaves the way you chose. If it does the opposite, your Teams build words the switch the other way around. Flip the switch and test again.
To undo the change, return to the same screen and flip the switch back. The setting normally applies right away. If it does not, close Teams completely and reopen it.
Disabling "Keep the app bar visible when resizing" stops the app bar from covering your content when you adjust the Teams window size.
Reference:
https://support.microsoft.com/en-US/teams/notifications-settings/change-settings-in-microsoft-teams
Summary
This guide showed how to configure the Teams app bar so it either stays visible or hides automatically when the window shrinks. If the behavior ever feels wrong, the switch in Settings Appearance is the first place to check.
Did this guide fix your problem?

About the Author
Richard
Tech Writer, IT Professional
Richard is a writer at Geek Rewind who turns complex IT tasks into clear, step-by-step guides. He draws on years of hands-on experience in system administration and enterprise IT operations, focusing on Windows, Linux and WordPress: the problems people actually run into, and the fixes that work. His server and WordPress guides come from systems he runs himself. Richard builds and maintains the platform behind Geek Rewind, from its Ubuntu servers and Nginx configuration to its custom WordPress plugins. Many new tutorials start with readers' questions, and he's always glad to answer them in the comments.
No comments yet — be the first to share your thoughts!