
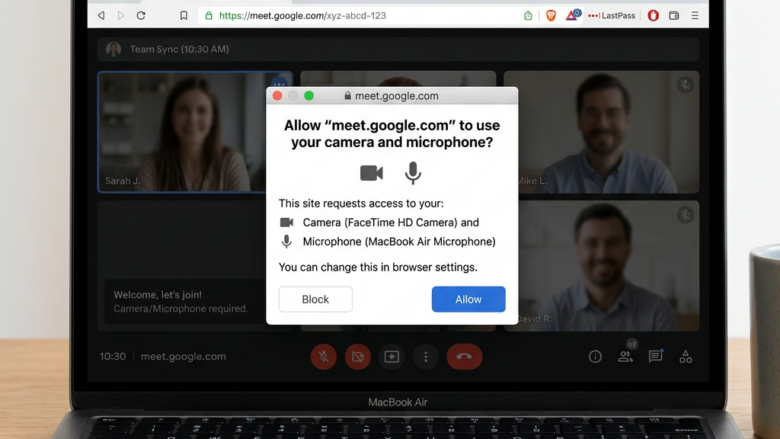
Microsoft Edge does not let a website use your microphone or camera until you say so. The first time a site asks, Edge shows a prompt and waits for your answer. You can later change that answer in the browser settings, giving permanent access to sites you trust or blocking ones you don’t. This works the same on Windows 11 Home and Pro, and no restart is needed.
Open the website and click the button that requests your camera or microphone. When the permission prompt appears below the address bar, click Allow. To change permissions later, go to Edge Settings Cookies and site permissions > Camera or Microphone, find the website, and use the dropdown to select Allow, Block, or Ask.
Step 1Go to the Website Asking for Access
Edge only shows the permission prompt when a page tries to use your hardware. So the first job is to open the site and do whatever makes it ask. Nothing happens just because the page has loaded.
- Open the website that needs your camera or microphone.
- Find the control that starts the request. This is usually a button such as Start Video Call, a mic test, or a camera feature.
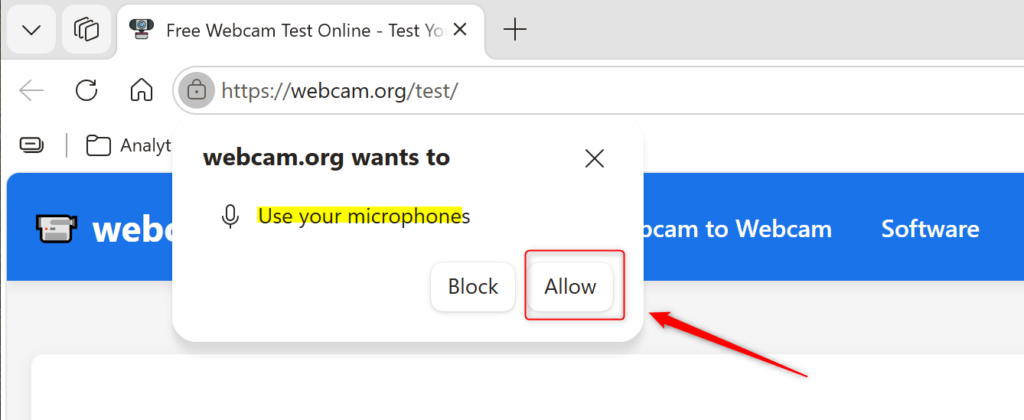
- Click it. A permission box should appear below the address bar, near the top left of the browser window.
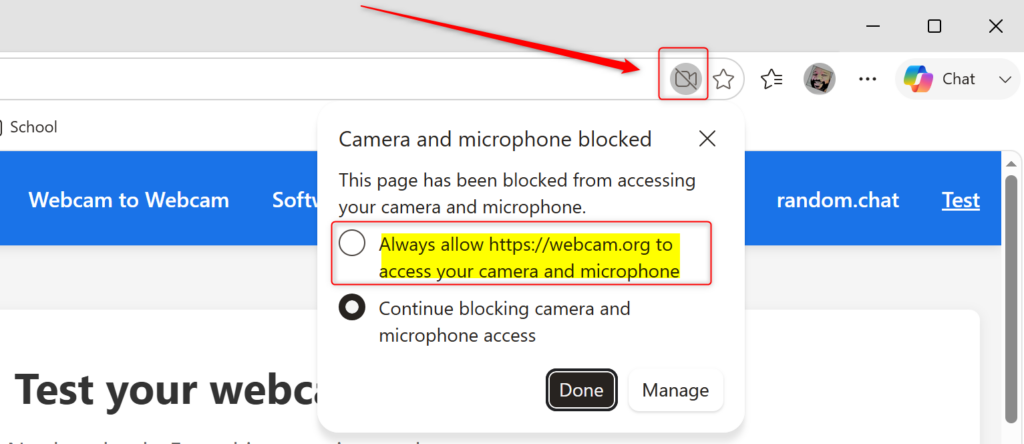
If no box appears, refresh the page and click the button again. Also look at the right end of the address bar for a camera or microphone icon. Clicking that icon reopens the permission options. If you answered the prompt on an earlier visit, Edge will not ask again. In that case, skip ahead to the section on changing permissions for a single site.
Prompts only appear after you interact with the page. That is why clicking a button like Start Video Call is what triggers the request.
Step 2Give Permission
The prompt asks whether the site can use your camera, your microphone, or both. Your answer takes effect straight away.
- Read the prompt and check that the site name shown is the one you meant to open.
- Click Allow if you trust the site. It can use your hardware immediately, and the call or test should start.
- Click Block if you do not want the site to have access.
You can also close the box without choosing. That usually blocks access for that visit, and the site may ask again next time. Depending on your Edge version, the prompt may offer extra options such as allowing access for this visit only. Use those if you do not want the permission saved.
You have to change the setting in Edge, as described below.
Step 3Block or Allow Specific Websites
If you missed the prompt, blocked a site by accident, or want to remove access you gave earlier, change the permission in Edge's settings. Edge keeps a list of sites for the camera and another for the microphone. Both lists work the same way.
- Go back to Site permissions in Edge settings (under Cookies and site permissions).
- Click Camera or Microphone, whichever you want to change. You should see the settings page for that device, with a list of sites.
- Look through the sites in the list. These are sites you have visited that have asked for access, or that you have set manually.
- Find the website you want to adjust.
- Click the dropdown menu to the right of the website name.
- Choose Allow, Block, or sometimes Ask. Ask makes Edge prompt you every time the site requests the device.
The layout of this page can differ a little between Edge versions. Some versions use separate Allow and Block lists with a Remove option instead of a dropdown. The idea is the same. If you remove a site from a list, Edge treats it as new and prompts you again on your next visit.
Allowing one does not allow the other.
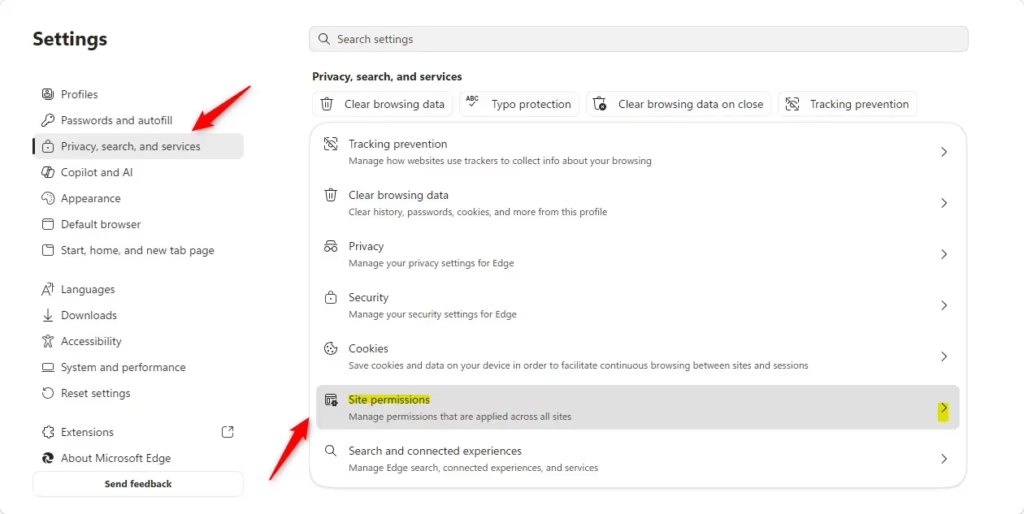
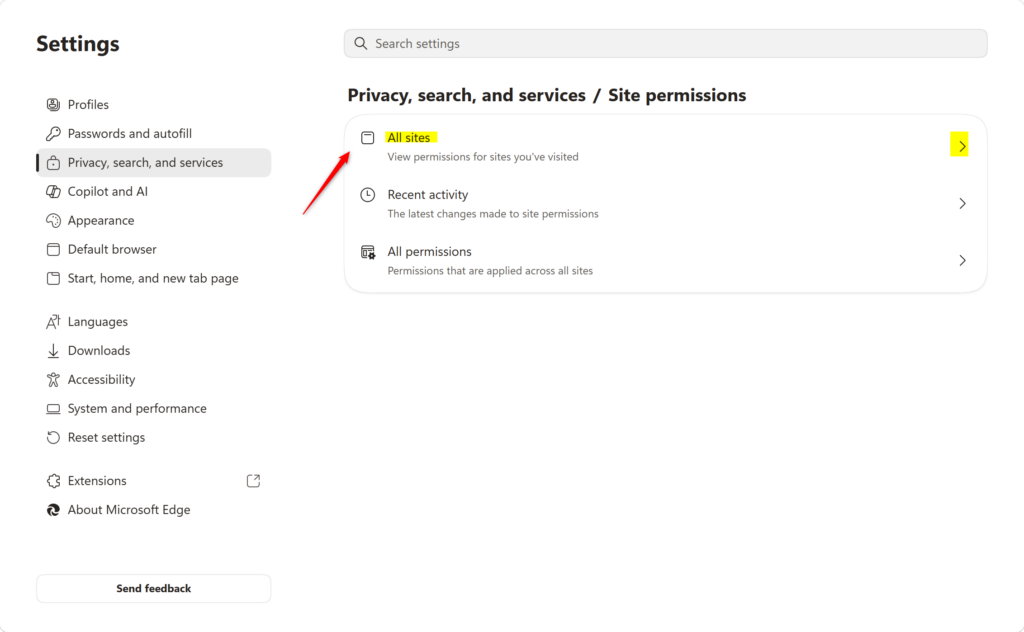
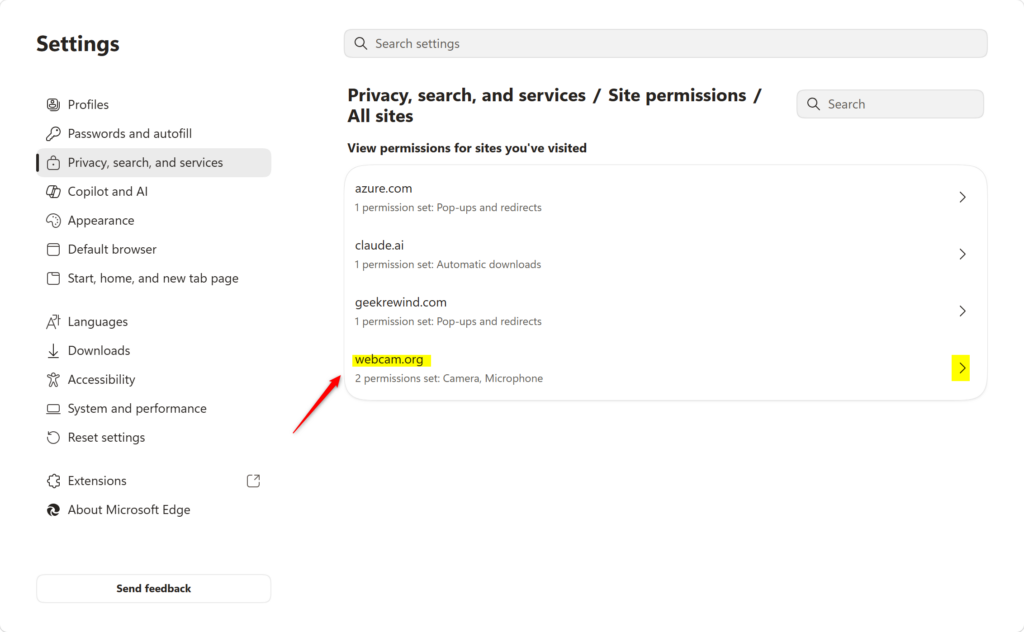
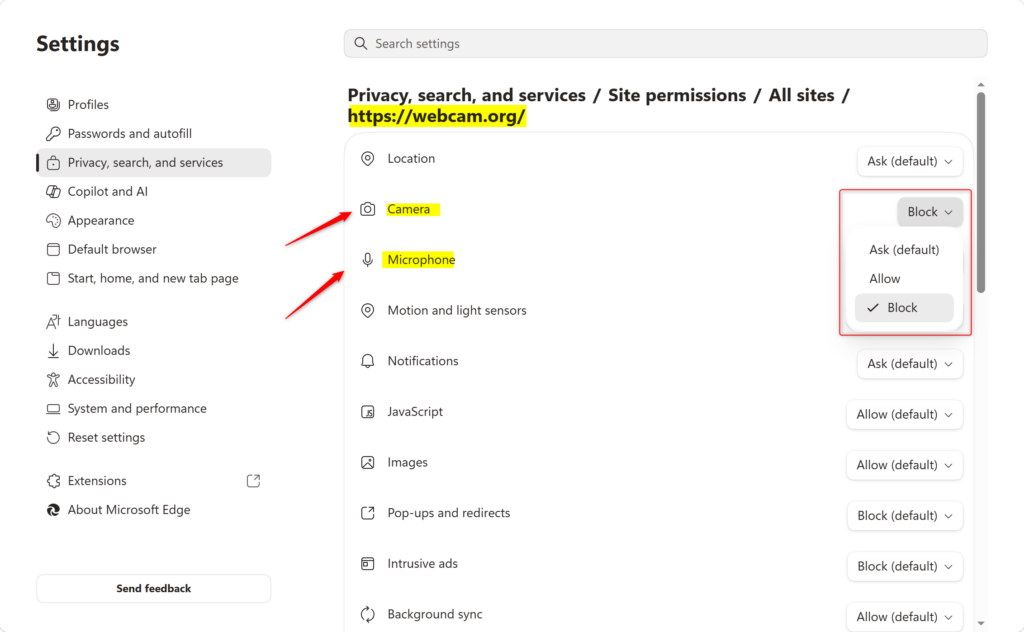
Site permissions in Edge decide which websites can reach your camera and microphone. If you change a site from Block to Allow, that site can use your camera or microphone the next time it asks. If you change it from Allow to Block, the site can no longer use them.
If a site still can't reach your camera or microphone after you allow it, check two things. First, check that no other app is using the device. Second, check that camera and microphone access is turned on for desktop apps in Windows (Settings Privacy & security > Camera, and the same for Microphone). If you changed a setting while the site was open, reload the page so it picks up the new permission.
Reference:
Summary
This guide showed you how to let websites use your mic and camera in Microsoft Edge. It covered granting permission when a site asks, and changing or undoing those permissions later in the settings.
How do I grant camera and Microphone permission in Edge?
Open the website that needs camera or microphone access. Click the button or control that requests permission—such as Start Video Call or Begin Test. A permission box appears below the address bar. Click Allow to grant access, or Deny to block it.
How do I let a website access my Microphone and camera?
Visit the website and trigger the permission request by clicking the relevant button or feature. When the permission prompt appears near the top of the browser, select Allow. For permanent settings, go to browser settings, find Site Permissions, and manage camera and microphone access there.
How do I give Microsoft Edge permission to use my Microphone?
Navigate to the website requesting microphone access and click the button that initiates the request. The permission prompt appears below the address bar. Click Allow to grant access. You can also manage microphone permissions permanently in Edge Settings under Privacy and Site Permissions.
How do I grant permission to use my Microphone and camera in Chrome?
Open the website in Chrome and click the button requesting microphone and camera access. When the permission prompt appears, click Allow. To change permissions later, go to Chrome Settings, select Privacy and Security, then Site Settings, and adjust camera and microphone access.
Was this guide helpful?
0% of readers found this helpful (1 votes)

About the Author
Richard
Tech Writer, IT Professional
Richard is a writer at Geek Rewind who turns complex IT tasks into clear, step-by-step guides. He draws on years of hands-on experience in system administration and enterprise IT operations, focusing on Windows, Linux and WordPress: the problems people actually run into, and the fixes that work. His server and WordPress guides come from systems he runs himself. Richard builds and maintains the platform behind Geek Rewind, from its Ubuntu servers and Nginx configuration to its custom WordPress plugins. Many new tutorials start with readers' questions, and he's always glad to answer them in the comments.



No comments yet — be the first to share your thoughts!