
This article explains how to enable or eisable Unicode UTF-8 for worldwide language support in Windows 11.
The display language in Windows determines the system menus, dialog boxes, and other interface elements. Users can change the display language in the settings to customize their experience based on personal preferences.
Changing the display language may result in some programs not showing text in your desired language in menus and dialog boxes. This occurs because those programs might not support Unicode.
You can enable Unicode UTF-8 for worldwide language support to help Windows display the correct text for your language.
Enable Unicode UTF-8 for Worldwide Language Support using the Settings app
There are multiple ways to enable UTF-8 worldwide language support in Windows. The most recent Windows updates let users change the UTF-8 support in the Settings app.
Here’s how to do it.
First, open the Windows Settings app.
You can do that by clicking on the Start menu and selecting Settings. Or press the keyboard shortcut (Windows key + I) to launch the Settings app.
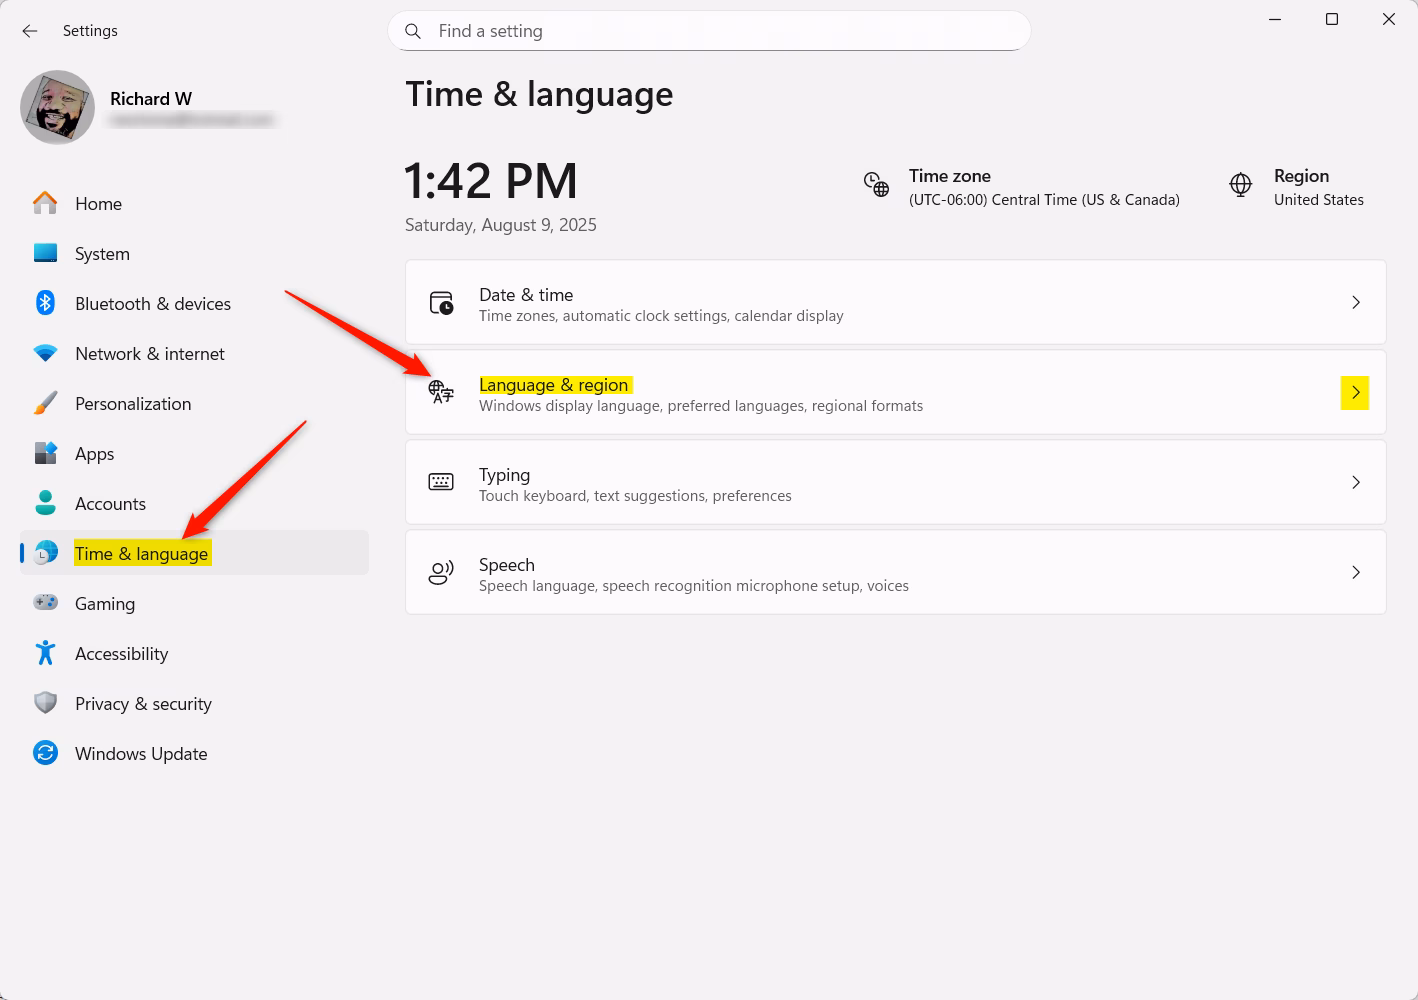
When the Settings app opens, click the Time & language button on the left. Then, select the Language & region tile on the right to expand it.
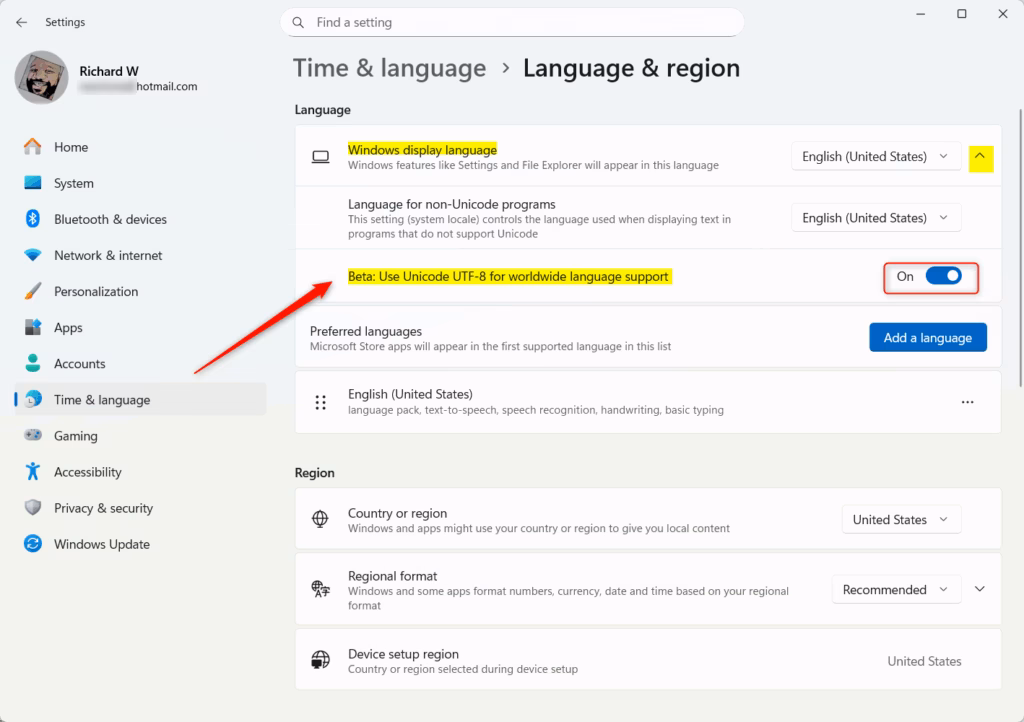
On the Langue & region tile, click on the “Windows display language” tile to expand it.
Then, toggle the “Use Unicode UTF-8 for worldwide lanauge support” button to enable or disable the feature.
Enable Unicode UTF-8 for Worldwide Language Support using the Registry
Another way to enable or disable the new Unicode UTF-8 feature is to use the Windows Registry Editor.
Remember to back up your registry before making any changes, or create a System Restore point as a precaution.
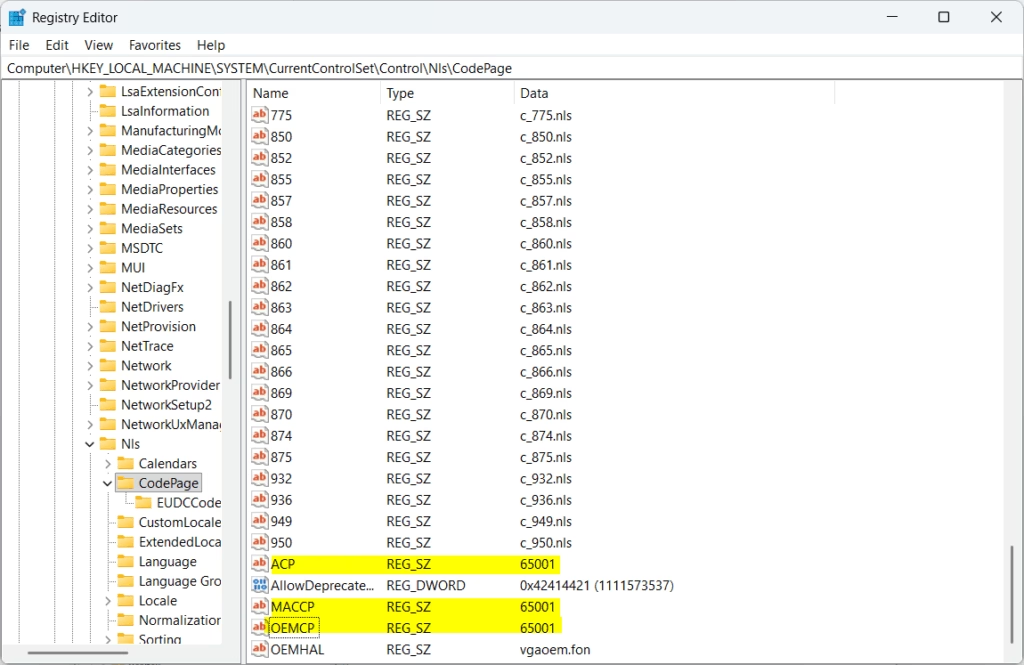
First, open the Windows Registry and navigate to the folder key path below.
Computer\HKEY_LOCAL_MACHINE\SYSTEM\CurrentControlSet\Control\Nls\CodePage
Double-click to open the highlighted REG_SZ and names and values in the list below:
To enable Unicode UTF-8 worldwide language support, update the values for the names below:
- ACP = 65001
- MACCP = 65001
- OEMCP = 65001
To disable UTF-8 worldwide language support, use the names and values below:
- ACP = 1252
- MACCP = 10000
- OEMCP = 437
You may have to reboot your computer to apply the changes.
That should do it!
Conclusion:
Enabling or disabling Unicode UTF-8 support in Windows 11 is a straightforward process that can improve language handling across various applications. Here are the key takeaways:
- Customizable Language Support: Adjusting the Unicode settings allows users to enhance their experience based on their preferred display languages.
- Easily Accessible Settings: Users can enable or disable UTF-8 support through the Settings app or the Windows Registry Editor, providing flexibility based on user preference.
- Need for Precaution: Always back up the registry or create a system restore point before making significant changes to the Windows settings to avoid potential issues.
- Reboot Required: Remember to restart your computer after making changes for them to take effect.
- Better Program Compatibility: Implementing UTF-8 can resolve issues with unsupported languages in certain applications, ensuring accurate text display.


Leave a Reply