How to Install Oracle Java JDK on Windows 11


You install Oracle Java JDK on Windows 11 to set up your PC for Java development.
The Java Development Kit (JDK) is the core software package developers use to write, compile, and run Java applications. Think of it as the essential toolbox for any Java programmer.
This guide walks you through installing JDK 17, the latest Long-Term Support (LTS) version, on your Windows 11 machine. Once installed, you can leverage the command line to build and manage Java projects.
Prerequisites
Before you begin, ensure you have the following:
- Administrative Rights: You must have an administrator account on your Windows 11 PC to install software and modify system environment variables.
- Storage Space: Ensure you have at least 500MB of free disk space.
- Internet Connection: Required to download the JDK installer.
Oracle JDK vs. OpenJDK: Which Should You Choose?
When you decide to install Java JDK on Windows 11, you will encounter two main types: Oracle JDK and OpenJDK. Oracle JDK is the commercial version provided by Oracle. It is free for personal use but requires a paid license for certain commercial applications. The Microsoft Build of OpenJDK is a free, open-source alternative that is fully compatible with Java standards and is often preferred for enterprise environments.
Downloading and Installing Java
To get started, visit the Oracle Java Downloads page or the Microsoft Build of OpenJDK page. Download the Windows installer (.EXE file).
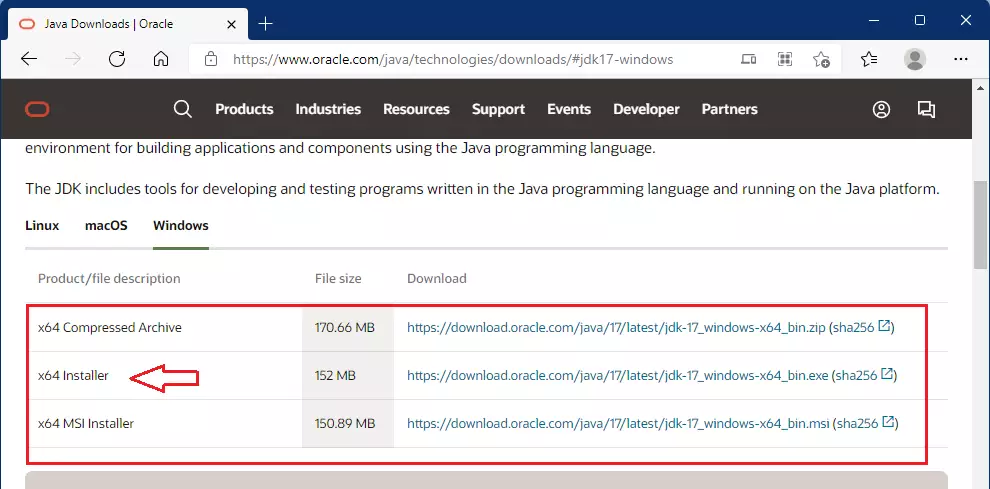
Once the download finishes, open your Downloads folder and double-click the installer. Note: This step requires administrator privileges. Follow the on-screen prompts.
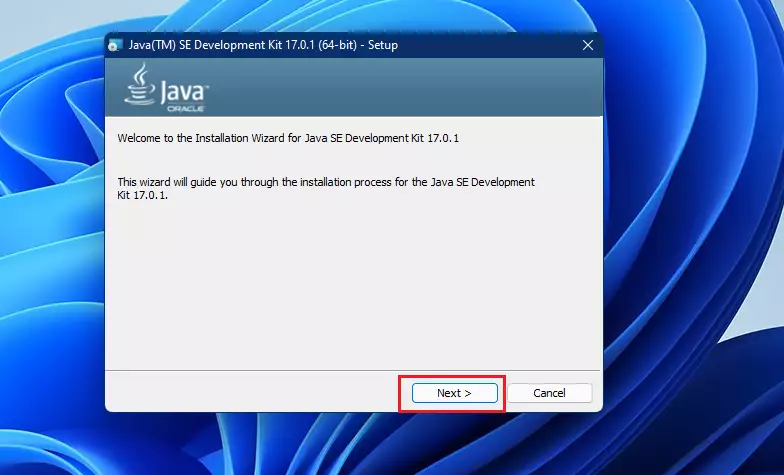
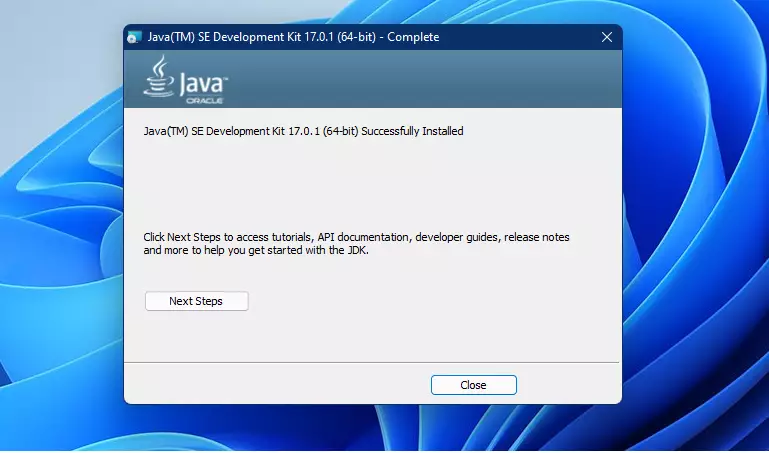
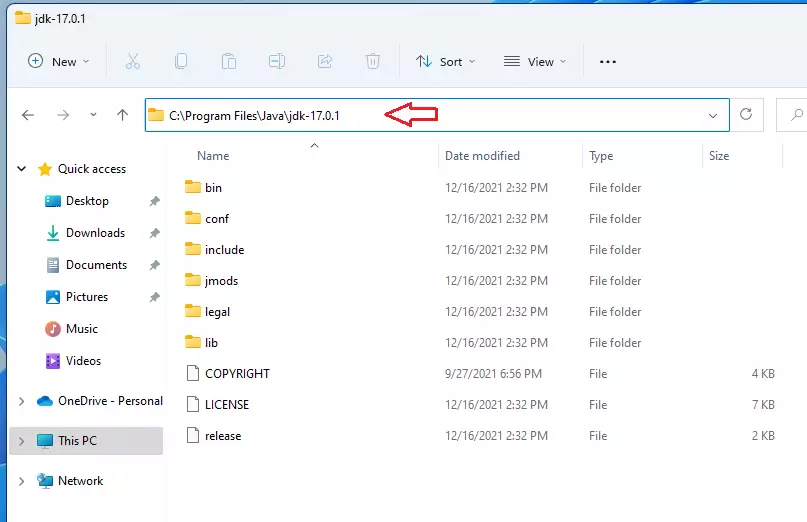
Keep the default settings. Java will install to C:\Program Files\Java\jdk-version-number. Click Close when finished.
Configuring Environment Variables
To make Java work globally, you must set the JAVA_HOME variable. Search for “Edit the system environment variables” in the Start menu. Note: This step requires administrator privileges.
Click “Environment Variables” at the bottom. Under “System variables,” click “New.”
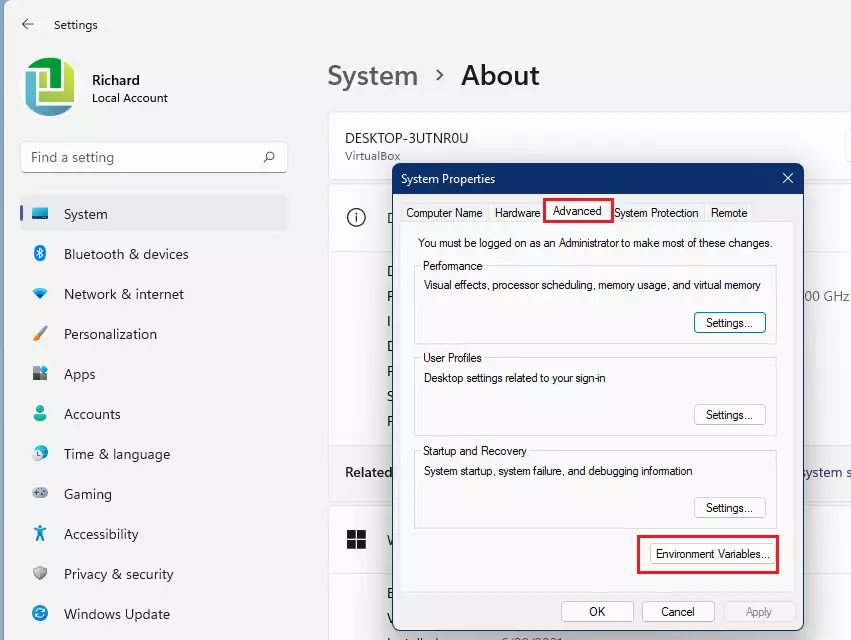
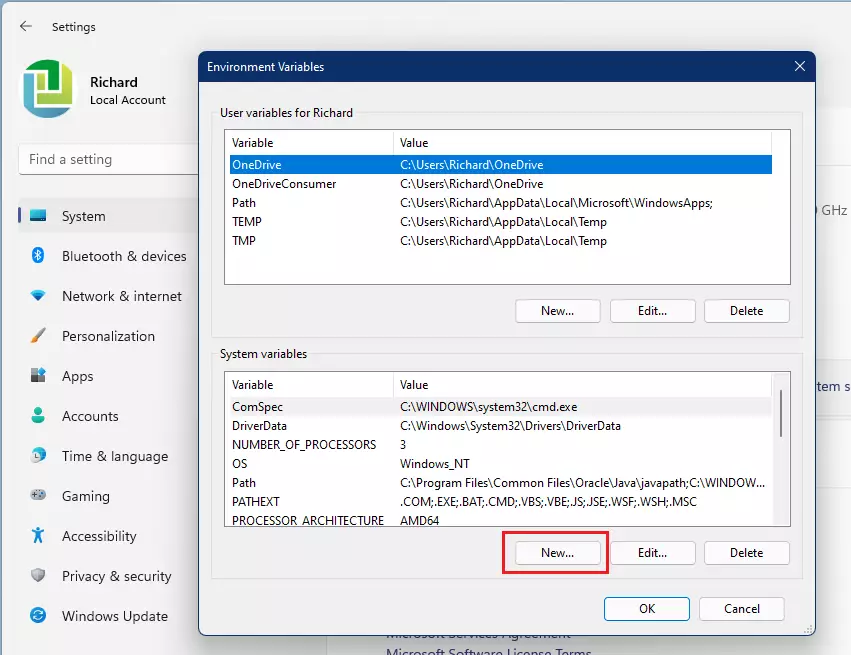
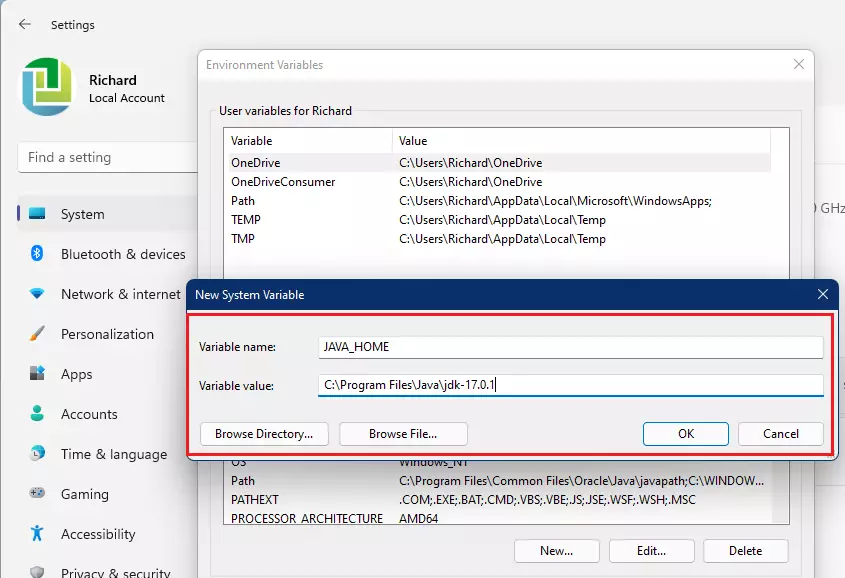
Enter JAVA_HOME as the variable name and your installation path (e.g., C:\Program Files\Java\jdk-17) as the value.
Next, find the “Path” variable in the list and click “Edit.” Click “New” and add the following line:
%JAVA_HOME%\bin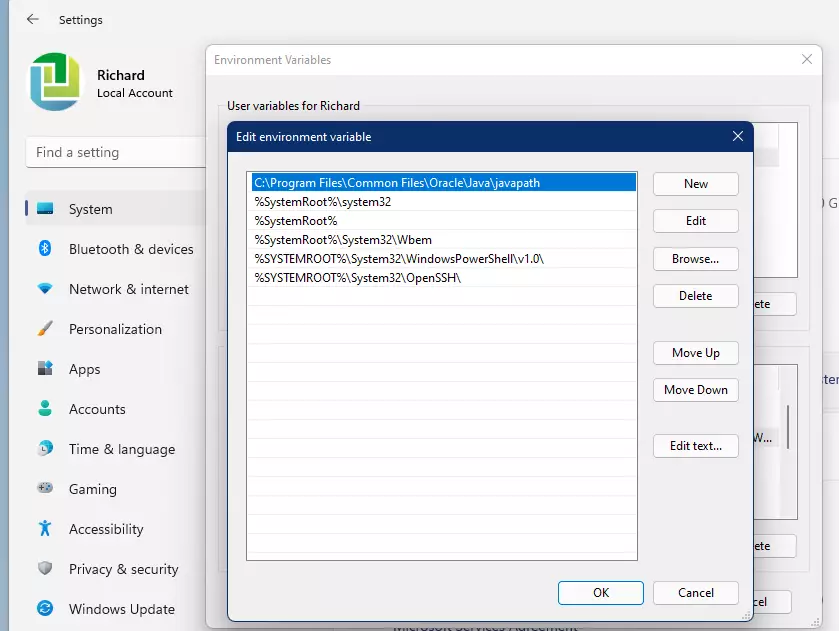
Verifying the Installation
Open Command Prompt or PowerShell and type these commands:
java -version
javac -version
Troubleshooting Installation
If the java -version command fails, check these common issues:
- Path Typos: Ensure your
JAVA_HOMEpath matches your actual installation folder exactly. - Restart Terminal: Always close and reopen your Command Prompt after changing environment variables so the system can refresh the settings.
- Permissions: Ensure you ran the installer as an administrator.
Summary
Installing the Java Development Kit on Windows 11 involves downloading the installer, running it with administrative rights, and correctly setting your JAVA_HOME and Path environment variables. By choosing between Oracle JDK or OpenJDK, you can tailor your setup to your specific project needs. Always verify your installation using the command line to ensure your system is ready for development. For more help with system paths, check out our guide on Windows PATH environment variables.
Is the Oracle JDK free for commercial use?
No, Oracle JDK is generally not free for commercial use under the current Oracle No-Fee Terms and Conditions. For business environments, it is often safer to use the Microsoft Build of OpenJDK or other free distributions to avoid licensing fees and compliance issues.
What is the difference between JRE and JDK?
The JRE (Java Runtime Environment) only allows you to run Java programs. The JDK (Java Development Kit) includes the JRE plus all the tools needed to develop, compile, and debug Java code. If you want to write your own programs, you must install the JDK.
Do I need to uninstall old versions of Java before installing a new JDK?
It is not strictly required, but it is highly recommended. Having multiple versions of Java can cause conflicts with your PATH variables. Uninstalling older versions through the Windows Settings menu ensures that your new installation is the primary version used by your system.
How do I check which version of Java is currently installed on 🪟 Windows 11?
Open the Command Prompt by typing “cmd” in the search bar. Type java -version and press Enter. The terminal will display the installed version number. If you see an error, Java is either not installed or your PATH variable is not configured correctly.
Was this guide helpful?

About the Author
Richard
Tech Writer, IT Professional
Richard, a writer for Geek Rewind, is a tech enthusiast who loves breaking down complex IT topics into simple, easy-to-understand ideas. With years of hands-on experience in system administration and enterprise IT operations, he’s developed a knack for offering practical tips and solutions. Richard aims to make technology more accessible and actionable. He's deeply committed to the Geek Rewind community, always ready to answer questions and engage in discussions.


No comments yet — be the first to share your thoughts!