Windows 11 Recall Feature: How to Uninstall or Reinstall for Enhanced Privacy

You can uninstall or reinstall the Windows 11 Recall feature to manage your privacy. Recall & Snapshots acts as a digital memory, capturing your screen activity to help you find past information.
The feature takes a snapshot of your screen every 5 seconds when content changes. You might want to remove it to protect your privacy or free up storage space.
Removing Recall stops your PC from saving these snapshots. As of the KB5041865 update (build 26100.1591 for 24H2), Recall is an optional feature, making it easier to uninstall completely.
To uninstall Recall, open Windows Features by running OptionalFeatures.exe, uncheck Recall, and click OK. To reinstall, open the same menu, check the box for Recall, and click OK. Administrator privileges are required for these actions.
Add or remove Recall using Windows Features
You can easily uninstall or add back the Recall feature using the Windows Features menu right on your PC.
- Open the Windows Features menu by running
OptionalFeatures.exe. - Find Recall in the list.
- Uncheck the box to remove it, or check the box to add it back.
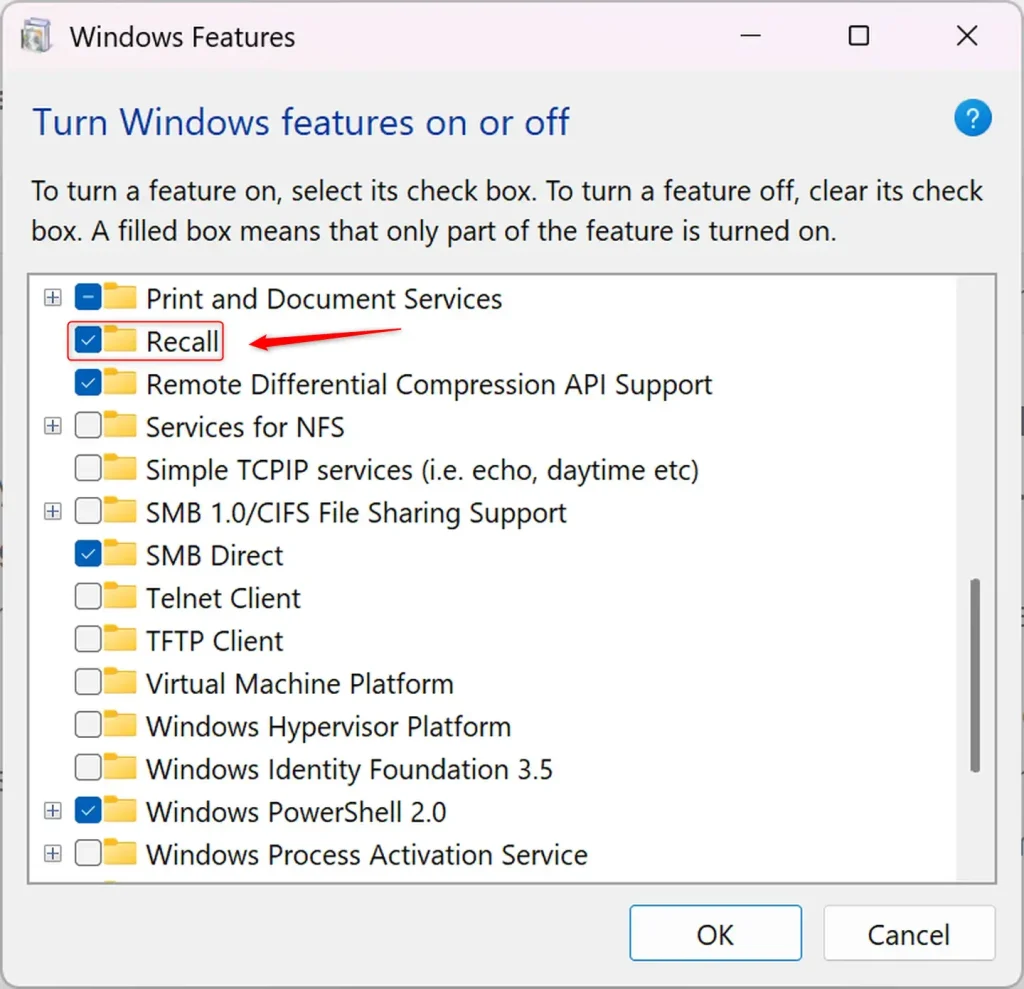
Click OK to save your changes. Note: This step requires administrator privileges.
Uninstall or Reinstall Recall using Command
If you’re comfortable with commands, you can uninstall or reinstall Recall using Windows Terminal with a simple command.
Note: These steps require administrator privileges.
First, open the Windows Terminal as an administrator and select the Windows PowerShell or Command Prompt tab.
To install the feature, run this command:
DISM /Online /Enable-Feature /FeatureName:"Recall"
To remove the feature, run this command:
DISM /Online /Disable-Feature /FeatureName:"Recall"
Alternatively, you can use PowerShell by opening the Windows Terminal as administrator and selecting the PowerShell tab.
To install the feature via PowerShell, run:
Enable-WindowsOptionalFeature -Online -FeatureName "Recall"
To remove the feature via PowerShell, run:
Disable-WindowsOptionalFeature -Online -FeatureName "Recall"
You may need to restart your computer for these changes to take effect.
Summary
If you want to uninstall or reinstall Windows 11 Recall, you can do it through Privacy settings, the Windows Features menu, or by using command-line tools like DISM and PowerShell.
How do I remove Recall from Windows?
Remove Recall as a Windows feature (for individuas) Open Windows Search and type Windows features. Select Turn Windows features on or off. Find and uncheck Recall.
Can you get 🪟 Windows 11 without Recall?
Recall is an optional feature for Windows.
Was this guide helpful?

About the Author
Richard
Tech Writer, IT Professional
Richard, a writer for Geek Rewind, is a tech enthusiast who loves breaking down complex IT topics into simple, easy-to-understand ideas. With years of hands-on experience in system administration and enterprise IT operations, he’s developed a knack for offering practical tips and solutions. Richard aims to make technology more accessible and actionable. He's deeply committed to the Geek Rewind community, always ready to answer questions and engage in discussions.

No comments yet — be the first to share your thoughts!