How to Change OneDrive Personal Vault Lockout Time in Windows 11
You change the OneDrive Personal Vault lockout time in Windows 11 by adjusting a specific setting within the OneDrive app itself.
OneDrive Personal Vault acts as an extra secure folder for your most sensitive files, requiring an authenticated login like Windows Hello or a two-factor authentication code each time you access it. By default, this vault locks itself after 20 minutes of inactivity to protect your data.
If you work with important documents frequently and find the default 20-minute lockout too short, you can easily extend this period to suit your workflow. This adjustment gives you more seamless access without compromising security.
Change the Personal Vault lockout time by clicking the OneDrive gear icon, selecting Settings, then Account, and choosing your preferred time from the Personal Vault options. You can set it to 20 Minutes, 1 Hour, 2 Hours, or 4 Hours.
What Happens When Done?
When you change the OneDrive Personal Vault timeout, your files stay accessible for longer. Once the timer expires, the vault locks itself. You must then verify your identity again to view your files. This ensures that even if you walk away from your PC, your private data remains protected.
Method 1Using OneDrive Settings
Changing how long your OneDrive Personal Vault stays unlocked is simple using the OneDrive app on your computer.
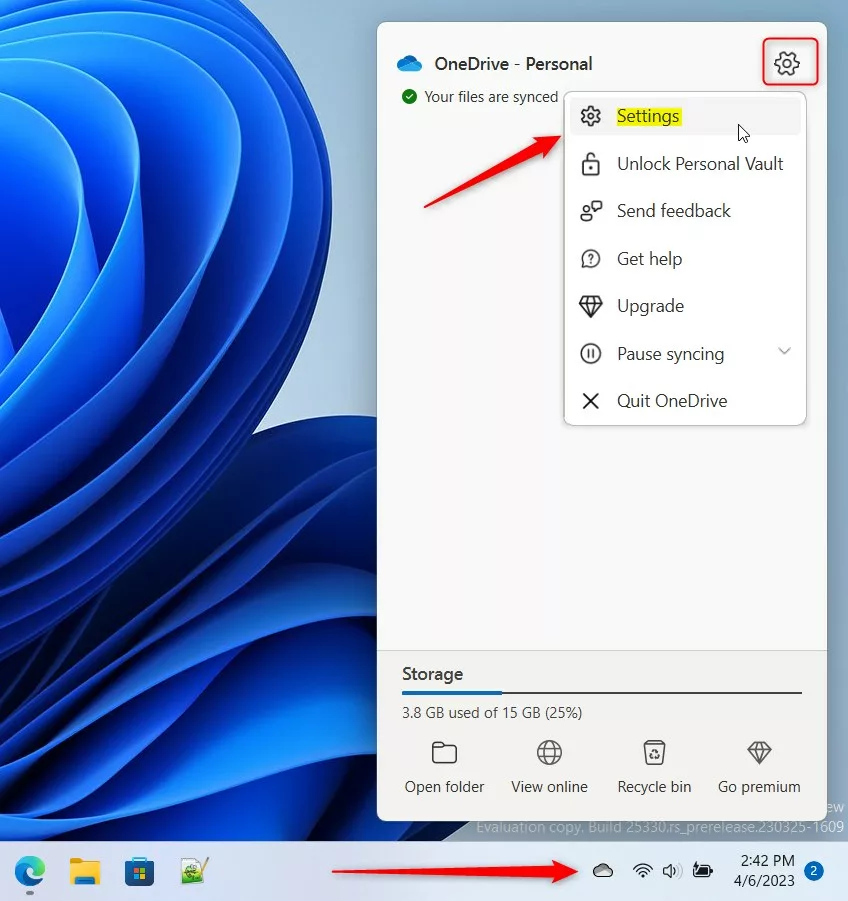
- Click the OneDrive icon in your Taskbar.
- Select the gear icon and choose Settings.
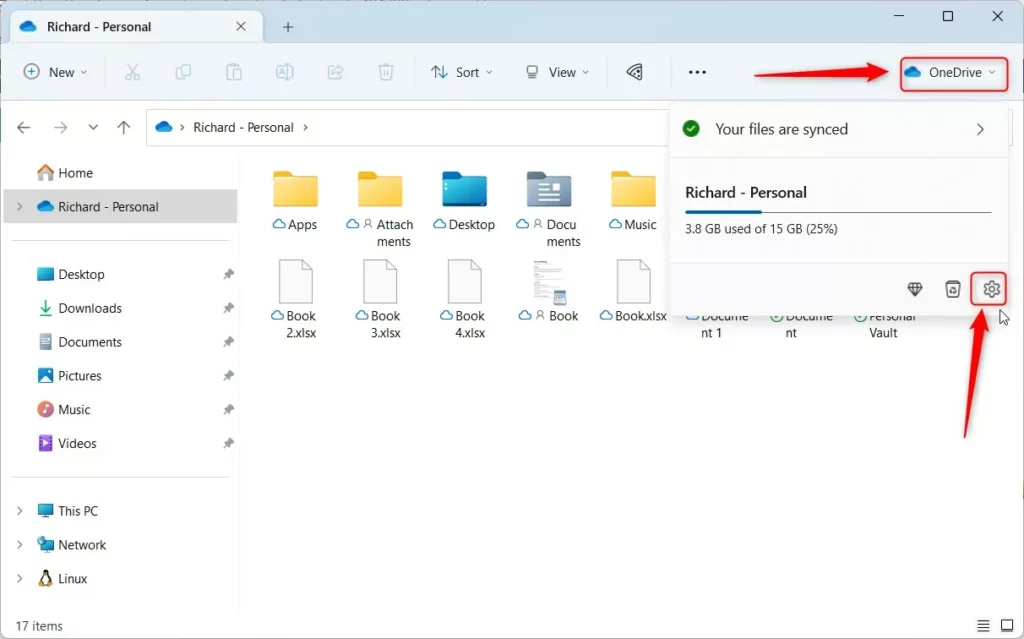
Alternatively, open your OneDrive folder in File Explorer, click the OneDrive button at the top, and select the Settings gear.
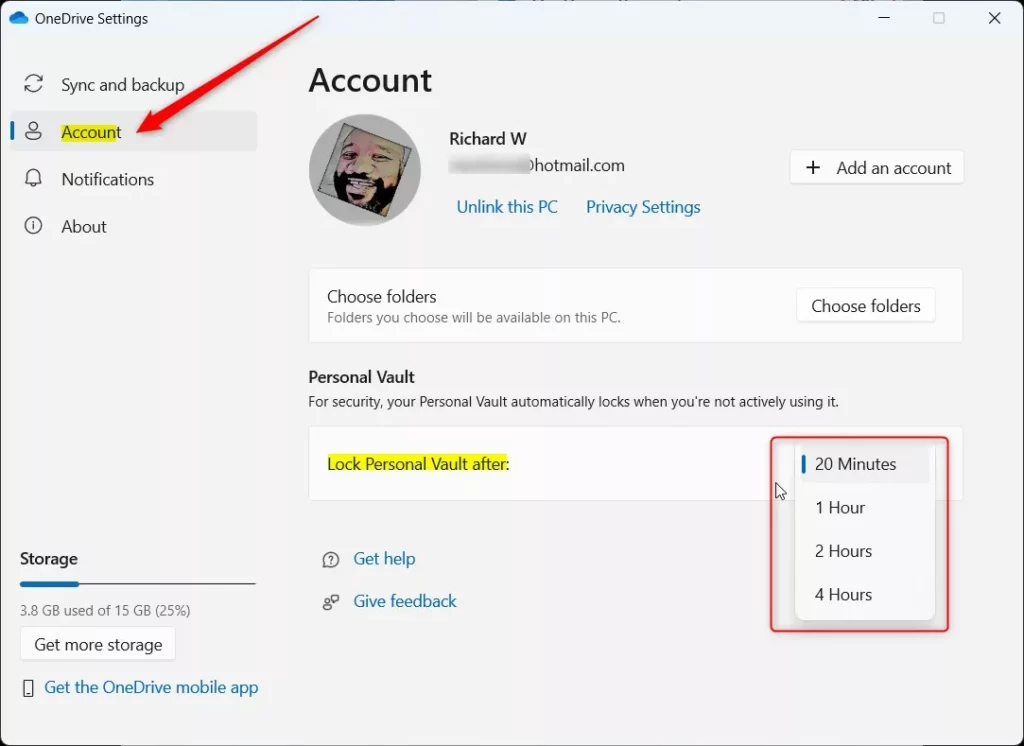
- When the window opens, click Account on the left.
- Look for Personal Vault.
- Pick the time you prefer from the list: 20 Minutes, 1 Hour, 2 Hours, or 4 Hours.
Method 2Using the Windows Registry (Advanced)
If you can’t find the setting in the OneDrive app, you can change the OneDrive Personal Vault timeout using the Windows Registry Editor, but this is for advanced users.
If the standard menu does not work, you can force the Personal Vault configuration via the Registry Editor, a tool for modifying Windows settings.
- Press ⊞ Win+R, type
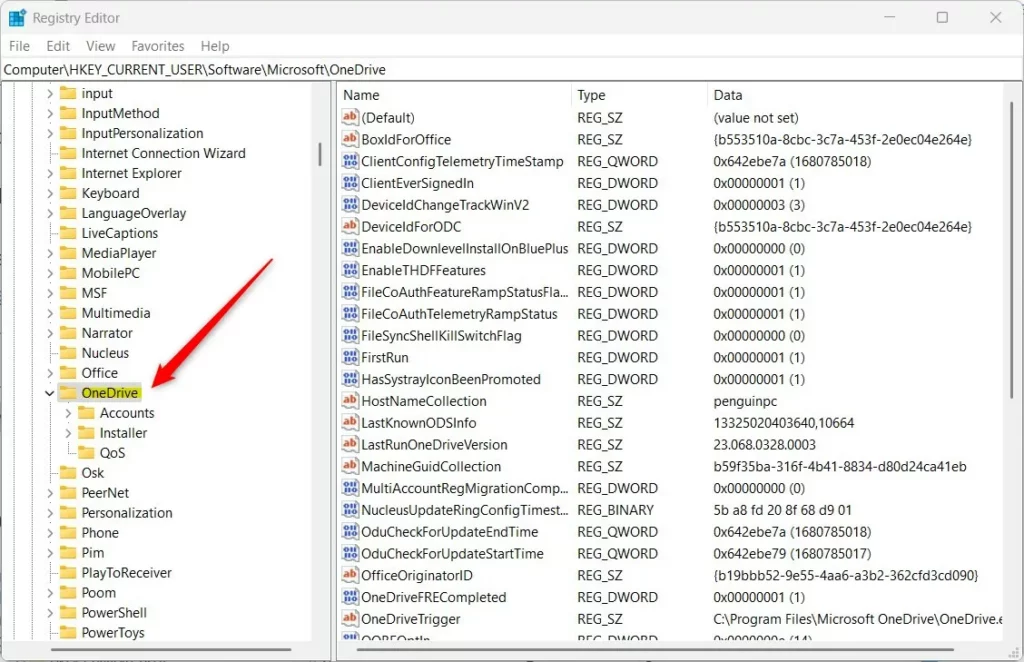
regedit, and press Enter. - Navigate to:
HKEY_CURRENT_USER\SOFTWARE\Microsoft\OneDrive - If the OneDrive folder is missing, right-click the Microsoft folder and select New > Key, naming it
OneDrive.
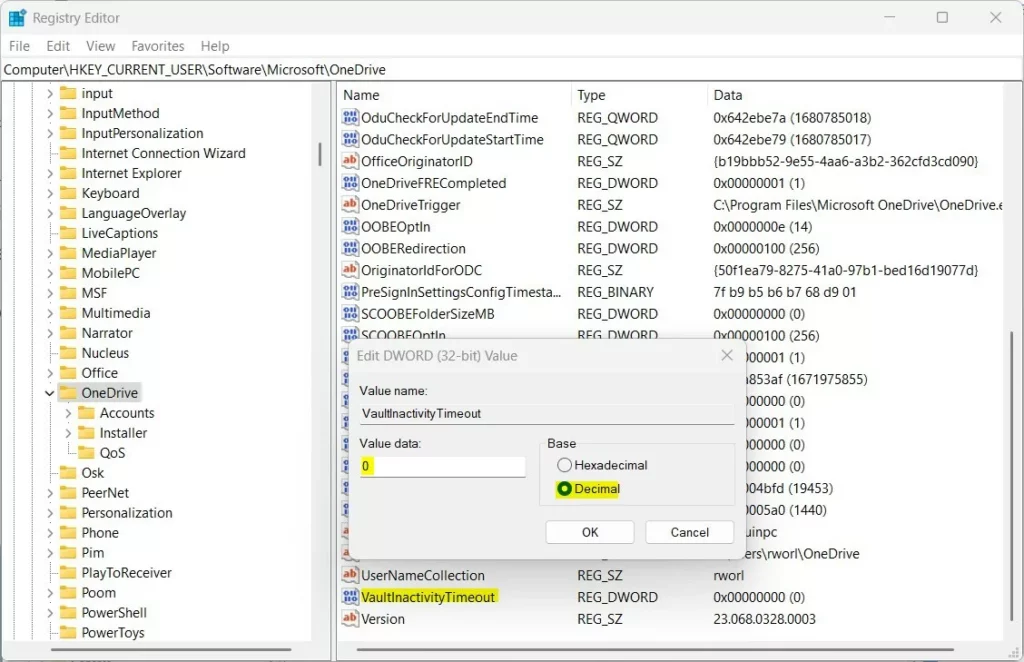
- Right-click in the empty space on the right side.
- Select New > DWORD (32-bit) Value.
- Name the item
VaultInactivityTimeout. - Double-click it, set the Base to Decimal, and enter your value (0, 1, 2, or 4).
Restart your computer to apply the changes.
Troubleshooting Lockout Issues
If your OneDrive Personal Vault locks right away, check your Windows Hello settings and make sure your computer isn’t set to sleep too quickly.
Summary
You can adjust your OneDrive Personal Vault timeout to balance security and convenience, extending the unlock time up to 4 hours using either the app settings or the Windows Registry.
Can I disable the Personal Vault timeout entirely?
No, you cannot disable the timeout entirely. Microsoft enforces this security measure to protect your data. The maximum duration you can select is 4 hours. This ensures that your files are not left exposed indefinitely if you forget to lock your computer or step away from your desk.
Why does my Personal Vault lock immediately after minimizing the window?
This usually happens if there is a sync error or a conflict with your Windows user profile. Try clearing your OneDrive cache or ensuring that your Windows 11 system is fully updated. If the issue persists, reset the OneDrive app to restore default behavior and fix potential configuration bugs.
Was this guide helpful?

About the Author
Richard
Tech Writer, IT Professional
Richard, a writer for Geek Rewind, is a tech enthusiast who loves breaking down complex IT topics into simple, easy-to-understand ideas. With years of hands-on experience in system administration and enterprise IT operations, he’s developed a knack for offering practical tips and solutions. Richard aims to make technology more accessible and actionable. He's deeply committed to the Geek Rewind community, always ready to answer questions and engage in discussions.

[…] default, your OneDrive Vault will automatically lock after a period of inactivity in Windows. Howerver, you can lock or unlock your Vault […]