How to Enable or Disable Snipping Tool Screenshot Saving in Windows 11


You can enable or disable the automatic saving of screenshots taken with the Snipping Tool in Windows 11.
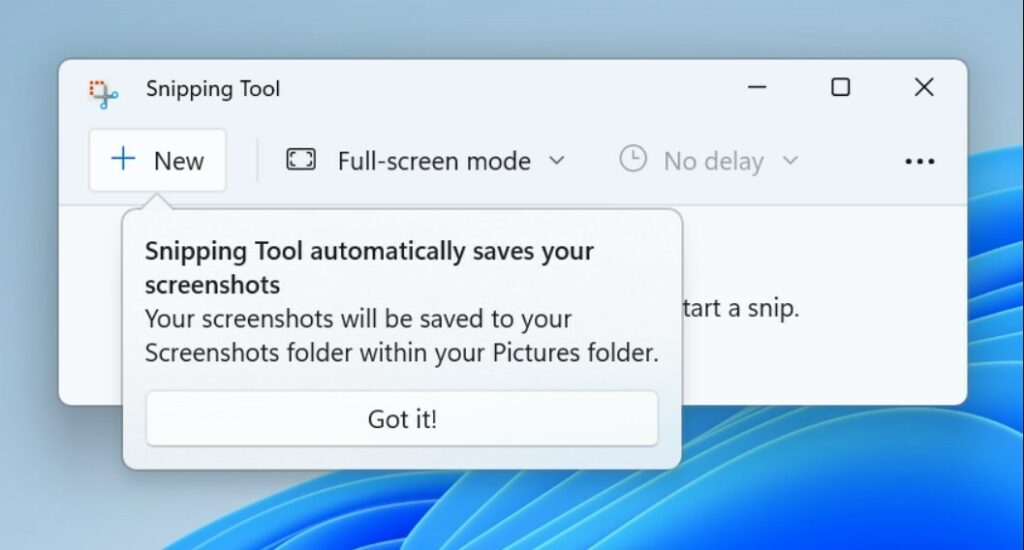
The Snipping Tool, accessed via the ⊞ Win+Shift+S shortcut, lets you capture parts of your screen. By default, Windows 11 automatically saves these captured images to the `pictures-folder-in-windows-11/" class="sal-link" rel="noopener" target="_blank" data-sal-id="12451">Pictures\Screenshots` folder, typically located at `📁C:\Users\YourUsername\Pictures\Screenshots`.
You might want to disable this auto-save feature to conserve hard drive space or maintain cleaner folders. Conversely, enabling it ensures you never accidentally lose an important screenshot.
Once you adjust this setting, the Snipping Tool will either automatically create files or only copy them to your clipboard. If disabled, you must manually paste each screenshot into an application like Paint or Word.
How to Enable or Disable Automatic Saving
The Snipping Tool is a modern app, so you manage most settings directly inside its interface.
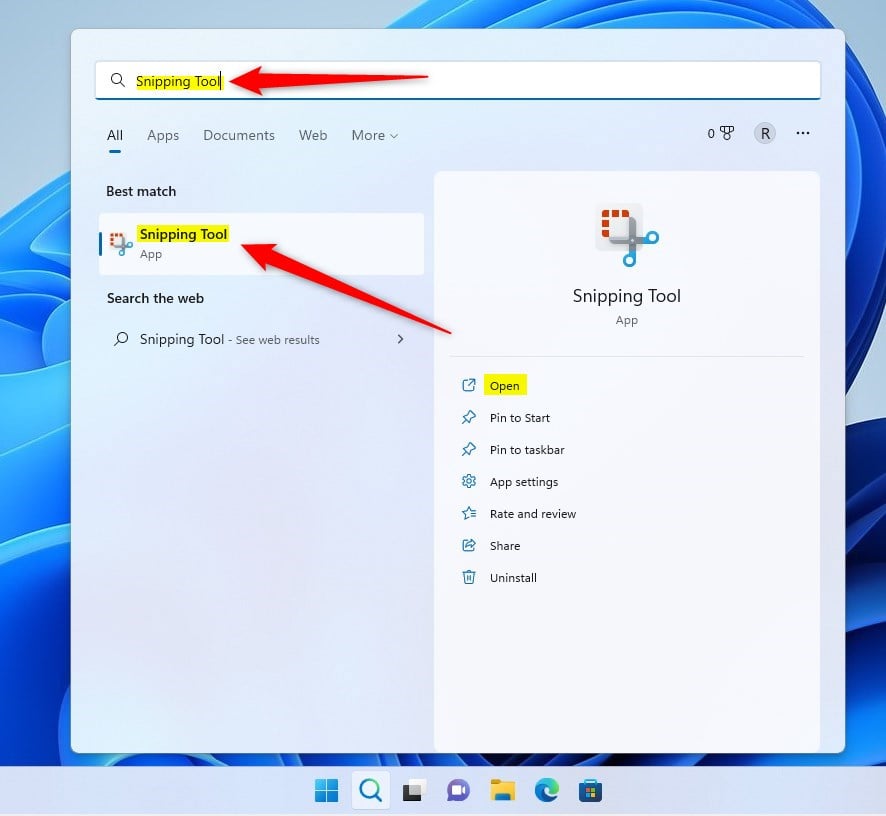
- Open the Start menu.
- Search for Snipping Tool and click to open it.
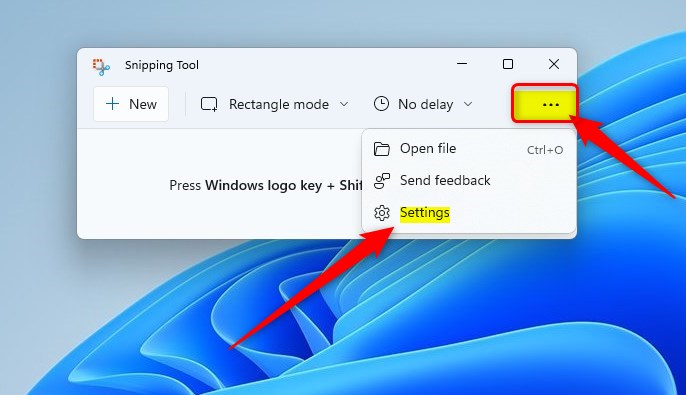
- Click the three dots (ellipses) in the top right corner.
- Select Settings from the menu.
- Locate Automatically save screenshots.
- Click the toggle switch to turn it On or Off.
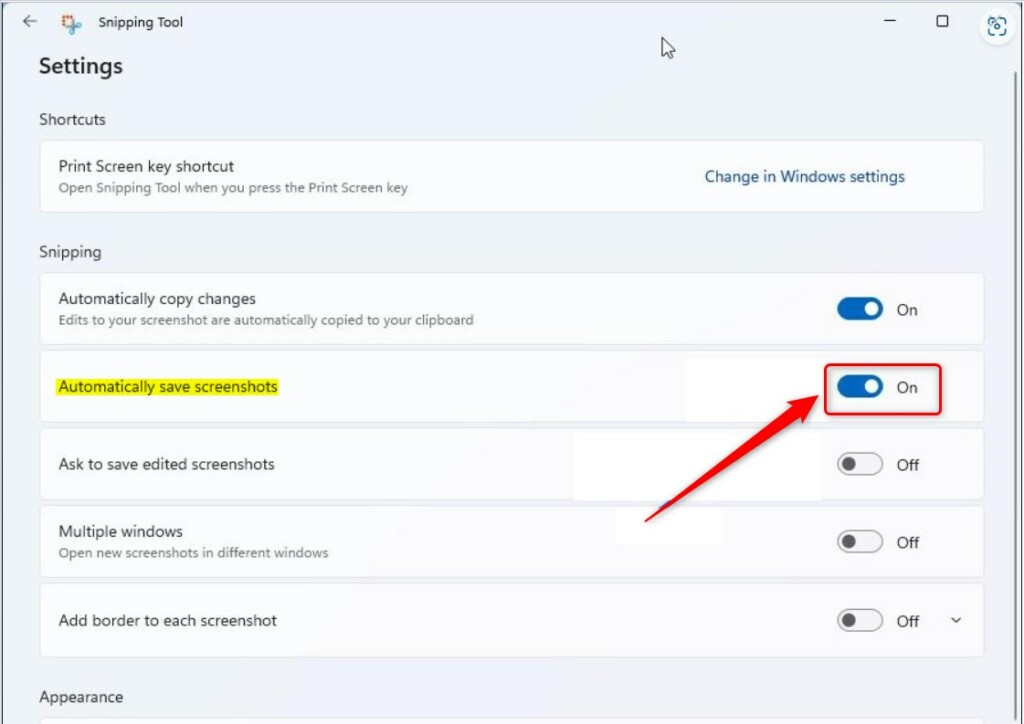
Your changes take effect immediately. Simply close the settings window to finish.
Advanced Configuration and Troubleshooting
Sometimes the tool fails to save files. This is often due to permission issues in your Pictures library. If you receive an ‘Access Denied’ error, ensure your user account has write permissions to the folder.
Customizing Save Locations and Formats
While the app defaults to PNG, you can change the file format by using the ‘Save As’ option after taking a snip. To automate saving to OneDrive, ensure your Pictures folder is set to sync within the OneDrive settings menu.
Clearing Clipboard History
If you disable auto-save, your screenshots stay in your clipboard. To clear this and free up memory, press ⊞ Win+V and click Clear all.
Summary
Managing your Snipping Tool screenshot saving settings helps keep your computer organized. By toggling the automatic save feature, you control whether files clutter your Pictures\Screenshots folder or stay in your clipboard. For more details, visit the official Microsoft documentation.
Why does my Snipping Tool not save automatically?
If your screenshots are not saving, check the Snipping Tool settings to ensure ‘Automatically save screenshots’ is toggled to On. Also, verify that your Pictures folder is not set to read-only, as this prevents the app from writing new files to your hard drive.
How do I change the default file format for Snipping Tool?
The Snipping Tool currently defaults to PNG for high-quality images. To save in a different format like JPG, you must manually select ‘Save As’ after taking the screenshot and choose your preferred file type from the dropdown menu in the File Explorer window.
Was this guide helpful?
[…] 11 has a new Snipping Tool app that replaces the classic Snip & Sketch app in previous versions for taking […]