How to Enable or Disable Snipping Tool Screenshot Saving in Windows 11


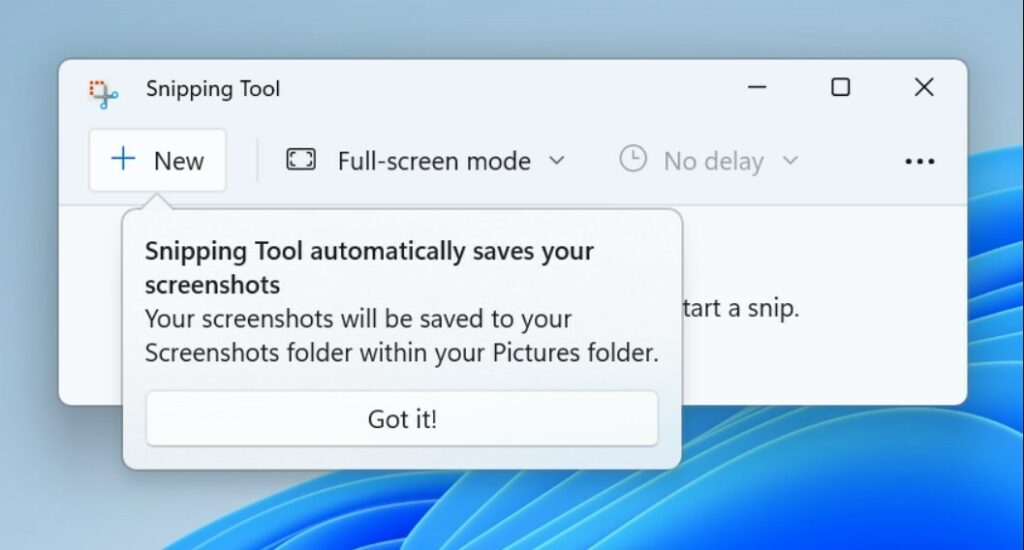
Snipping Tool screenshot saving in Windows 11 controls whether your screen captures are saved automatically as files. In Windows 11 versions after the May 2024 update, screenshots taken with Snipping Tool tend to be saved straight to your Pictures\Screenshots folder.
You can capture part of your screen with shortcuts like Win+Shift+S. With auto-save on, each capture is saved as an image file. With it off, the capture is only copied to the clipboard, and you paste it into an email, chat or document, or save it yourself.
Turning auto-save off keeps your folders tidy and saves disk space. Leaving it on means you won’t lose a screenshot by accident, because every snip is already a file. Pick the one that matches how you work. You can change it at any time.
Open the Snipping Tool, click the three dots, select Settings, and toggle “Automatically save screenshots” on or off. This setting controls whether your captured images are saved to the PicturesScreenshots folder or only copied to your clipboard. Your changes apply immediately.
How to Enable or Disable Automatic Saving
Snipping Tool has a setting for automatic saving in its own settings menu. You can leave it on so every screenshot is saved to your computer right away. You can also turn it off and choose where each screenshot goes yourself. The steps below work on all editions of Windows 11, Home and Pro. No administrator rights are needed, because the setting applies only to your user account.
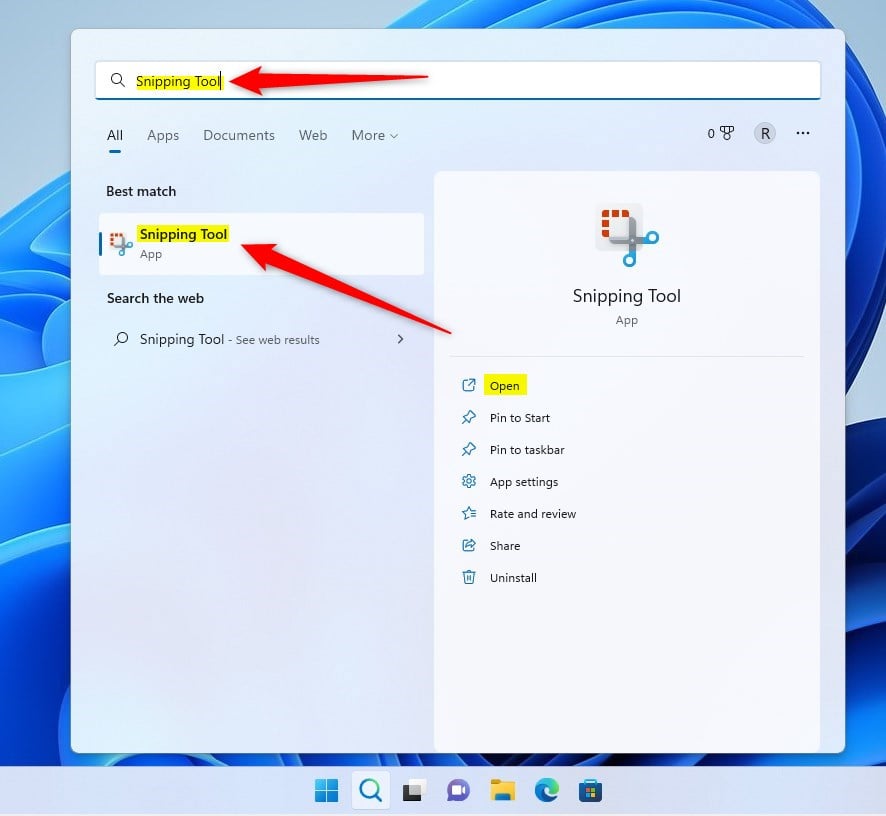
- Open the Start menu.
- Search for Snipping Tool and click to open it.
The Snipping Tool window should now be open on your screen. If it doesn’t appear in the search results, open the Microsoft Store and update the app. Older versions of Snipping Tool have a different layout and may not include the setting described below.
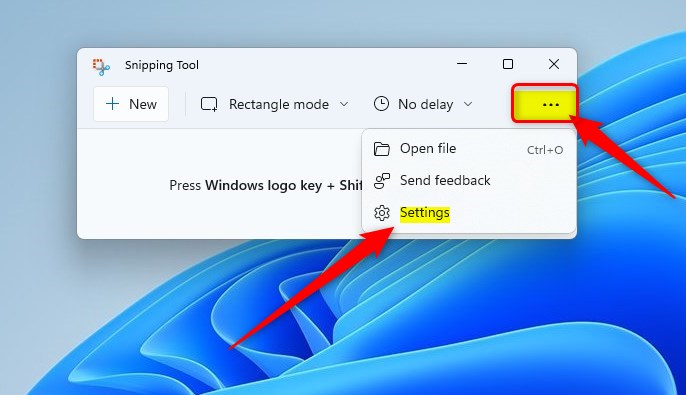
- Click the three dots (ellipses) in the top right corner of the Snipping Tool window.
- Select Settings from the menu.
The Snipping Tool settings page should now be showing, with a list of options for screenshots and how the app behaves. Keep it open for the next step.
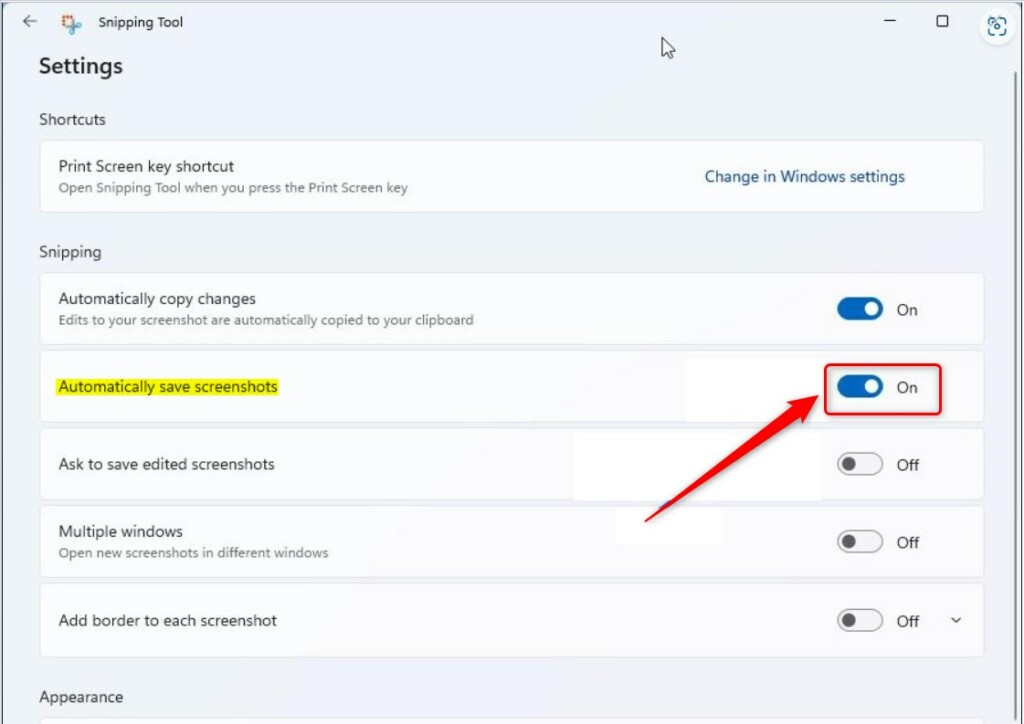
- Locate Automatically save screenshots. In some versions of the app, the label reads Automatically save original screenshots. It is the same option.
- Click the toggle switch to turn it On or Off.
The toggle should now show the new state. On means each screenshot is saved to Pictures\Screenshots automatically. Off means screenshots are only copied to the clipboard until you save them yourself. If you change your mind, return to this page and flip the toggle back.
Your changes take effect immediately. You don't need to restart Snipping Tool or Windows. Close the settings window to finish. To test it, press Windows+Shift+S, take a snip, and then look in Pictures\Screenshots in File Explorer. With auto-save on, a new file should be there. With it off, nothing new should appear.
Advanced Configuration and Troubleshooting
Occasionally, the Snipping Tool might fail to save files. This often happens because of permission issues with your Pictures library (the folder where your images are stored). If you receive an 'Access Denied' error, make sure your user account has write permissions to the folder.
To check, right-click the folder in File Explorer, choose Properties, open the Security tab and look at the permissions for your account. If the Ransomware protection feature in Windows Security (Controlled folder access) is on, it can also block apps from writing to protected folders. In that case, allow Snipping Tool through it. If the drive is full, free up some space and try again.
Customizing Save Locations and Formats
While the app defaults to PNG, you can change the file format using the 'Save As' option after taking a snip. In the save dialog, pick another format from the Save as type list, such as JPG, if you want a smaller file.
To automate saving to OneDrive, make sure your Pictures folder is set to sync within the OneDrive settings menu. Once it is, screenshots saved to Pictures\Screenshots are backed up along with the rest of that folder. This only works while auto-save is on, or when you save the file yourself into that folder.
Clearing Clipboard History
If you disable auto-save, your screenshots stay in your clipboard until you paste or save them. A new copy replaces the previous one, so save anything you want to keep before you take another snip. To clear your clipboard history and free up memory, press Windows+V and then click Clear all. If clipboard history is turned off, Windows+V will offer to turn it on. You can skip that if you only want to clear things.
Summary
Managing your Snipping Tool screenshot saving settings helps keep your computer organized. By toggling the automatic save feature, you control whether files pile up in your Pictures\Screenshots folder or stay in your clipboard. The toggle works on every edition of Windows 11, takes effect at once, and you can reverse it any time. For more details, visit the official Microsoft documentation.
Have a question about this guide?
Answered by AI from this guide. Good questions may be added to this page — please don't include personal details.
Did this guide fix your problem?

About the Author
Richard
Tech Writer, IT Professional
Richard is a writer at Geek Rewind who turns complex IT tasks into clear, step-by-step guides. He draws on years of hands-on experience in system administration and enterprise IT operations, focusing on Windows, Linux and WordPress: the problems people actually run into, and the fixes that work. His server and WordPress guides come from systems he runs himself. Richard builds and maintains the platform behind Geek Rewind, from its Ubuntu servers and Nginx configuration to its custom WordPress plugins. Many new tutorials start with readers' questions, and he's always glad to answer them in the comments.
[…] 11 has a new Snipping Tool app that replaces the classic Snip & Sketch app in previous versions for taking […]