How to Change WiFi Network Profile in Windows 11


You can change your WiFi network profile in Windows 11 to either Public or Private to control how your PC interacts with other devices on the network.
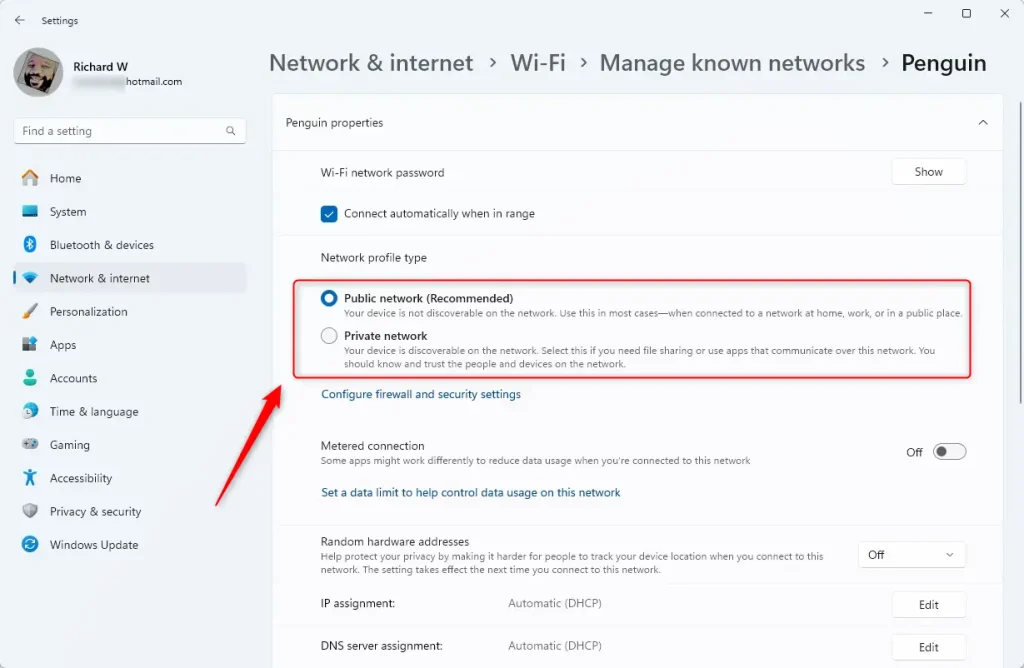
A Public profile hides your PC from other devices, enhancing security when you’re connected to untrusted networks like those in coffee shops or airports. A Private profile allows your PC to be discoverable and interact with other devices, which is ideal for home or office networks where you might want to share files or printers.
Switching between these profiles is simple and ensures you have the right balance of security and functionality. For instance, Windows 11 defaults to a Private profile for your home network, enabling features like network discovery and file sharing.
Quick Summary: Network Profile Settings
| Profile | Best For | Security Level | Sharing |
|---|---|---|---|
| Public | Coffee shops, Airports | High | Disabled |
| Private | Home, Office | Medium | Enabled |
Windows 11 uses network profiles to decide how your computer talks to other devices. Choosing the right profile keeps your data safe. Why do this? It controls your firewall and discovery settings. What happens when done? Your computer either hides itself from others or opens up for file and printer sharing.
Understanding Public vs. Private Profiles
A Public network profile is your default shield. It turns off network discovery, meaning other devices cannot see your PC. A Private network profile is for trusted spaces. It allows your computer to be seen by other devices, which is necessary for enabling file sharing in Windows 11.
Why does my network keep reverting to Public?
Windows often resets to Public for security. If your router settings change or you connect to a new access point, Windows treats it as a fresh, untrusted connection.
Is it safe to set my home network to Public?
It is safe, but it will block your ability to use network printers or shared folders. Only use Public at home if you have no need for local device communication.
Method 1Using Windows Settings (Easiest)
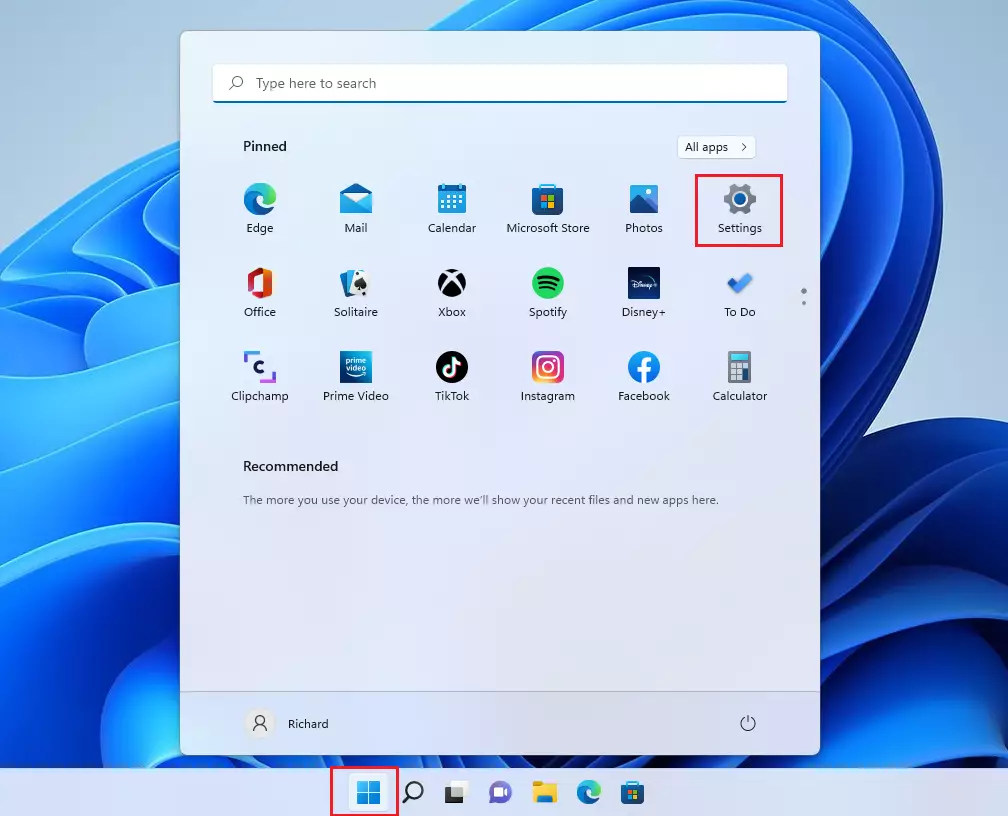
1. Open Settings (⊞ Win+I).
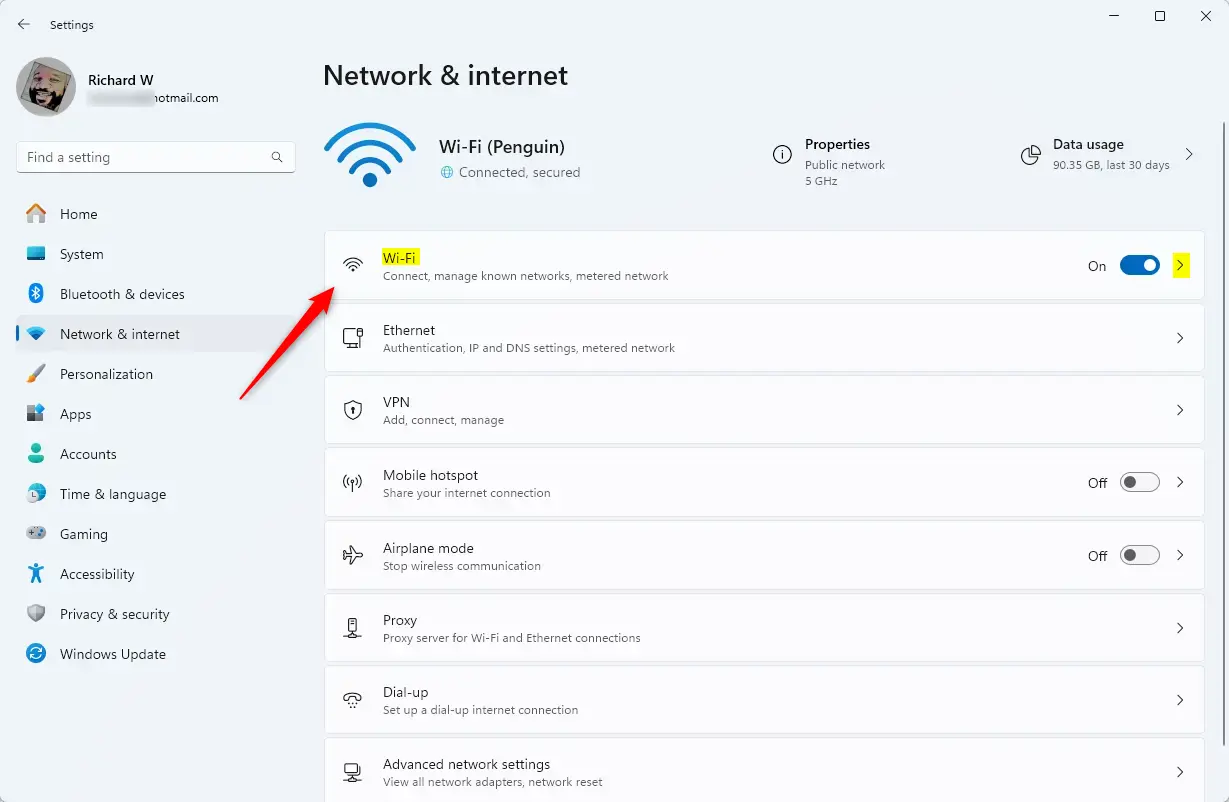
2. Go to Network & internet.
3. Click WiFi.
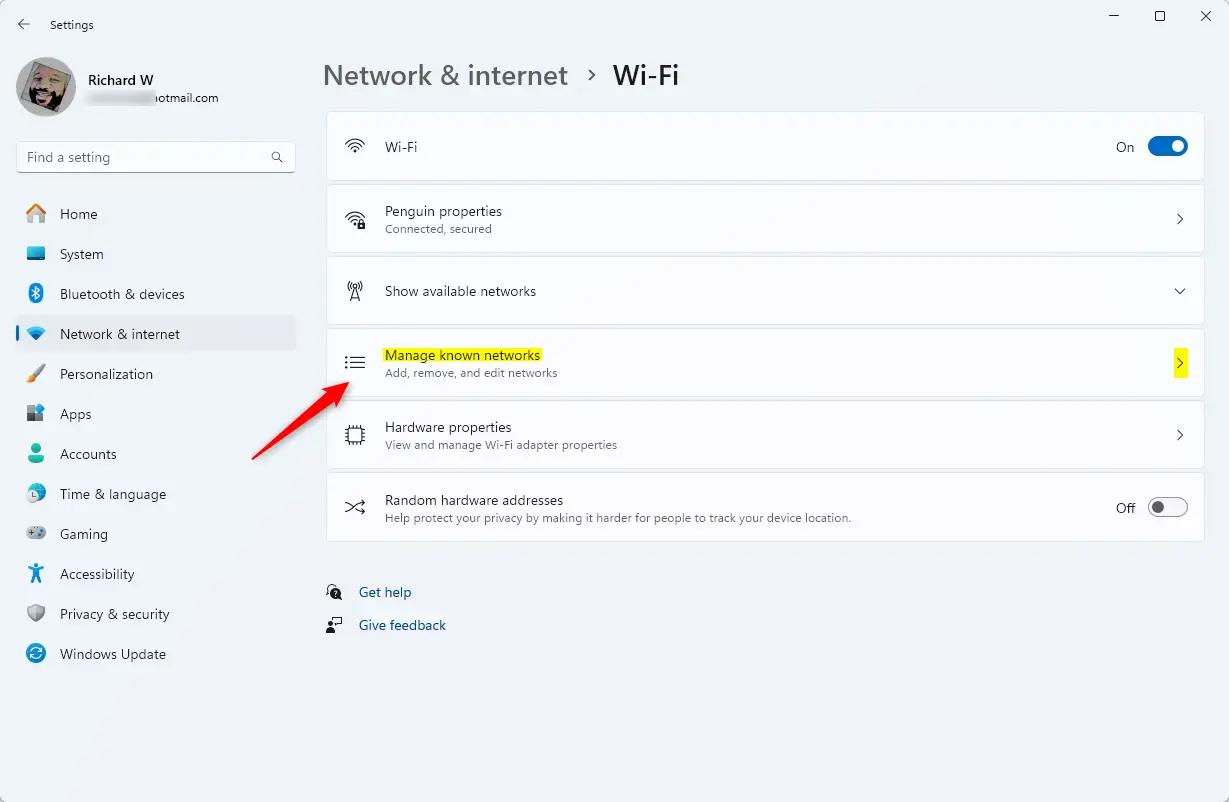
4. Select Manage known networks.
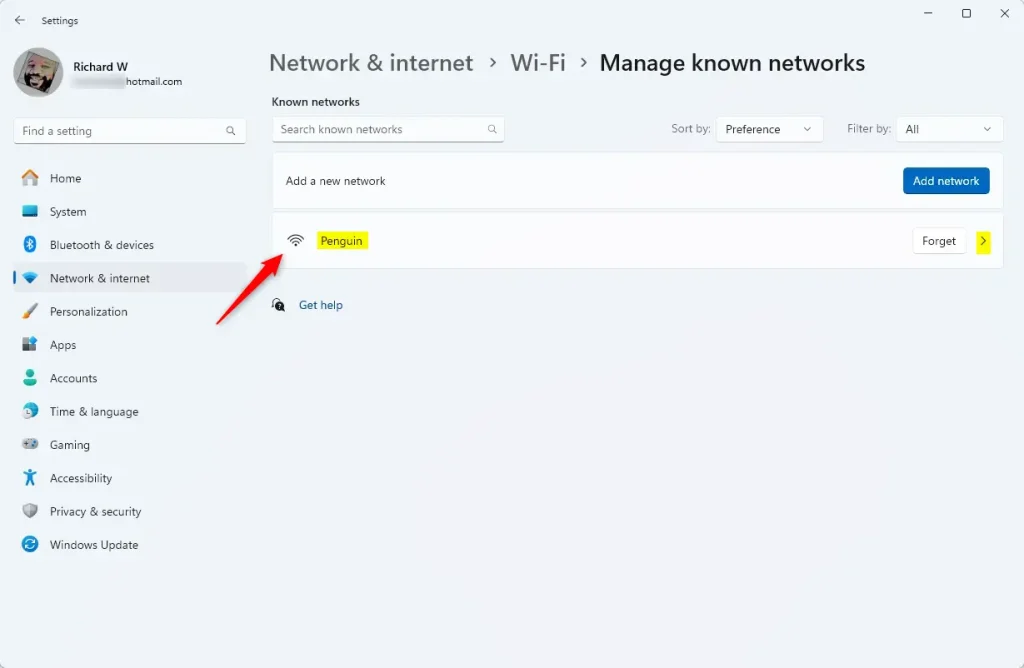
5. Click your network name.
6. Change Network profile type to Public or Private.
Method 2PowerShell (Admin Required)
Note: This requires running PowerShell as an administrator. Right-click the Start button and select Terminal (Admin).
Use the Get-NetConnectionProfile command to see your current status. To change it, use the Set-NetConnectionProfile command:
Set-NetConnectionProfile -Name "YourNetworkName" -NetworkCategory Private
Replace “YourNetworkName” with your actual network name. This works for both WiFi and Ethernet.
Method 3Windows Registry (Advanced)
Note: Requires Admin privileges. Modifying the registry incorrectly can cause system issues.
1. Press ⊞ Win+R, type regedit, and hit Enter.
2. Navigate to: HKEY_LOCAL_MACHINE\SOFTWARE\Microsoft\Windows NT\CurrentVersion\NetworkList\Profiles
3. Look through the folders to find your network name in the ProfileName value.
4. Change the Category value: 0 for Public, 1 for Private.
Troubleshooting Connectivity
If you cannot see other devices, ensure your profile is set to Private. If you still have issues, check your Windows firewall settings to ensure file and printer sharing is allowed through the firewall.
Summary
You have learned how to change your network profile using Settings, PowerShell, and the Registry. Always use Public for untrusted networks and Private for home. This simple change balances your security needs with the convenience of sharing files across your local network.” }
Can I change the network profile for an Ethernet connection?
Yes, you can change the profile for Ethernet connections using the same methods. In Settings, go to Network & internet, click Ethernet, and toggle the Network profile type. You can also use the PowerShell method, which applies to both WiFi and wired connections equally.
Was this guide helpful?

About the Author
Richard
Tech Writer, IT Professional
Richard, a writer for Geek Rewind, is a tech enthusiast who loves breaking down complex IT topics into simple, easy-to-understand ideas. With years of hands-on experience in system administration and enterprise IT operations, he’s developed a knack for offering practical tips and solutions. Richard aims to make technology more accessible and actionable. He's deeply committed to the Geek Rewind community, always ready to answer questions and engage in discussions.


[…] default, your Windows device with WiFi adapters will allow users to enable or disable the ability to connect to a WiFi network. No particular […]
[…] More details here: Change network profile in Windows 11 […]