Select Multiple Files with a Selection Rectangle in Windows 11


A selection rectangle is a box you draw with the mouse to pick several files or folders at once. In Windows 11, you click an empty spot in a File Explorer folder, hold the left mouse button, and drag. Every file and folder the box touches gets selected. It is also called rubber band selection, and it works the same way on the desktop.
Dragging can feel odd the first time, mostly because of where you start. Start on empty space, not on a file, or you will move the file instead of selecting it.
The rest of this article shows you where to start, how to add to or remove items from a selection, how to scroll while you drag, and how to change how the box looks. It also covers check boxes, a good option when dragging is hard to control.
To select several files at once in File Explorer , click an empty spot in the folder, hold the left mouse button, and drag across the files. A selection rectangle appears, and every file or folder it touches is highlighted. Start the drag on empty space, not on a file name, or Windows moves the file instead.
What the Selection Rectangle Does
The selection rectangle is the box that follows your pointer while you drag across empty space. You do not need to enclose a file completely. Touching any part of its icon or name row is enough to select it. Selected items are highlighted, and the status bar at the bottom left of File Explorer shows a count such as 3 items selected.
Compared with Ctrl+click (holding Ctrl and clicking each file in turn), it is faster when the files you want sit next to each other. Compared with Shift+click, it is better when the files form a block in an icon grid rather than a single run in a list.
How to Use the Selection Rectangle in File Explorer
Start with the basic method. It needs no special settings and no administrator rights.
- Open File Explorer by pressing Windows key + E, then open the folder that holds your files.
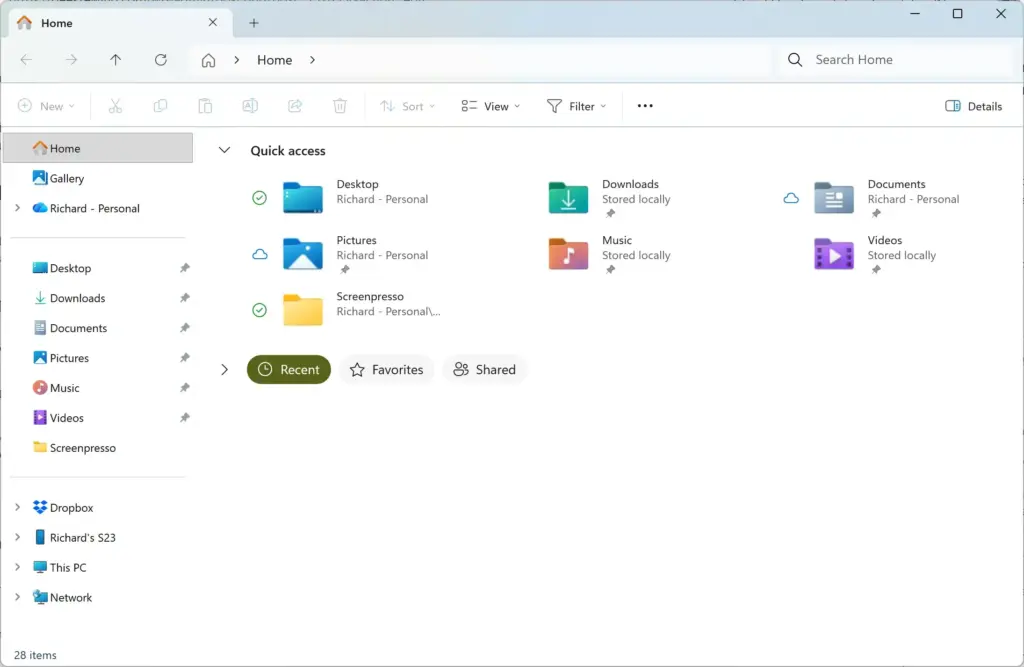
Windows 11 File Explorer showing Dropbox folder in sidebar. - Find an empty area next to the files you want, such as the blank space beside or below an icon. Move the pointer there. Do not put it on a file or folder name.
- Press and hold the left mouse button.
- Drag the pointer across the files. A box grows from the point where you pressed. The items it touches turn highlighted as you go.
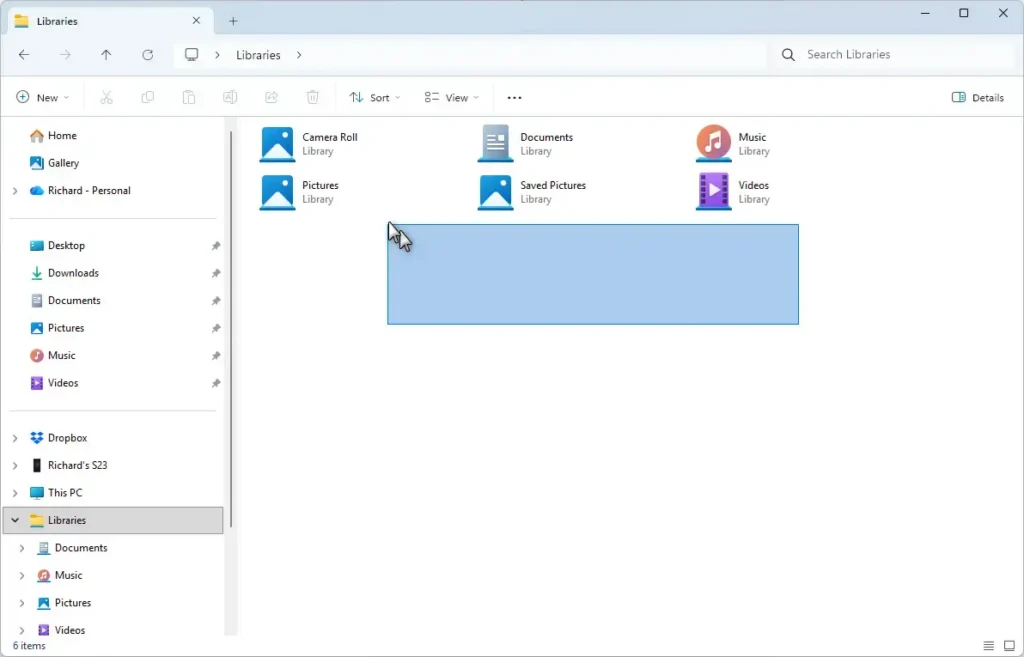
- Release the mouse button when every file you want is highlighted. The selection stays in place, and the status bar shows how many items are selected.
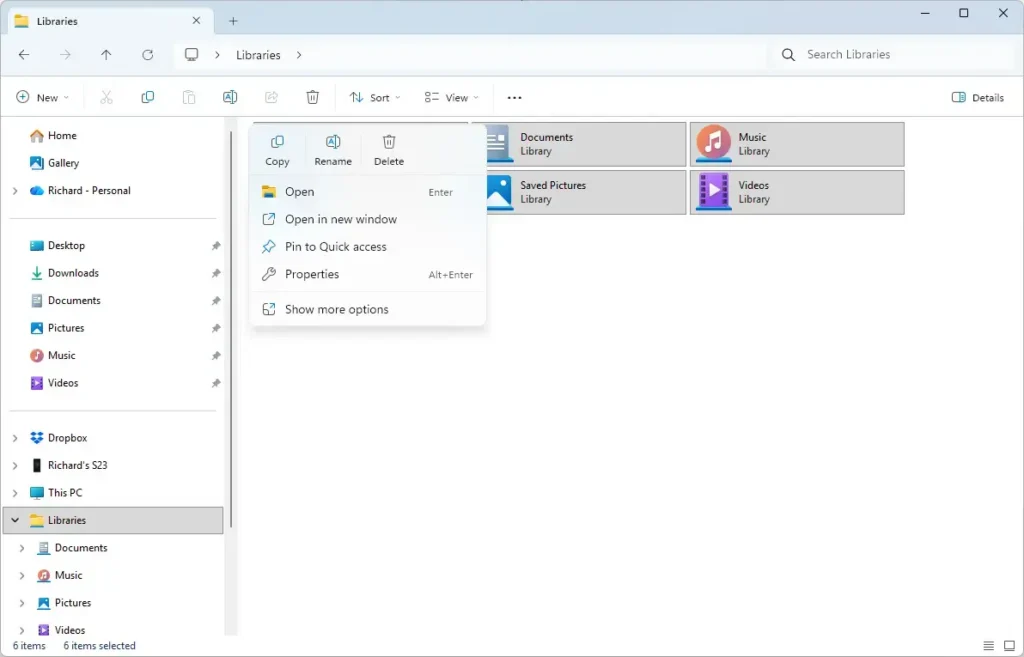
- Use the selection. Press Ctrl+C to copy, Ctrl+X to cut, or Delete to send the items to the Recycle Bin. You can also right-click any highlighted item for the full menu.
To clear the selection, click an empty area of the folder or press an arrow key.
If the Files Move Instead of Being Selected
This happens when you press the mouse button on top of a file or folder. Windows reads that as a drag-and-drop (moving an item by dragging it to a new place), so the item moves with the pointer and no box appears. Release the button over the folder you started in, and the file goes back where it was. If you drop it onto another folder by accident, press Ctrl+Z straight away to undo the move.
Start the drag from empty space instead. If the folder is so full that no empty space is visible, drag from the margin at the far edge of the window, or scroll down to find a blank area below the last item.
Using It in Details View
Details view lists files in rows with columns such as Name, Date modified, and Size. Each row fills the full width of the list, so it is harder to find a spot that counts as empty. Start the drag in the blank area below the last file, or to the right of the last column. If you start on a row, you drag that file instead.
If every file in Details view is covered edge to edge, make the window slightly wider or narrow one of the columns by dragging a column divider. That leaves a strip of empty space on the right to start from.
Using It in Icon and Tile Views
In the icon views (Extra large icons, Large icons, Medium icons, Small icons) and in Tiles, the gaps between items make good starting points. To switch views, select View on the File Explorer command bar and pick a layout. Large and medium icon views are the easiest for dragging, because the empty gaps are wide.
Add or Remove Files from a Selection
You can adjust a selection without starting over. Hold Ctrl while you work.
- Select your first group of files with the selection rectangle.
- Hold down Ctrl.
- Start a new drag from empty space while still holding Ctrl. The first group stays highlighted, and the new box adds to it.
- Release the mouse button, then release Ctrl. Both groups are now selected together.
To remove a single file, hold Ctrl and click it. Its highlight disappears and the rest of the selection stays. Dragging a box while holding Ctrl can switch off files that are already selected. Check the highlights before you act on the selection.
For a plain run of files in a list, there is a faster option. Click the first file, hold Shift, and click the last. Everything between them is selected. To select everything in the folder, press Ctrl+A.
Scroll While You Drag in a Long Folder
You do not need to fit every file on screen. Keep the mouse button held and move the pointer past the top or bottom edge of the file list. The folder scrolls on its own, and the box keeps growing so it takes in the files that pass by. Slide the pointer back inside the list to slow or stop the scrolling.
If the folder scrolls too fast to control, make the window taller, or move the pointer only slightly past the edge. A small overshoot scrolls more slowly than a large one.
Change How the Selection Rectangle Looks
On most PCs the box is shaded blue and see-through. If you see only a thin dotted outline, or no shading at all, the visual effect called Show translucent selection rectangle is turned off. Selection still works, but the box is harder to read. This setting applies to your user account. You do not normally need administrator rights to change it.
- Open Settings by pressing Windows key + I.

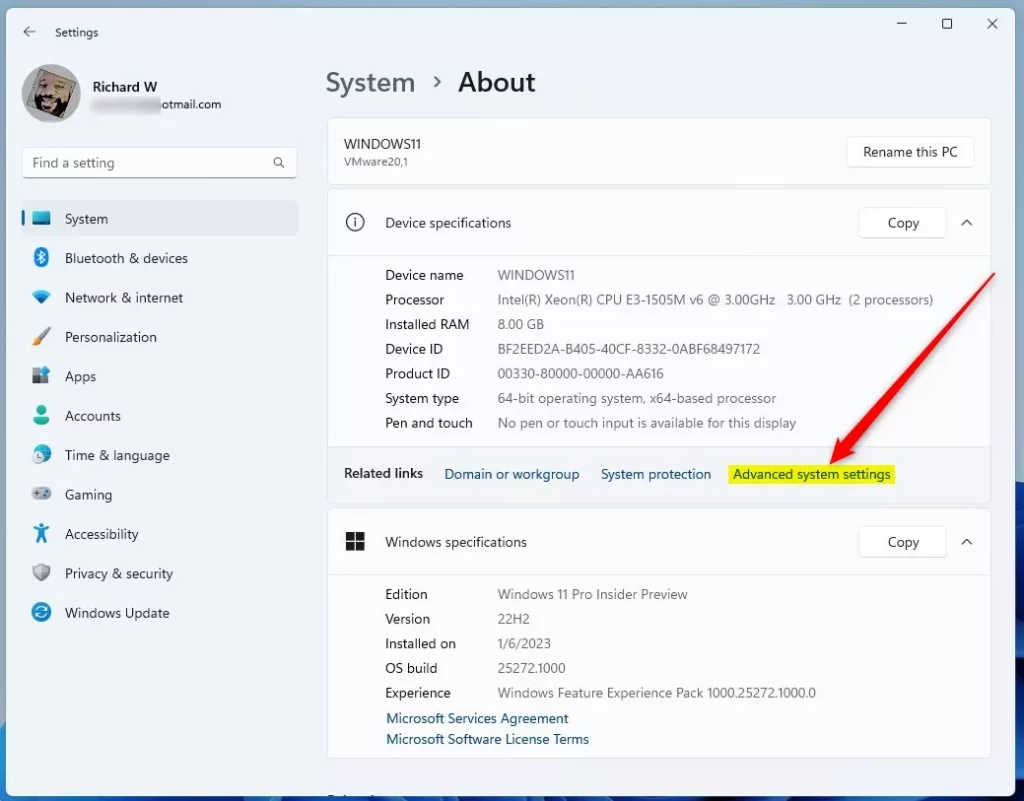
Windows 11 Start menu with Settings gear icon highlighted. - Go to System About
- Under Related links, select Advanced system settings. The System Properties window opens. If Windows asks for administrator approval, approve it.
windows about advanced system settings - Select the Advanced tab.
- Under Performance, select Settings. The Performance Options window opens on the Visual Effects tab.
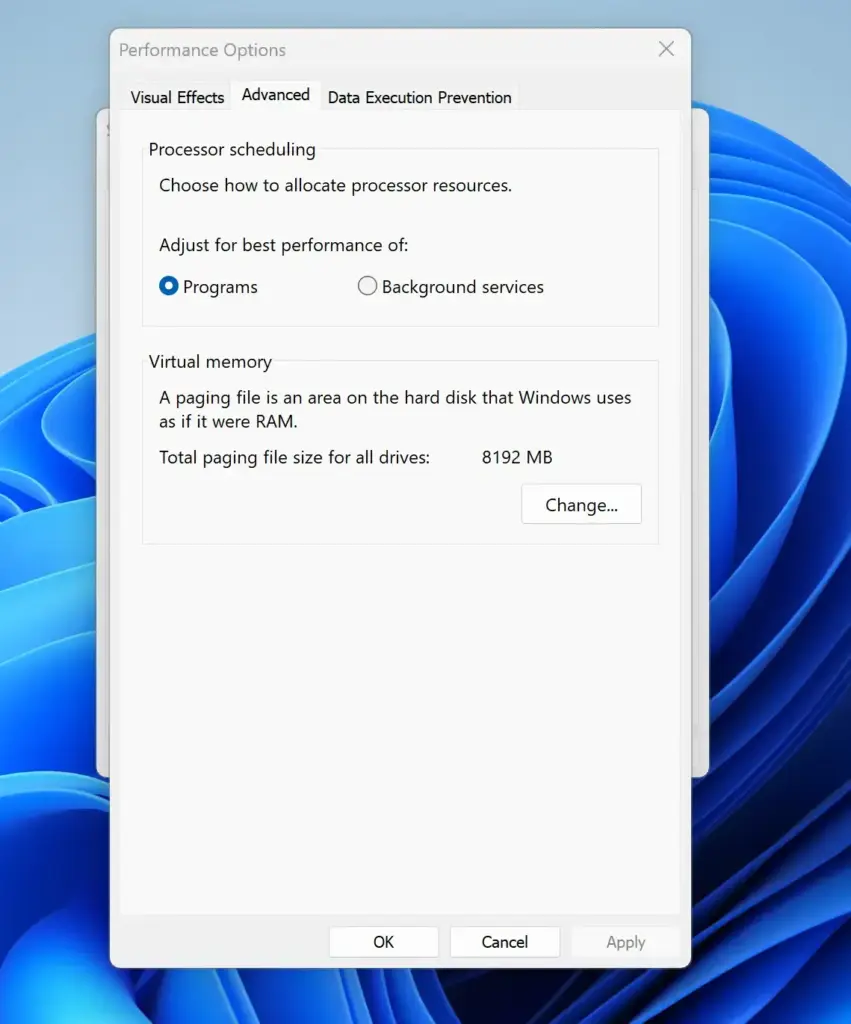
- Find Show translucent selection rectangle in the list. Tick the box to turn the shading on, or clear it to get a plain dotted outline.
- Select OK, then select OK again to close System Properties. The change takes effect without a restart. Drag in a folder to check the result.
To undo the change, return to the same list and reverse the tick box.
Why the Setting Is Already Off or Keeps Changing
The Visual Effects tab has four preset options at the top: Let Windows choose what's best for my computer, Adjust for best appearance, Adjust for best performance, and Custom. If someone chose Adjust for best performance, Windows clears all the effects below, including the translucent rectangle. When you then tick one box, the preset switches to Custom. This is normal.
If you choose Adjust for best appearance, Windows turns on every effect at once. That brings the translucent rectangle back, but it also turns on animations you may have disabled on purpose.
Select Files Without Dragging
Dragging is not comfortable for everyone. It can be hard because of a touchpad, hand pain, or a touch screen. If dragging is difficult because of a touchpad, a hand strain, or a touch screen, File Explorer has a second way to select several files: check boxes.
- Open a folder in File Explorer.
- Select View on the command bar.
- Point to Show, then select Item check boxes. A check mark appears next to the option. A small empty box now shows when you point at a file.
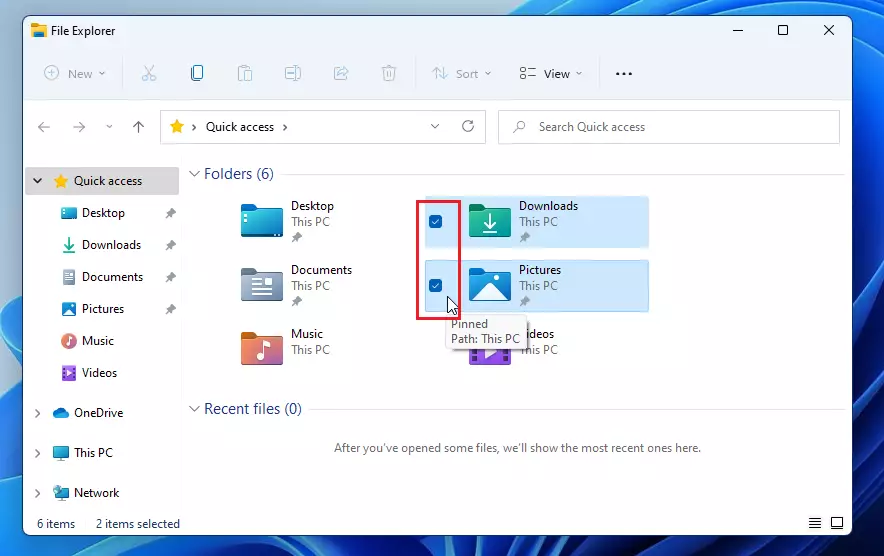
file explorer check boxes on windows 11 - Tick the check box beside each file you want. Every ticked file stays selected until you clear the box. The status bar count goes up with each tick.
- Tick the box in the column header, if your view shows one, to select every file in the folder at once.
You can also reach this setting from the older Folder Options window. Select See more (the three dots) on the command bar, then select Options. Open the View tab, and under Advanced settings tick Use check boxes to select items. Select OK.
The check boxes work in every folder, so the setting is not tied to one location. To turn them off, repeat the steps and clear the same option.
On a touch screen, the check boxes are the most reliable way to build a multi-file selection. A drag from empty space often scrolls the folder instead of drawing a box, so do not rely on the rectangle there.
When the Selection Rectangle Does Not Appear
Check these causes in order. Each one produces a different symptom.
- The file moves with the pointer. You started on an item. Release over the original folder and begin again from empty space, as described above.
- The folder scrolls instead of selecting. You are on a touch screen, or your finger started on a scroll bar. Use a mouse, or switch to Item check boxes.
- Only an outline appears. The translucent effect is off. Selection is still working. Turn the effect back on in Performance Options if you want the shaded box.
- Nothing highlights, even when you start on blank space. File Explorer may have stopped responding. Restart File Explorer from Task Manager. Select Windows Explorer in the Processes list, then select Restart. The steps are in the last section.
- It works in folders but not on the desktop, or the other way round. Check that icons are not locked in a grid you can't reach. Right-click an empty part of the desktop, point to View, and check that Show desktop icons is ticked. Then start the drag from an empty patch of wallpaper.
If This Didn't Work
If the box never appears in any folder, restart File Explorer. Press Ctrl+Shift+Esc to open Task Manager, select Windows Explorer in the Processes list, and select Restart. The taskbar disappears for a moment and returns, and open File Explorer windows close. Save any work first.
Once the selection works, the next task is usually moving or copying the group. Right-click the highlighted files and choose Copy or Cut. Open the destination folder and press Ctrl+V.
Have a question about this guide?
Answered by AI from this guide. Good questions may be added to this page — please don't include personal details.
Did this guide fix your problem?

About the Author
Richard
Tech Writer, IT Professional
Richard is a writer at Geek Rewind who turns complex IT tasks into clear, step-by-step guides. He draws on years of hands-on experience in system administration and enterprise IT operations, focusing on Windows, Linux and WordPress: the problems people actually run into, and the fixes that work. His server and WordPress guides come from systems he runs himself. Richard builds and maintains the platform behind Geek Rewind, from its Ubuntu servers and Nginx configuration to its custom WordPress plugins. Many new tutorials start with readers' questions, and he's always glad to answer them in the comments.
No comments yet — be the first to share your thoughts!