See Your Laptop’s Last Known Location in Windows 11

Find my device shows where your Windows 11 laptop last connected to the internet. It is a Microsoft account feature that saves the laptop’s location and shows it on a map. The quickest route is to turn on Find my device in Settings, then open your Microsoft account’s Devices page from any browser and select the laptop.
Find my device only shows a location it saved earlier. Turn it on before the laptop goes missing. If it is off now, the steps below fix that, but they cannot recover a location the laptop never saved.
To see your Windows 11 laptop’s last known location, first turn on Find my device in Settings Privacy & security Find my device, with Location services set to On and an administrator account signed in with a Microsoft account. Then open your Microsoft account’s Devices page in any browser and select the laptop. The map shows the last time it reported its location, with a time stamp.
What “last known location” means
The map shows where the laptop was the last time it saved its location and reported it to Microsoft. It is not a live tracker. If the laptop is switched off, asleep with no connection, or offline, you see the last report with a time stamp.
Read the time stamp first. A location from ten minutes ago is useful. One from last week tells you much less.
It does not stop anyone from using the laptop, and it does not replace a strong sign-in password, device encryption, or a police report if the laptop is stolen.
What you need before you start
Check these four points first. Any one of them failing is the most common reason people cannot see a location.
- A Microsoft account on the laptop. Find my device ties the laptop to the Microsoft account you sign in with. A local account (one that exists only on the laptop) does not work.
- An administrator account. Only an administrator on the laptop can turn Find my device on or off.
- Location services turned on. The laptop cannot save a location if Windows has location switched off.
- An internet connection. The laptop reports its location over Wi-Fi or a wired connection. It has to connect at least once after saving a location for the report to reach Microsoft.
Home and Pro editions of Windows 11 both include Find my device. The edition does not matter. What matters is the account type and whether an employer or school manages the laptop.
Turn on Find my device
This step tells Windows to save the laptop's location and report it to your Microsoft account. This step requires administrator privileges.
Check that you are signed in correctly
Confirm the account type before you change anything. Checking takes a minute and often explains why an option is missing.
- Open Settings by pressing Windows key + I.
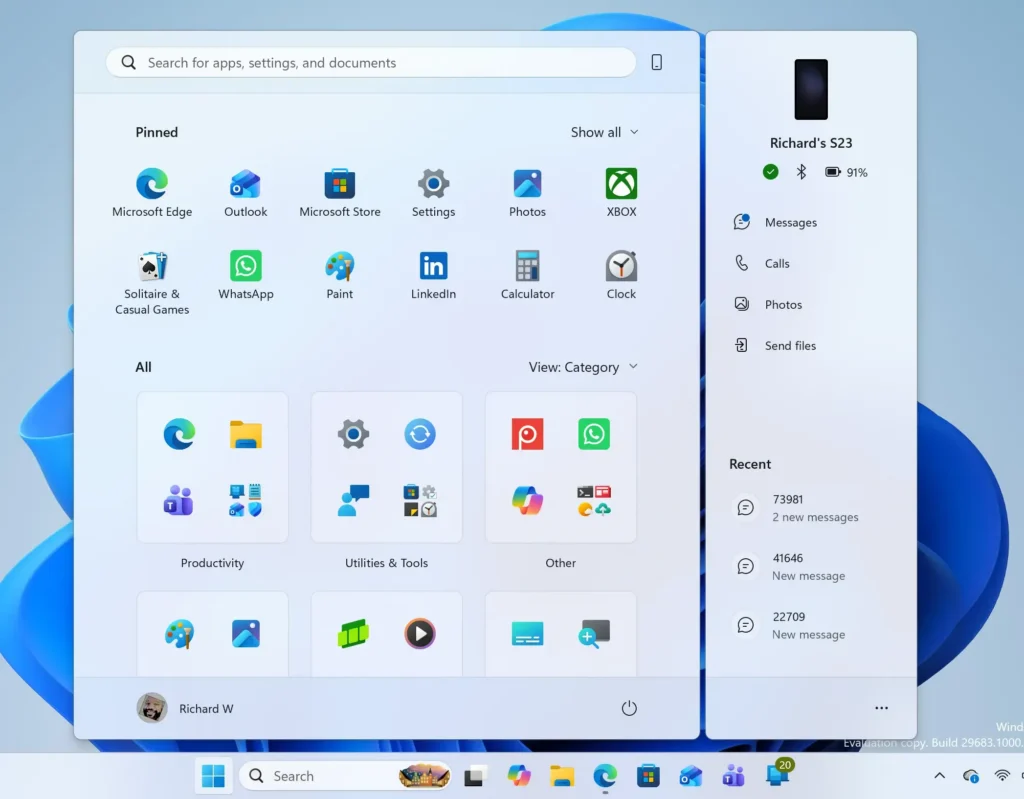
- Go to Settings Accounts Your info
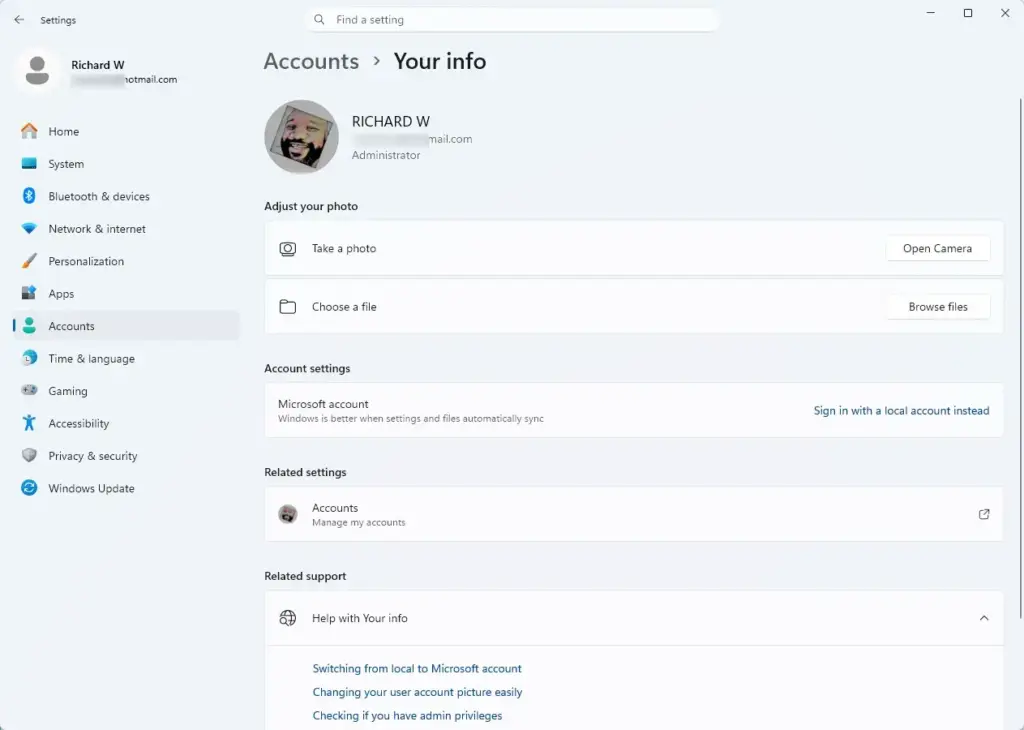
Settings › Accounts › Your info - Look under your name. You should see an email address and the word Administrator. If you see Local account instead, select Sign in with a Microsoft account instead and follow the prompts. You land back on the same page, now showing your email address.
Check that location services are on
Find my device needs Location services turned on. This is the main location switch for the whole laptop, found under Settings Privacy & security Location If it is off, the laptop has nothing to report.
- Go to Settings Privacy & security Location
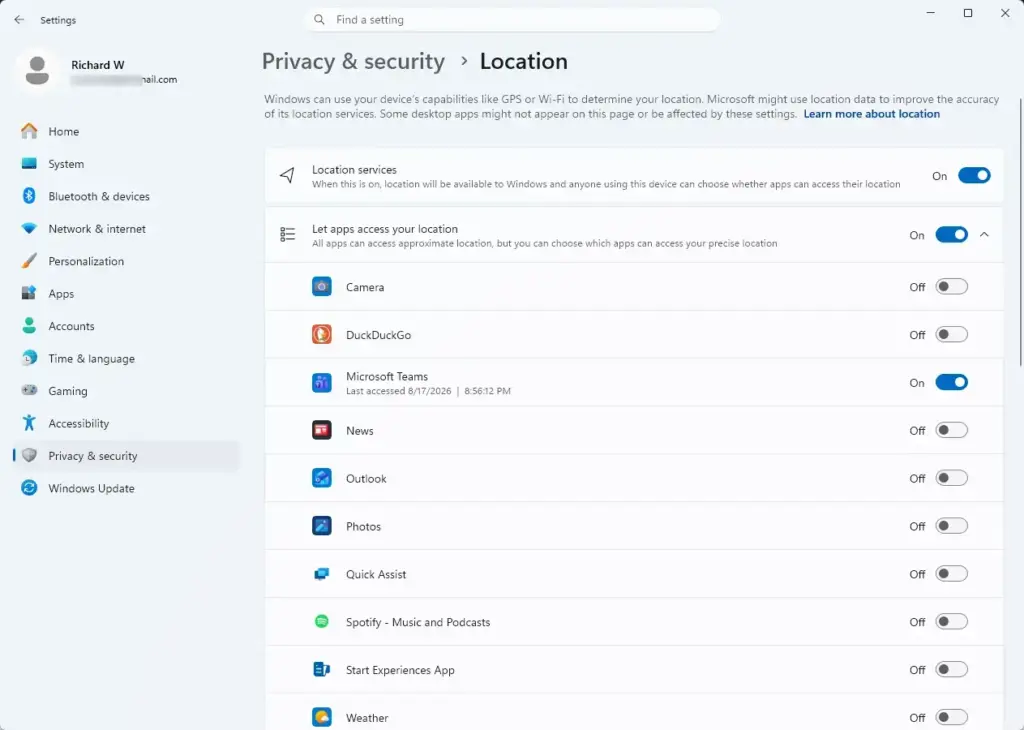
Settings › Privacy › Location - Find the Location services toggle at the top of the page. If it is Off, switch it to On.
- Confirm the toggle now reads On. If it is greyed out, your organisation controls it. See the section on missing or greyed-out options below.
You do not need to allow every app to use your location. Find my device works for the whole laptop, so it does not need the app-by-app location settings further down the page.
Switch on the Find my device setting
- Go to Settings Privacy & security Find my device
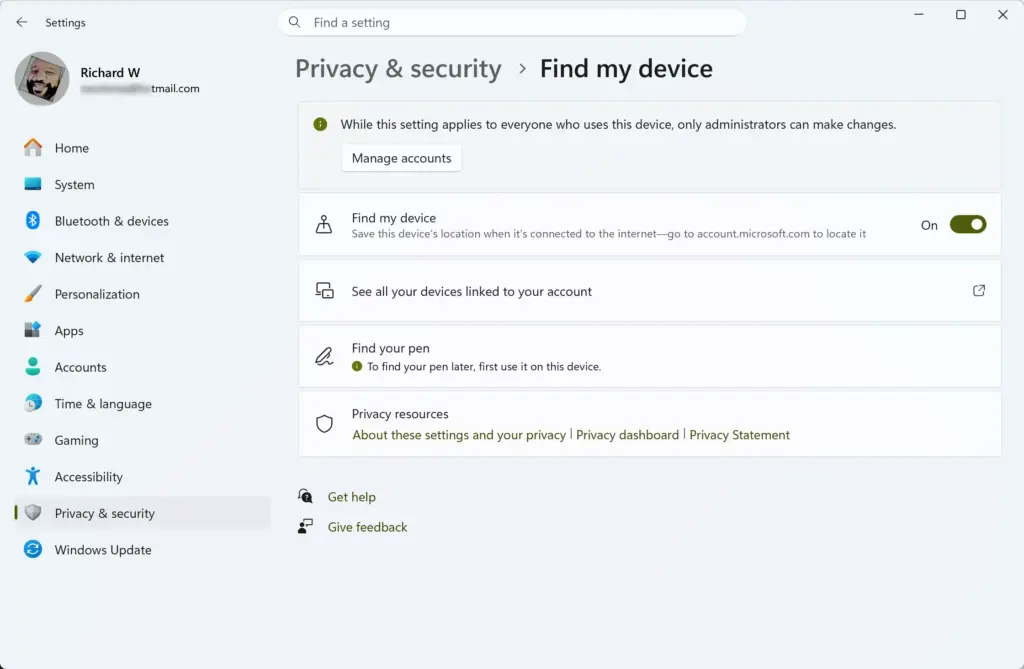
Settings › Privacy & security › Find my device - Switch the Find my device toggle to On.
- Confirm the toggle now reads On. If a User Account Control prompt appears, select Yes.
You do not need to restart the laptop. The laptop saves its location in the background, so the first location may take a little while to reach your account. Leave the laptop connected to the internet for a few minutes before you test it.
See the laptop's last known location
You do this from your Microsoft account, not from the laptop itself. That is the point: it works from a phone, a second computer, or a friend's browser when the laptop is gone.
- Open a web browser on any device and go to account.microsoft.com/devices.
- Sign in with the same Microsoft account the laptop uses, for example user@example.com. You should see a list of devices linked to that account, shown as cards.
- Find the laptop's card and select Find my device. On some versions of the page, Find my device is a tab at the top of the Devices page instead. In that case, open the tab and choose the laptop from the list.
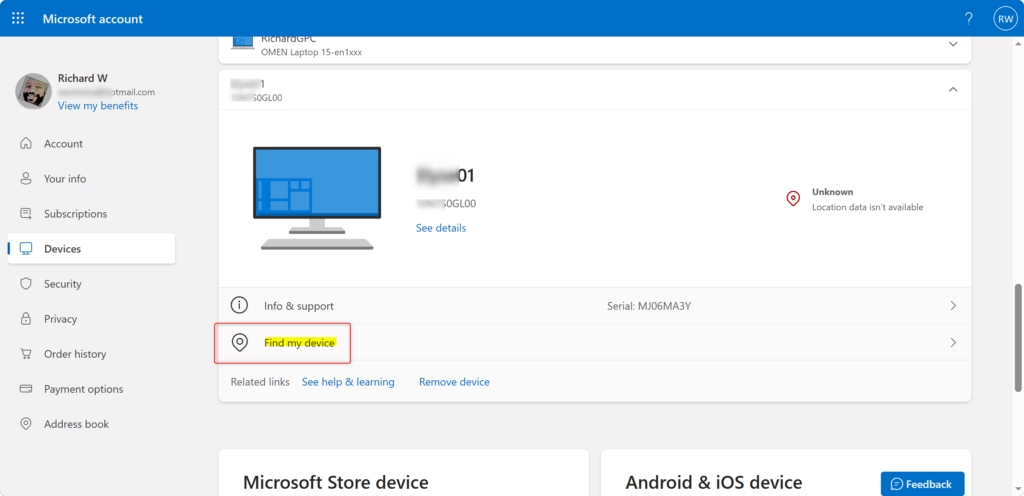
- Select the laptop if you are asked to pick a device, then select Find. Microsoft retrieves the most recent saved location.
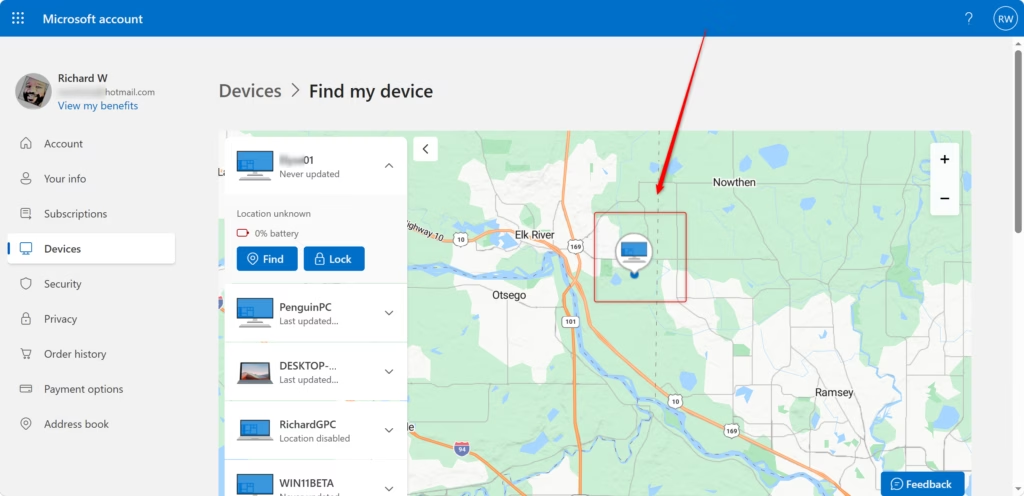
- Read the map and the time stamp. A pin marks the position, and the page shows when the location was last reported.
Microsoft changes the layout of this page from time to time, so a button may sit in a slightly different place from the description above. On the page, look for the names Find my device and Find.
If the laptop is not in the list
The laptop appears only if it has been signed in with that Microsoft account. Check three things:
- You are signed in to the web page with the right account. If you own more than one Microsoft account, sign out and try the others.
- The laptop is signed in with that same account, not a local account. Check Settings Accounts Your info on the laptop.
- The laptop has connected to the internet at least once since you signed in.
If the page says no location is available
This means Find my device is off on the laptop, or the laptop has never reported a location. If you can still reach the laptop, go back to the setting above and confirm it reads On. If you cannot reach the laptop, you cannot fix this remotely. Change your Microsoft account password first. If the laptop is managed by your employer or school, contact them. If it was stolen, contact the police.
How accurate the location is
Most laptops have no GPS chip (a receiver that picks up satellite signals), so Windows estimates position from nearby Wi-Fi networks and the internet connection. The pin is often accurate to a building or a street. It can be wrong by much more on a wired connection, when you use a VPN (a service that routes your internet traffic through another server), or in a rural area with few Wi-Fi networks. Treat the pin as a starting point, not an address.
If the laptop is stolen, do not go to the location yourself. Give the map location and the time stamp to the police.
Lock the laptop remotely
Locking stops anyone from using the laptop until they enter your password or PIN. Use it as soon as you think the laptop is lost or stolen, because a lock only takes effect once the laptop is online.
- On the Find my device page in your Microsoft account, select the laptop and locate it as described above.
- Select Lock. The page walks you through a short confirmation.
- Follow the prompts and confirm. When the laptop next connects to the internet, Windows locks it and signs users out of the session.
Locking does not erase the laptop. You can undo it: the owner signs in again with a password or PIN. Windows asks you to confirm, so read the on-screen text before you continue. The exact wording of the prompts can change between versions of the page.
Why the option is missing or greyed out
If Find my device is not under Privacy & security, or you cannot change the toggle, one of these is the cause.
You are signed in with a local account
Find my device needs a Microsoft account. Go to Settings Accounts Your info and switch to a Microsoft account, as described earlier.
You are not an administrator
A standard user cannot change the setting. Sign out and sign in with an administrator account on the laptop, then try again. If you are the only user, check Settings Accounts Your info for the word Administrator.
The laptop signs in with a work or school account
A laptop managed by an employer or school often hides the setting or locks it with a message such as Some settings are managed by your organization. Your IT department decides whether the feature is available. Ask them. They may offer their own device tracking.
Location services are off
With Location services off, the laptop has no location to save. Turn it on in Settings Privacy & security Location If the toggle is greyed out, an organisation policy controls it.
Turn off Find my device
Switch the feature off if you sell the laptop, give it away, or no longer want Microsoft to hold its location. This step requires administrator privileges.
- Go to Settings Privacy & security Find my device
- Switch the Find my device toggle to Off.
- Confirm the toggle now reads Off.
To remove the laptop from your account completely, open account.microsoft.com/devices, find the laptop's card, and choose the option to remove or unlink the device. The wording on that menu can change. Button labels can differ between versions of the page. Look for words such as remove or unlink.
What can stop it working later
Switching to a local account, resetting the PC, or reinstalling Windows removes that link, so repeat the setup steps afterwards. Turning off Location services also stops new locations from being saved, even if Find my device still reads On.
What to do next
Test it now while the laptop is in your hands: open account.microsoft.com/devices on your phone and confirm the laptop shows a recent location. If the map is empty, recheck the account type and Location services, then wait a few minutes with the laptop online. Once that works, add a strong sign-in PIN or password and make sure device encryption is on, so a lost laptop is also a locked one.
Have a question about this guide?
Answered by AI from this guide. Good questions may be added to this page — please don't include personal details.
Did this guide fix your problem?

About the Author
Richard
Tech Writer, IT Professional
Richard is a writer at Geek Rewind who turns complex IT tasks into clear, step-by-step guides. He draws on years of hands-on experience in system administration and enterprise IT operations, focusing on Windows, Linux and WordPress: the problems people actually run into, and the fixes that work. His server and WordPress guides come from systems he runs himself. Richard builds and maintains the platform behind Geek Rewind, from its Ubuntu servers and Nginx configuration to its custom WordPress plugins. Many new tutorials start with readers' questions, and he's always glad to answer them in the comments.
No comments yet — be the first to share your thoughts!