How to Enable Spell Check In Notepad on Windows 11


Spell check in Notepad on Windows 11 spots typing mistakes as you write and puts a red line under each misspelled word, so you can fix it on the spot. Microsoft added this built-in tool in Notepad version 11.2309.18.0, so you can catch typos in plain text files without opening a word processor.
You turn spell check on or off in the Notepad settings, and you can tell the app to ignore words you use on purpose. This guide shows both.
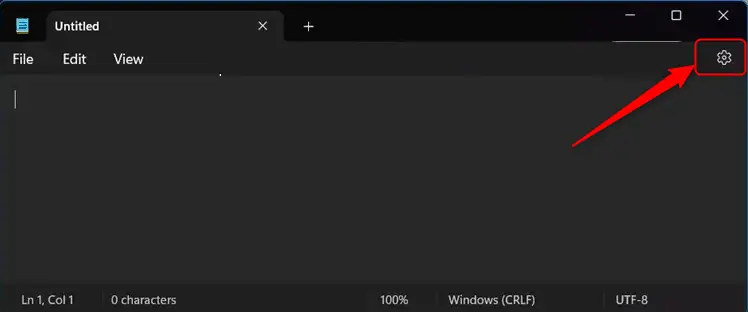
Open Notepad, select the Settings (gear) icon in the top right corner, and turn the Spell check toggle on or off. Spell check is on by default on current builds, and misspelled words get a red underline. The change applies immediately with no restart. You need Notepad version 11.2309.18.0 or later to see the option.
What is Notepad?
Notepad is the text editor built into Windows. It opens and edits plain text files, and it is often used for quick notes, config files and short scripts.
Why Use Spell Check in Notepad?
Spell check helps you catch typing mistakes, which makes your notes clearer and more accurate. It is most useful for plain notes and drafts. It is less useful for code, where unusual words are normal and would be flagged.
On current builds of Notepad, spell check is on by default, so you may already see red lines under misspelled words. If you prefer to write without any automatic marking or correction, you can switch it off in a few seconds. The steps below work for both cases. Check the toggle first, then set it the way you want.
Open the Microsoft Store, go to Library, and install any pending updates for Notepad. Then try again.
How to Enable or Disable Spell Check and Autocorrect
- Open Notepad. Click Start, type Notepad, and select the app from the results. A blank, untitled document opens.
- Click the Settings (gear) icon in the top right corner of the window. The Settings page opens in place of your document, and your text stays safe in its tab.
- Find the Spell check option and turn the toggle on or off, depending on what you want. When it is on, the toggle is switched to the right and shows the accent color. When it is off, it is switched to the left.
That is all it takes. A few clicks in the Notepad settings let you enable or disable spell check, and autocorrect if your version shows it as a separate toggle. This helps you keep notes and short pieces of text clean without opening a full word processor.
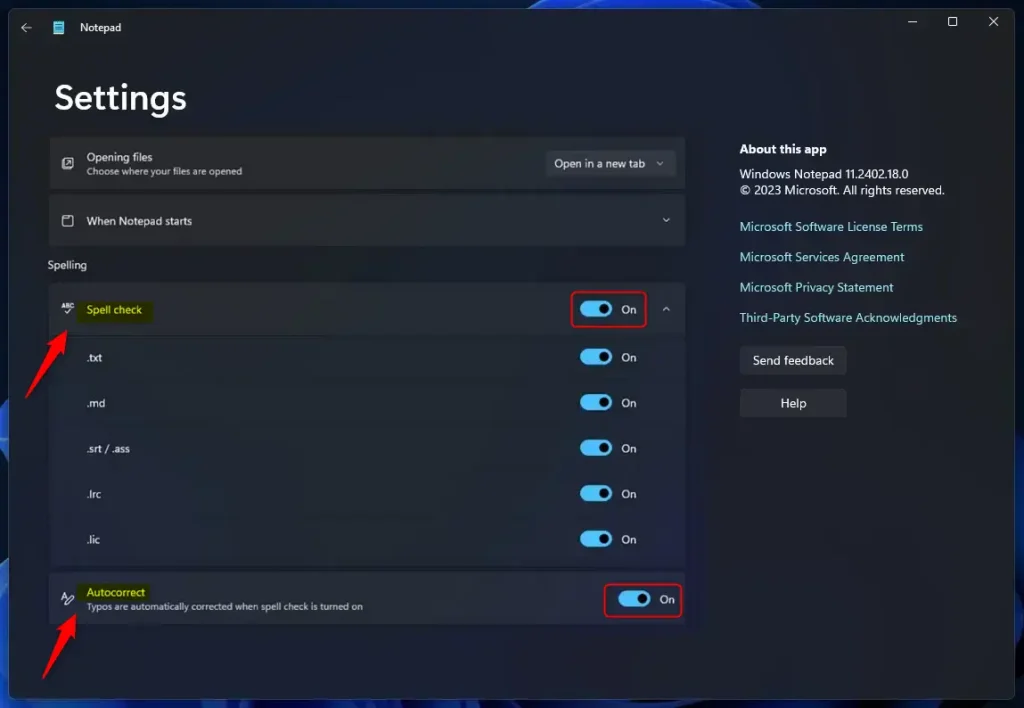
- Go back to your document by closing the Settings page or selecting your tab. Once the options are on, Notepad starts spell-checking, and auto-correcting if you enabled it, as you type.
To undo the change at any time, return to the Settings page and flip the same toggle back. No restart is needed. The change applies right away, and Notepad remembers it the next time you open the app.
What Happens When You Enable Spell Check?
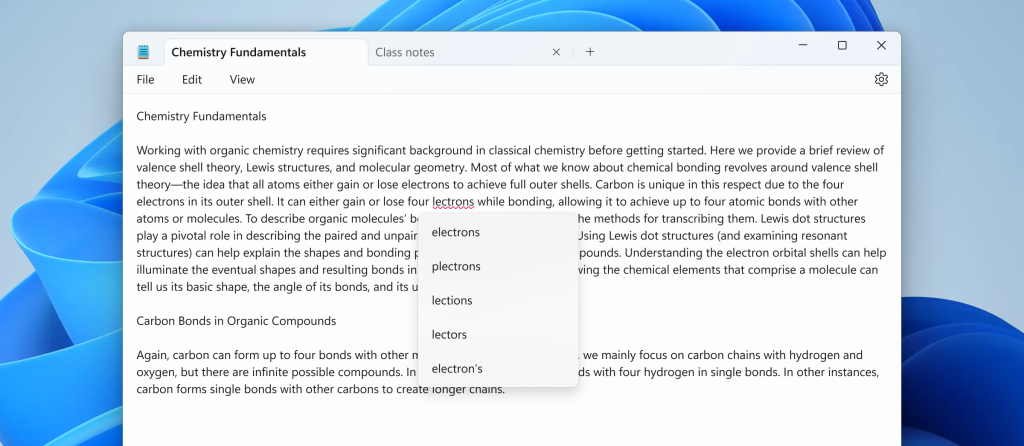
Misspelled words appear with a red underline. Right-click one to see correction suggestions, then click the suggestion you want. The word in your text is replaced straight away. If the word is correct, such as a name or a technical term, the same right-click menu lets you tell Notepad to ignore it, so it stops being flagged.
You can also customize how spell check behaves so that it only applies to certain file formats. This gives you control over when the corrections are active. For example, you can keep them for ordinary text notes and avoid them in files where unusual words are expected.
For more information, visit Microsoft blog
Summary
Notepad on Windows 11 now includes spell check and autocorrect to help you fix typing errors quickly. Check the toggle in the Settings page, and switch it back whenever you want to change how Notepad behaves.
Have a question about this guide?
Answered by AI from this guide. Good questions may be added to this page — please don't include personal details.
Did this guide fix your problem?

About the Author
Richard
Tech Writer, IT Professional
Richard is a writer at Geek Rewind who turns complex IT tasks into clear, step-by-step guides. He draws on years of hands-on experience in system administration and enterprise IT operations, focusing on Windows, Linux and WordPress: the problems people actually run into, and the fixes that work. His server and WordPress guides come from systems he runs himself. Richard builds and maintains the platform behind Geek Rewind, from its Ubuntu servers and Nginx configuration to its custom WordPress plugins. Many new tutorials start with readers' questions, and he's always glad to answer them in the comments.
No comments yet — be the first to share your thoughts!