How to Enable Specialized Display in Windows 11

Specialized Display in Windows 11 dedicates an extra monitor to one single app so nothing else gets in the way. This feature turns that screen into a private workspace by stopping Windows from treating it like a normal part of your desktop.
You need Windows 11 Enterprise or Pro for Workstations to use this setting. Once you turn it on, your mouse cursor leaves that screen behind, and you cannot drag other apps onto it.
This guide shows where the setting lives, what you should see after you change it, and how to switch it back. Menu labels can differ a little between Windows 11 builds and graphics drivers, so I point out where that is likely.
Who is this for?
Specialized Display in Windows 11 is mainly for developers and power users who need direct control over display hardware, not for everyday computer tasks or gaming.
Typical cases are a screen that belongs to a single program, such as a monitoring tool, a piece of custom hardware, or a simulation. In those setups you do not want a stray window or a mouse cursor wandering onto that display. If you only want a second monitor for browsers, chat or documents, you do not need this feature. Use the normal Extend mode in Settings System Display
Technical Implementation and API Context
Technically, Specialized Display mode changes how Windows handles your screen by using a special part of the programming tools called the Windows.Devices.Display.Core API.
In plain terms, the display stops being part of the desktop that Windows draws. An app that uses that API can then take the screen directly. That is why a normal app cannot be dragged onto it, and why the cursor will not move across to it.
Hardware Compatibility
Specialized Display mode generally works on most monitors, but your computer’s graphics card and its drivers must support specific low-level commands.
If the option is missing, the cause is usually the graphics driver or the edition of Windows, not the monitor. Older drivers, or the basic Microsoft display driver that Windows uses when the vendor driver is not installed, may not offer the setting. Install the current driver from your graphics card maker, or check Settings Windows Update Advanced options Optional updates for a driver update.
Performance Implications
Turning on Specialized Display mode can boost performance for your main app because Windows doesn’t have to manage that screen anymore, but it means less screen space for other tasks.
Think about your layout before you switch it on. If you have only two monitors and dedicate one of them, you are back to a single desktop screen for everything else. A three-monitor setup handles this better, because two screens stay available for normal work.
Step-by-Step Guide to Enable Specialized Display
Specialized Display in Windows 11 lets you use high-end monitor features for custom setups when you have administrator rights. Turn on Specialized Display by opening Settings, choosing System, and clicking Display to find the toggle. You need a compatible graphics card and a monitor that supports advanced modes for this setting to appear on your screen.
Before you start, make sure the extra monitor is connected and shows up as a separate display in Settings System Display. Sign in with an administrator account. The steps below assume Windows 11 Enterprise or Pro for Workstations.
- Open Settings by pressing the Win+I on your keyboard. The Settings window opens with a list of categories on the left.
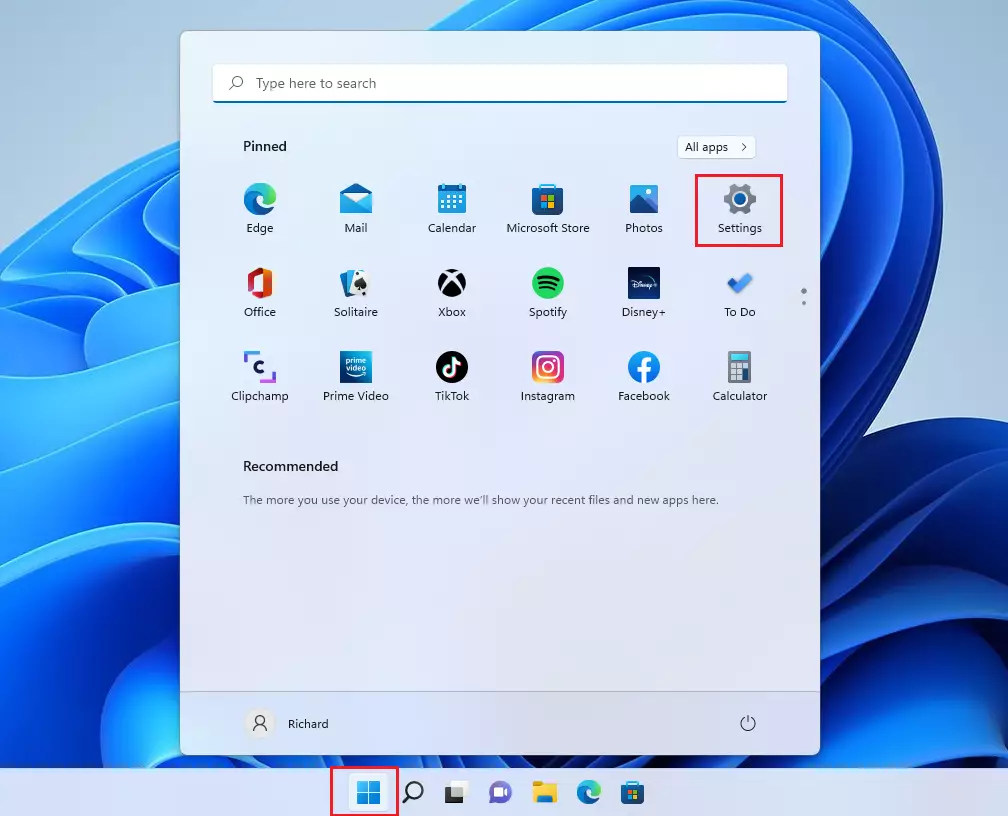
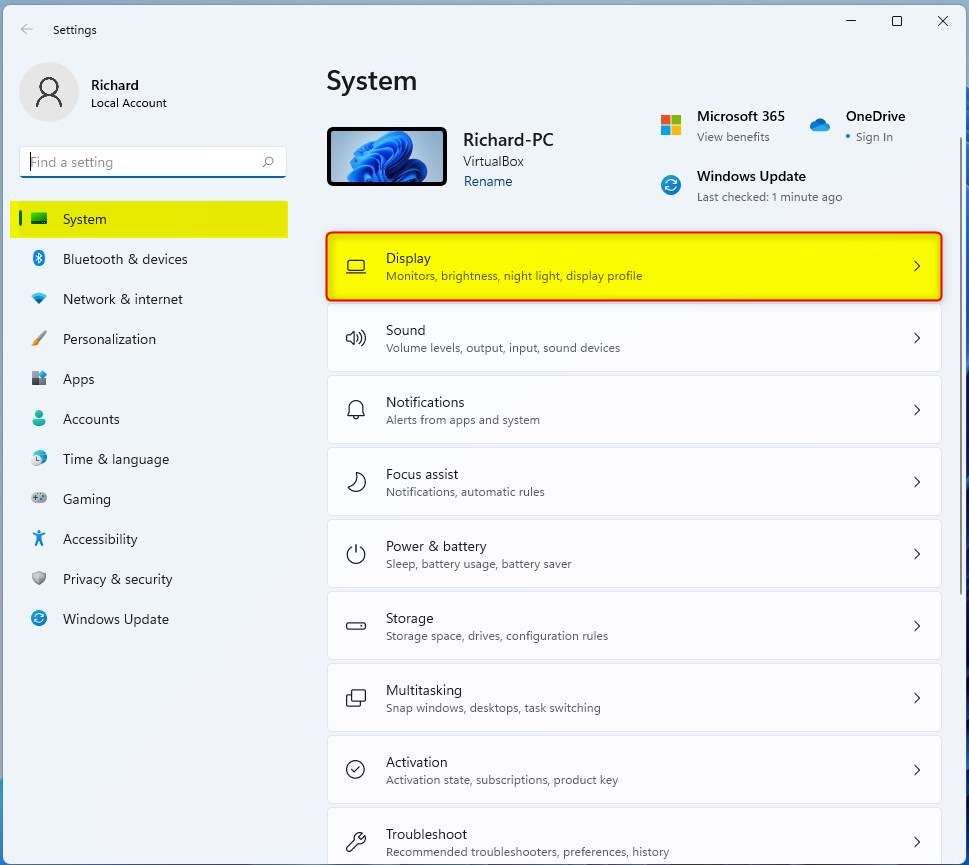
windows 11 start menu settings updated - Click on the System tab in the left sidebar.
- Click on the Display tile on the right side of the window. You should now see your connected monitors drawn as numbered boxes at the top.
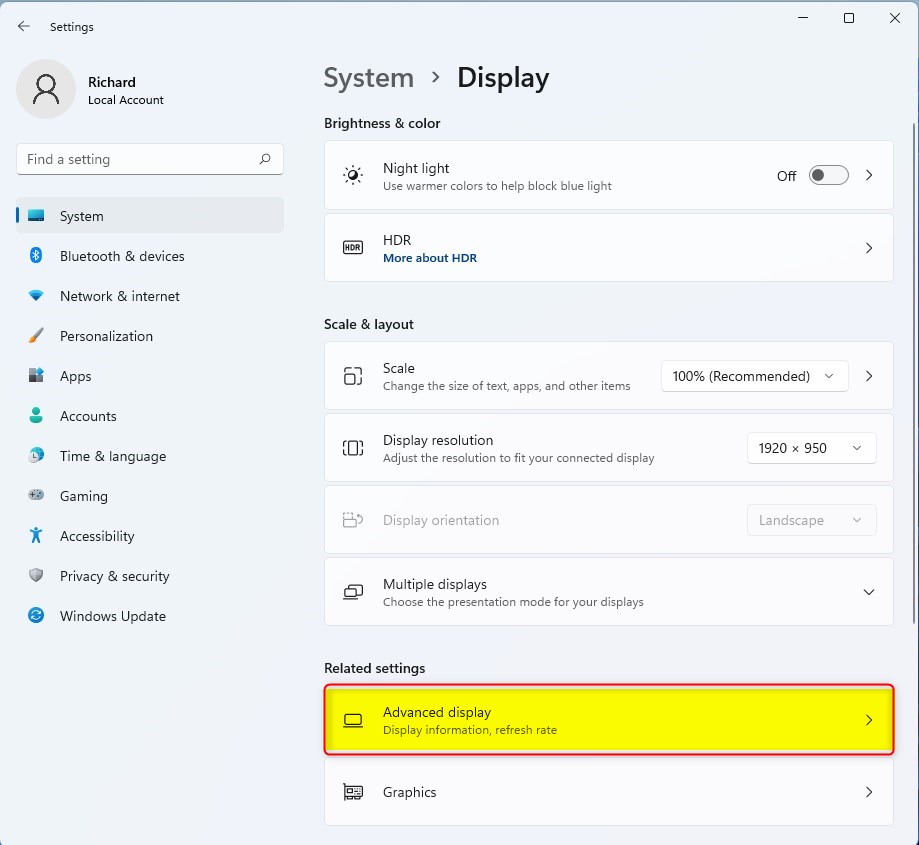
windows 11 display tile - Scroll down to the Related settings section and click on Advanced display to expand it. The page shows details for the selected monitor.
windows 11 display advanced display - Use the drop-down menu at the top to select the monitor you want to configure. Pick the extra screen, not your main one, so you do not remove the display you are working on.
- Find the option for Remove the display from the desktop and toggle the switch to On. If you do not see this option, go to the troubleshooting section below.
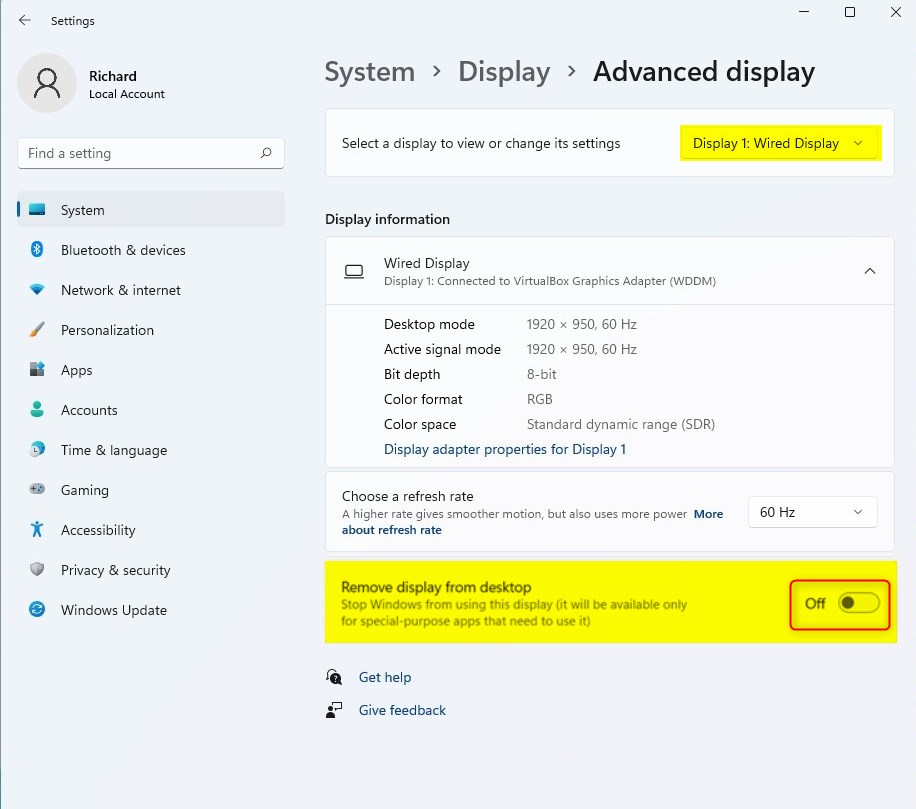
windows 11 remove display from desktop on or off
Once the toggle is on, the monitor no longer behaves as part of your desktop. The cursor will not move onto it, and you cannot drag windows there. To undo the change, return to the same page, select that monitor and set the switch back to Off. If the screen does not rejoin the desktop right away, unplug and reconnect the monitor, or restart the PC.
Troubleshooting and Verification
If you can’t find the Specialized Display option, first check if you have the right Windows version, like Enterprise or Pro for Workstations, as Home editions don’t support it.
Work through these checks in order:
- Open Settings System About and look under Windows specifications to see your edition. If it says Home, the setting is not available on that PC.
- Confirm you are signed in with an administrator account.
- Check that Windows lists the extra monitor in Settings System Display If it does not, fix the cable or port first.
- Update the graphics driver from your graphics card maker or through Optional updates in Windows Update , then restart and look again.
If the option is still missing after all that, the monitor or graphics card most likely does not support the advanced modes this setting needs.
Summary
Specialized Display in Windows 11 lets you dedicate a monitor to a specific app, which is useful for professionals using custom hardware in fields like medicine or simulations.
It is a narrow feature, but when you need it, nothing else does the same job. Check your Windows edition and graphics driver first, choose the right monitor, and turn on Remove the display from the desktop only for the screen you want to hand over. You can turn it off again at any time.
Have a question about this guide?
Answered by AI from this guide. Good questions may be added to this page — please don't include personal details.
Did this guide fix your problem?

About the Author
Richard
Tech Writer, IT Professional
Richard is a writer at Geek Rewind who turns complex IT tasks into clear, step-by-step guides. He draws on years of hands-on experience in system administration and enterprise IT operations, focusing on Windows, Linux and WordPress: the problems people actually run into, and the fixes that work. His server and WordPress guides come from systems he runs himself. Richard builds and maintains the platform behind Geek Rewind, from its Ubuntu servers and Nginx configuration to its custom WordPress plugins. Many new tutorials start with readers' questions, and he's always glad to answer them in the comments.
No comments yet — be the first to share your thoughts!