How to Turn On or Off Let Windows Manage Default Printer in Windows 11
Let Windows manage your default printer in Windows 11 controls whether your PC picks the printer for you or if you pick it yourself.
This setting automatically assigns your most recently used printer as the default. Turning it off means you can choose one specific printer to always use for printing.
It’s handy if you move between different printers, like one at home and one at work, and want to make sure the right one is always selected without changing it each time.
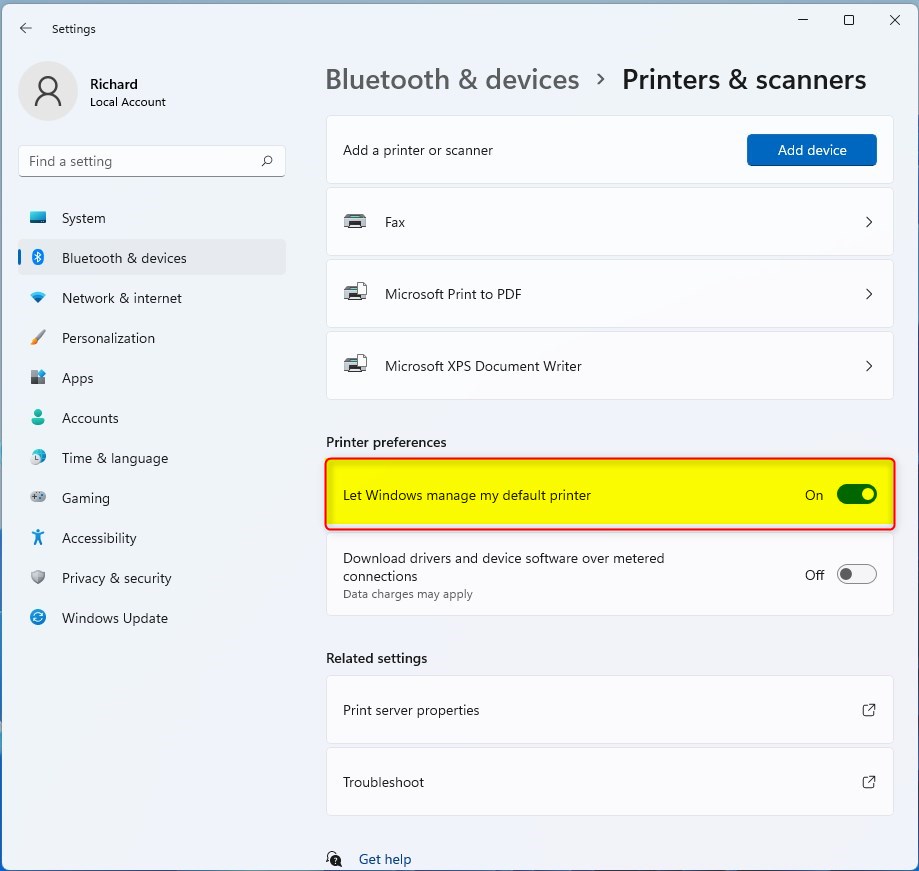
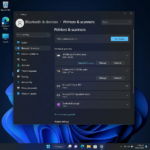
You find this option in Windows 11 Settings under “Printers & scanners,” which is within the “Bluetooth & devices” section.
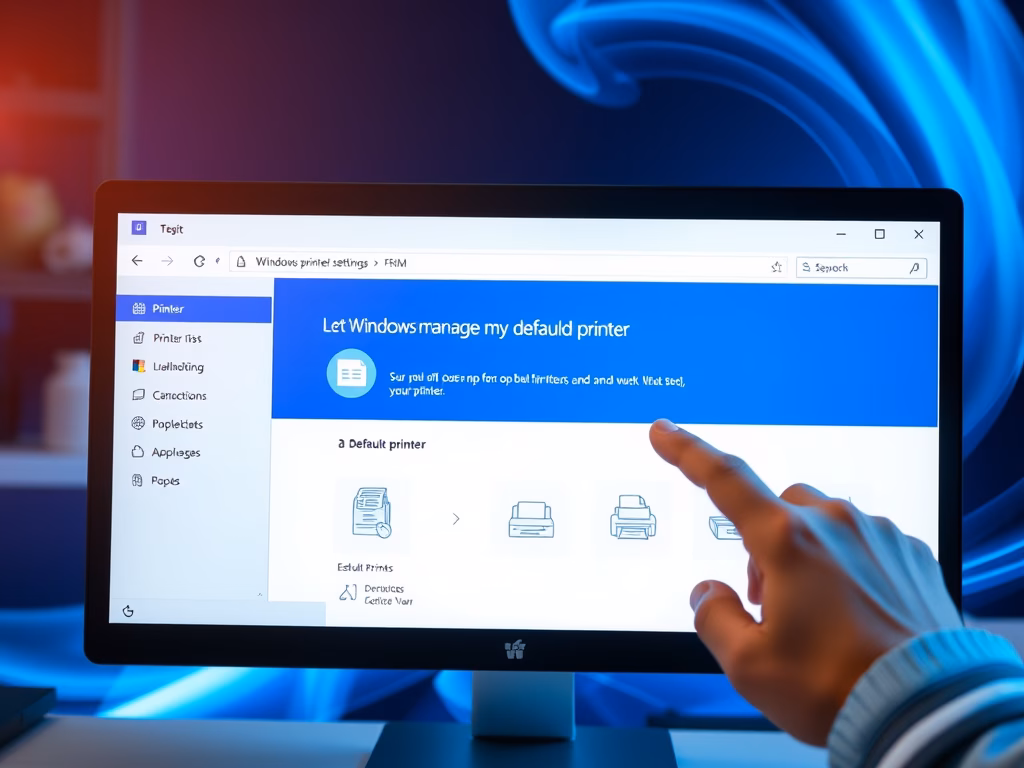
Disable “Let Windows manage my default printer” in Settings Bluetooth & devices Printers & scanners to manually select your default. Enable it for Windows to automatically choose the last printer you used.
Turn On or Off Let Windows Manage Default Printer in Settings
- Open Settings (⊞ Win+I).
- Click on Bluetooth & devices on the left side. Then click on Printers & scanners on the right side.
Using the Settings app, you can decide if Windows 11 should automatically pick your default printer. This feature, ‘Let Windows manage my default printer,’ determines whether your computer selects the printer you use most often or if you manually set it.
- Turn On (default) or Off the Let Windows manage my default printer option. Choose what you want.
- You can now close Settings if you like.
Option Two
Turn On or Off Let Windows Manage Default Printer Using Registry
You can change how Windows 11 handles your default printer by using the Registry Editor, a tool that requires administrator permission. This method lets you turn the ‘Let Windows manage my default printer’ feature on or off by running a specific command.
Turn On Let Windows Manage Default Printer
This is the default setting.
reg add "HKEY_CURRENT_USER\Software\Microsoft\Windows NT\CurrentVersion\Windows" /v LegacyDefaultPrinterMode /t REG_DWORD /d 0 /f
Turn Off Let Windows Manage Default Printer
reg add "HKEY_CURRENT_USER\Software\Microsoft\Windows NT\CurrentVersion\Windows" /v LegacyDefaultPrinterMode /t REG_DWORD /d 0 /f
Summary
You've now learned how to manage the "Let Windows manage my default printer" setting in Windows 11. You can do this through the Settings app or by editing the Registry. For most people, using the Settings app will be the clearest route.
Should I let 🪟 Windows 11 manage my default printer?
Click on Settings. From the left pane, click on "Bluetooth & devices," and on the right side, click on "Printers & scanners."
How do I let Windows decide my default printer?
Open Settings by searching for it or pressing Win + I. Navigate to Bluetooth & devices, then select Printers & scanners. Scroll down and toggle the "Let Windows manage my default printer" option.
Was this guide helpful?

About the Author
Richard
Tech Writer, IT Professional
Richard, a writer for Geek Rewind, is a tech enthusiast who loves breaking down complex IT topics into simple, easy-to-understand ideas. With years of hands-on experience in system administration and enterprise IT operations, he’s developed a knack for offering practical tips and solutions. Richard aims to make technology more accessible and actionable. He's deeply committed to the Geek Rewind community, always ready to answer questions and engage in discussions.

No comments yet — be the first to share your thoughts!