How to Turn On or Off AutoPlay for Cameras and Phones in Windows 11
If you’ve ever plugged in a camera, phone, or other device, you might have seen a box pop up asking what you want to do next. This feature is called AutoPlay. It helps Windows decide what to do when you connect devices or insert media.
Control what happens when you connect cameras or phones in Windows 11 via Settings. Navigate to System > AutoPlay and choose your preferred action or turn it off. These settings apply to non-storage devices like cameras and phones, not USB drives.
What is AutoPlay?
AutoPlay can:
- Automatically open photos, videos, or music from your device.
- Ask you what you want to do each time you connect a device.
- Show you a list of apps to choose from if your device has different types of content.
- Simply open the folder with your files.
- Do nothing if you’ve told it not to act on that device before.
If you want to quickly get the AutoPlay prompt regardless of settings, press and hold the Shift key while plugging in your device.
How to Turn On or Off AutoPlay for Cameras, Phones, and Other Devices (Non-storage Devices)
You need to be signed in as an administrator to change these settings.
Option 1Using Local Group Policy Editor (🪟 Windows 11 Pro, Enterprise, Education only)
This tool is not available in Windows 11 Home. If you have Home edition, skip to Option 2.
- Press ⊞ Win+R on your keyboard to open the Run box.
- Type
gpedit.mscand press Enter to open the Local Group Policy Editor. - In the left panel, go to:
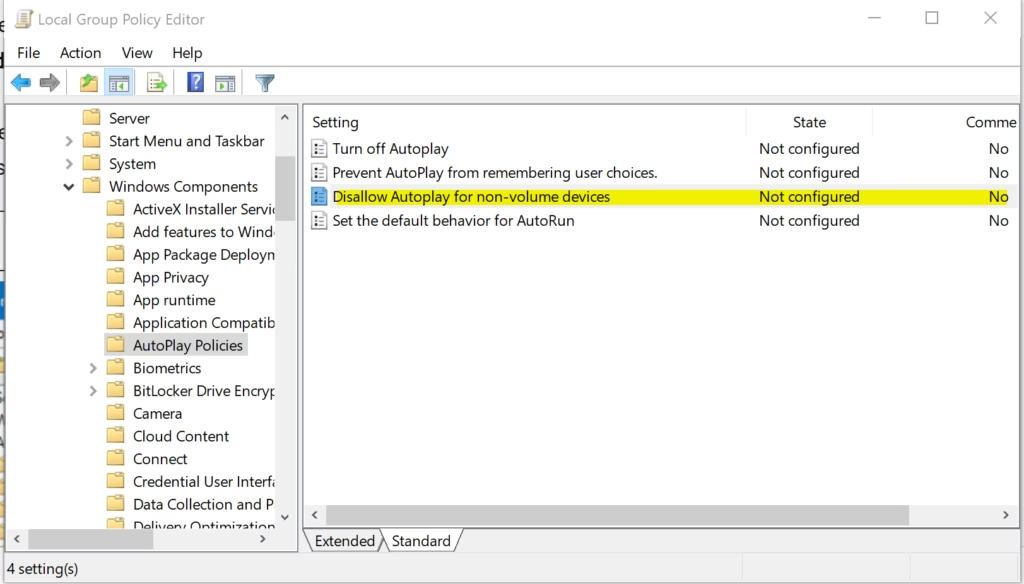
Computer Configuration > Administrative Templates > Windows Components > AutoPlay Policies - In the right panel, find and double-click Disallow AutoPlay for non-volume devices.
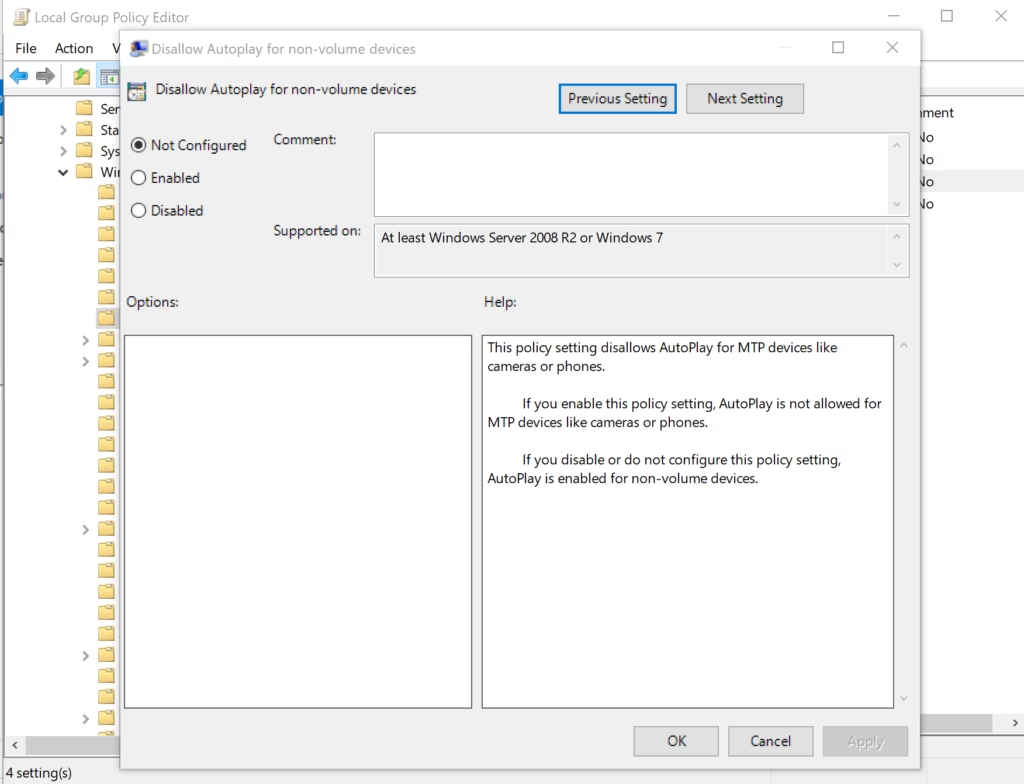
- To enable AutoPlay (default):
Select Not Configured or Disabled, then click OK. - To disable AutoPlay:
Select Enabled, then click OK. - Close the Local Group Policy Editor.
Here is what it looks like in the editor:
Option 2Using the Windows Registry (All 🪟 Windows 11 editions)
If you don’t have access to the Group Policy Editor, you can change this setting in the Registry. Be careful when editing the Registry — it’s a good idea to create a restore point first.
To Enable AutoPlay (default):
reg delete "HKCU\Software\Policies\Microsoft\Windows\Explorer" /v NoAutoplayfornonVolume /f
reg delete "HKCU\Software\Policies\Microsoft\Windows\Explorer" /v NoAutoplayfornonVolume /f
Deleting or removing the NoAutoplayfornonVolume value turns AutoPlay back on for these devices.
To Disable AutoPlay:
reg delete "HKCU\Software\Policies\Microsoft\Windows\Explorer" /v NoAutoplayfornonVolume /f
reg add "HKCU\Software\Policies\Microsoft\Windows\Explorer" /v NoAutoplayfornonVolume /t REG_DWORD /d 1 /f
This adds a value to turn off AutoPlay for cameras, phones, and other non-storage devices.
How to apply these changes:
- Or you can open Registry Editor (
regedit), navigate to the keys, and change or delete the values manually. - Restart your PC or sign out and back in for changes to take effect.
Summary
- AutoPlay helps you quickly open photos, videos, or music when you connect cameras, phones, or other devices.
- You can turn AutoPlay on or off for these devices using either the Group Policy Editor or the Registry Editor.
- You need to be an administrator to change these settings.
- AutoPlay settings only affect non-storage devices (like cameras and phones), not USB drives or external hard drives.
- Press Shift when plugging in a device to force the AutoPlay prompt to appear.
By setting AutoPlay the way you like, you can save time and avoid repeated prompts when connecting your devices.
For more details, you can visit the official Microsoft page about this setting: Disallow AutoPlay for non-volume devices.
Was this guide helpful?

About the Author
Richard
Tech Writer, IT Professional
Richard, a writer for Geek Rewind, is a tech enthusiast who loves breaking down complex IT topics into simple, easy-to-understand ideas. With years of hands-on experience in system administration and enterprise IT operations, he’s developed a knack for offering practical tips and solutions. Richard aims to make technology more accessible and actionable. He's deeply committed to the Geek Rewind community, always ready to answer questions and engage in discussions.
No comments yet — be the first to share your thoughts!