How to Enable or Disable Dynamic Lighting in Windows 11

Dynamic Lighting in Windows 11 lets you control RGB lighting on your PC devices directly from the operating system.
With this feature, you can manage the colorful lights on your keyboards, mice, and other accessories, no need for separate manufacturer software.
You can enable or disable Dynamic Lighting through the Settings app, specifically under Personalization.
This unified control system streamlines customizing your PC’s aesthetic. It’s particularly useful if you have multiple RGB-enabled devices from different brands.
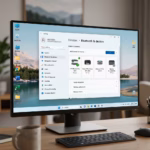
Enable or disable Dynamic Lighting in Windows 11 by opening Settings, navigating to Personalization, and then selecting Dynamic Lighting. Use the “Use Dynamic Lighting on my devices” switch to toggle the feature on or off.
How to Turn On or Off Dynamic Lighting
Follow these steps to enable or disable Dynamic Lighting on your Windows 11 PC:
Step 1Open Windows Settings
- Click the Start menu (Windows logo at the bottom left) and choose Settings.
- Or press the Windows key + I together on your keyboard to open Settings right away.
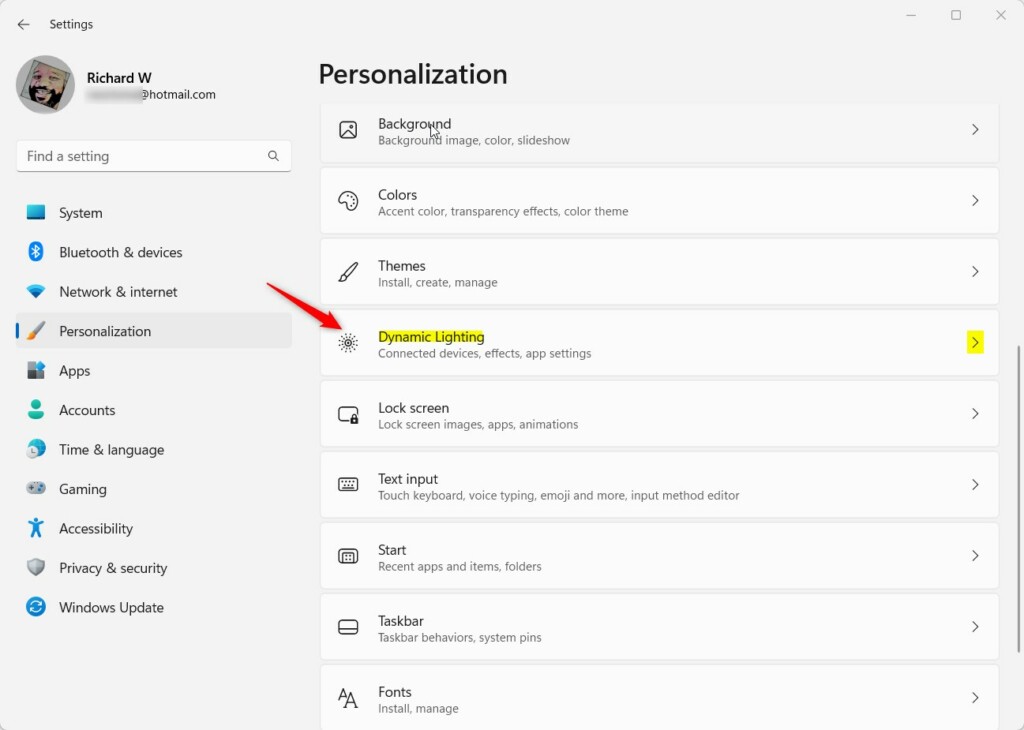
Step 2Go to Personalization
- In the Settings window, click on Personalization from the left-hand menu.

Step 3Find Dynamic Lighting
- On the right side, look for the tile labeled Dynamic Lighting and click it to open.
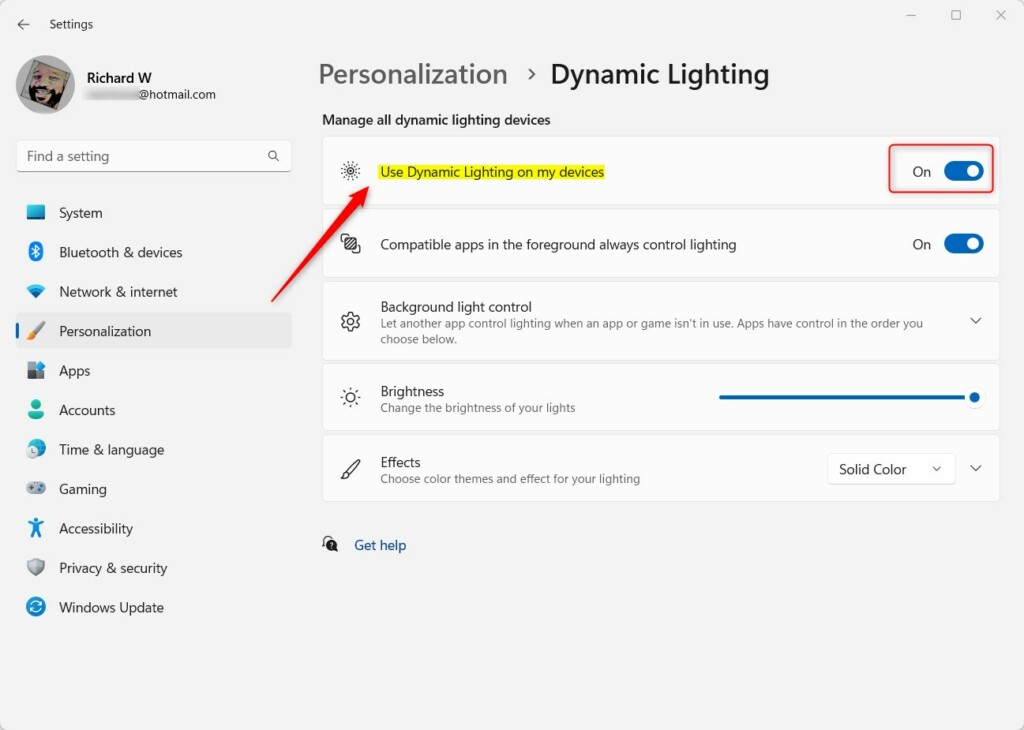
Step 4Turn Dynamic Lighting On or Off
- You will see a switch labeled Use Dynamic Lighting on my devices.
- Click the switch to On to enable it or Off to disable it .
Step 5Close Settings
- When done, just close the Settings window.
- Your changes save automatically.
Turn Dynamic Lighting On or Off Using the Registry Editor (Advanced)
You can turn dynamic lighting windows 11 on or off using the Registry Editor. This advanced method lets you change deep Windows settings for your PC’s lighting if the main settings aren’t enough. Only try this if you’re comfortable making changes in the Windows Registry, as mistakes can cause problems.
Advanced users choose the Windows Registry as another method to control Dynamic Lighting. The Registry is a central database that Windows uses to store settings. Using the Registry allows for finer control over system features beyond the standard settings menus.
Step 1Open the Registry Editor
- Press Windows key + R together.
- Type
regedit - Press Enter.
- Note: Registry Editor may require admin privileges.
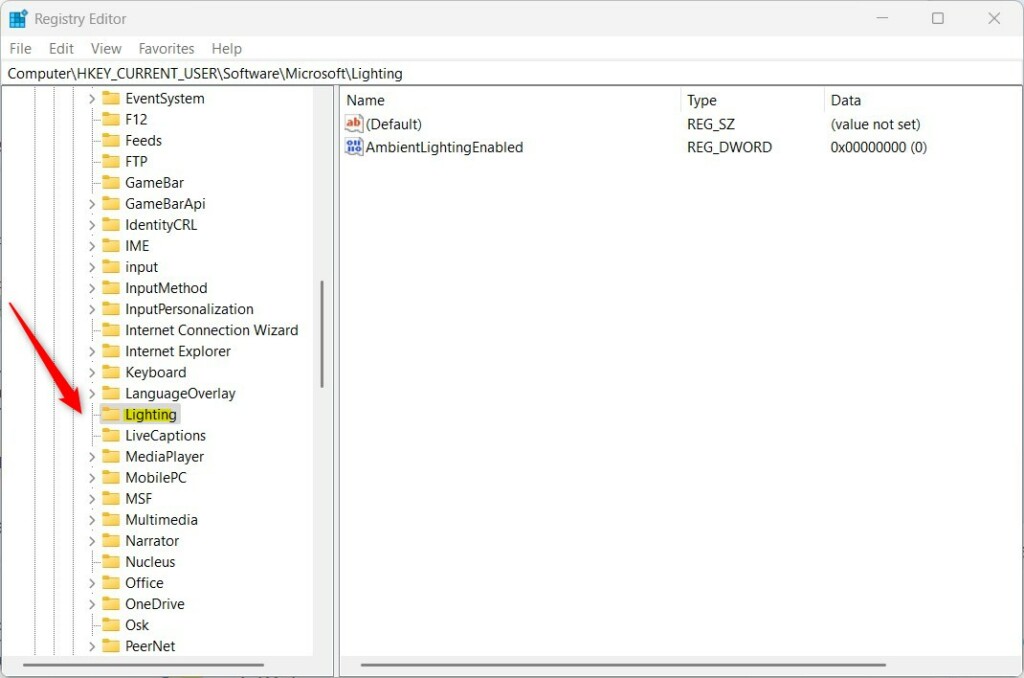
Step 2Navigate to the Right Location
- Look for this path:
HKEY_CURRENT_USER\Software\Microsoft\Lighting - If you don’t see the Lighting folder, follow these steps:
- Right-click on the Microsoft folder.
- Choose New > Key.
- Name it Lighting.
Step 3Create a New Value
- Inside the Lighting folder, right-click on the right side.
- Select New > DWORD (32-bit) Value.
- Name this new value
AmbientLightingEnabled
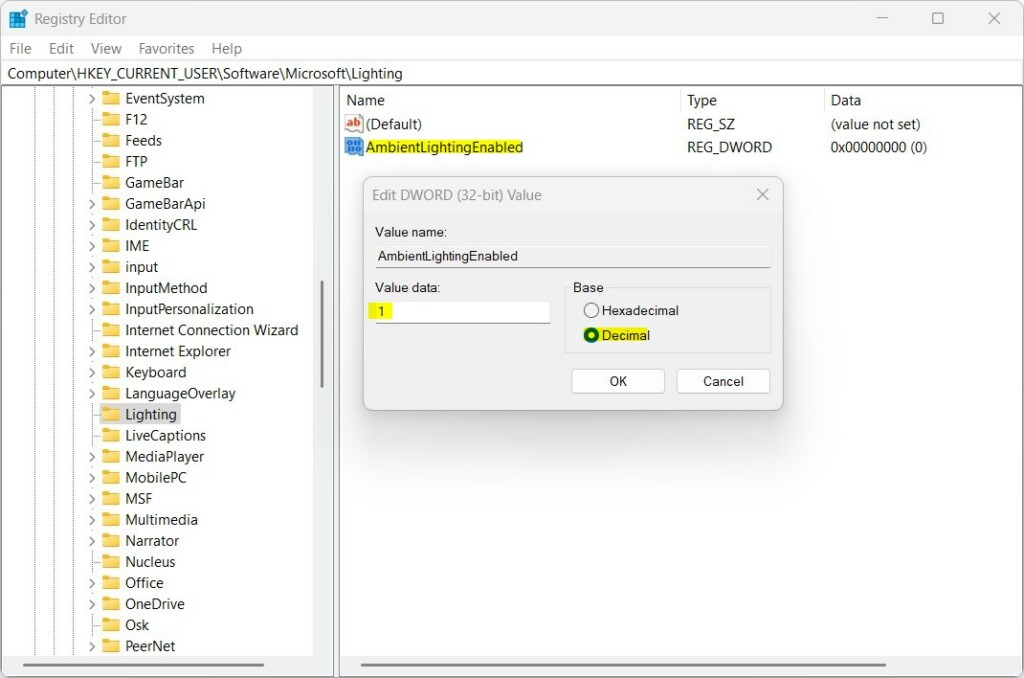
Step 4Set the Value
- Double-click
AmbientLightingEnabled - Set the Base to Decimal.
- Set the value data to one of these:
1to turn Dynamic Lighting ON0to turn Dynamic Lighting OFF
Step 5Close and Restart
- Close Registry Editor.
- Restart your computer to apply changes.
Summary
- Dynamic Lighting lets you control RGB lights on your Windows 11 devices easily.
- You can turn it on or off in Settings > Personalization > Dynamic Lighting.
- Advanced users can also change this setting in the Windows Registry.
- This feature helps you personalize your PC lighting without extra apps.
Dynamic lighting in Windows 11 lets you easily control your PC’s RGB lights. You can turn this feature on or off within the Settings app, or for more advanced control, use the Windows Registry. This helps you personalize your PC lighting without needing extra software.
How do I turn off dynamic lighting service in 🪟 Windows 11?
Step1: Go to Windows Settings > Personalization > Dynamic Lighting. Step2: Toggle off Use Dynamic Lighting on my devices.
Was this guide helpful?

About the Author
Richard
Tech Writer, IT Professional
Richard, a writer for Geek Rewind, is a tech enthusiast who loves breaking down complex IT topics into simple, easy-to-understand ideas. With years of hands-on experience in system administration and enterprise IT operations, he’s developed a knack for offering practical tips and solutions. Richard aims to make technology more accessible and actionable. He's deeply committed to the Geek Rewind community, always ready to answer questions and engage in discussions.


No comments yet — be the first to share your thoughts!