How to Switch to Local Account from Microsoft Account in Windows 11

Switching to a local account in Windows 11 means you sign in to your PC with an offline username and password instead of a cloud-connected Microsoft account. The PC stops using Microsoft’s servers to sign you in. It also stops syncing your personal settings to your Microsoft account.
You can do the whole switch in the Settings app in under 2 minutes. You will not lose any files or installed programs. The PC works the same as before, and your personal data stays on your local drive. You do not need to reinstall Windows.
To switch to a local account in Windows 11, open Settings with Win+I, click Accounts, then Your info, and select “Sign in with a local account instead.” Enter your Microsoft account password, then choose a user name and password for the new local account. Windows signs you out at the end, and your files and installed programs stay on the PC.
Why Switch Accounts?
You are not locked in. Windows 11 lets you move between a local account and a Microsoft account whenever you like.
Switching away from a Microsoft account does not touch your existing profile folder. The folder name stays the same, and your Documents, Desktop, Downloads and Pictures stay where they are. Nothing gets moved or copied, so there is no cleanup afterward.
Benefits of Using a Microsoft Account:
Before you decide, it helps to know what each account type gives you. With a Microsoft account you can:
- Download apps from the Microsoft Store.
- Get your online content automatically in Microsoft apps.
- Sync your settings across all your computers. This includes your browser history, account picture, and color choices.
Benefits of Using a Local Account:
With a local account:
- You create a unique username and account for each computer you use.
- You can remove the password if you choose (though this is not recommended).
- You'll still need a Microsoft account to download apps from the Microsoft Store.
- Your settings won't sync across your computers.
A local account gives you more control over your privacy. Your files and settings stay on that one PC instead of syncing to the cloud. You don't need a Microsoft profile to sign in, so Microsoft sees less of your daily activity.
You can reverse the change later. Switch the Windows sign-in back to a Microsoft account and settings sync across your machines again.
How to Switch to a Local Account
The steps are the same on Windows 11 Home and Pro, and you do not need to restart the PC.
These steps switch your Windows 11 sign-in from a Microsoft account to a local account, and the paragraph after the list explains how to switch from local to Microsoft account in Windows again.
- Open Settings by pressing
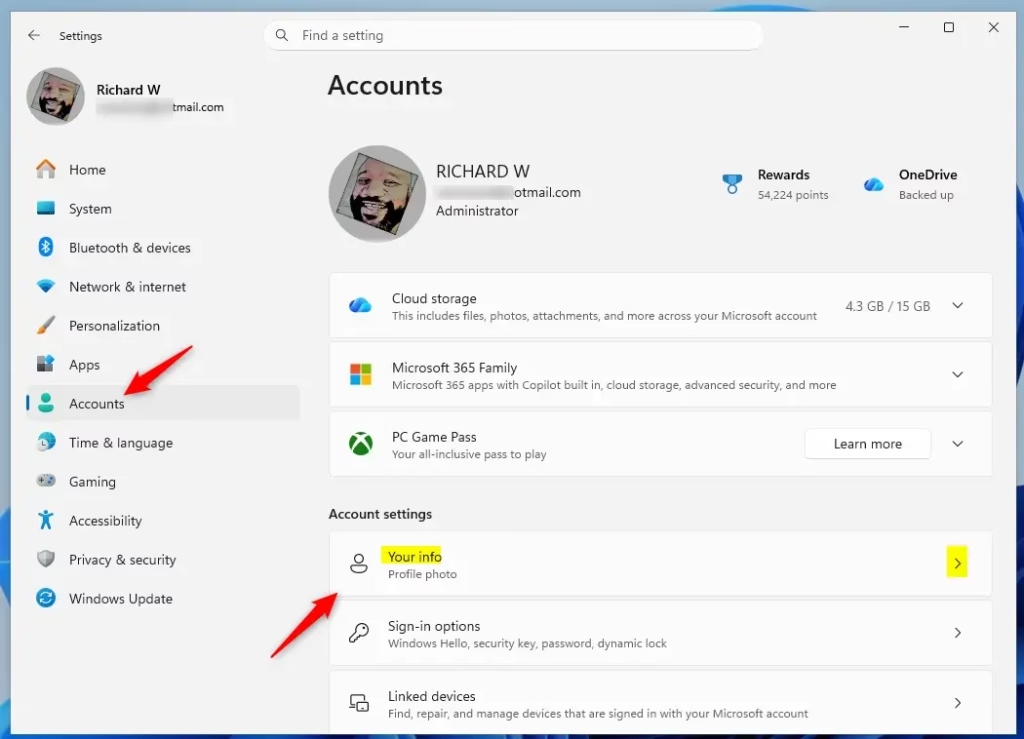
Win+I. The Settings window should open. - Click Accounts on the left side. The account options should appear on the right.
- Click Your info on the right side. You should see your name and Microsoft account email at the top of the page. For more detail on this step, see Open Your info settings.
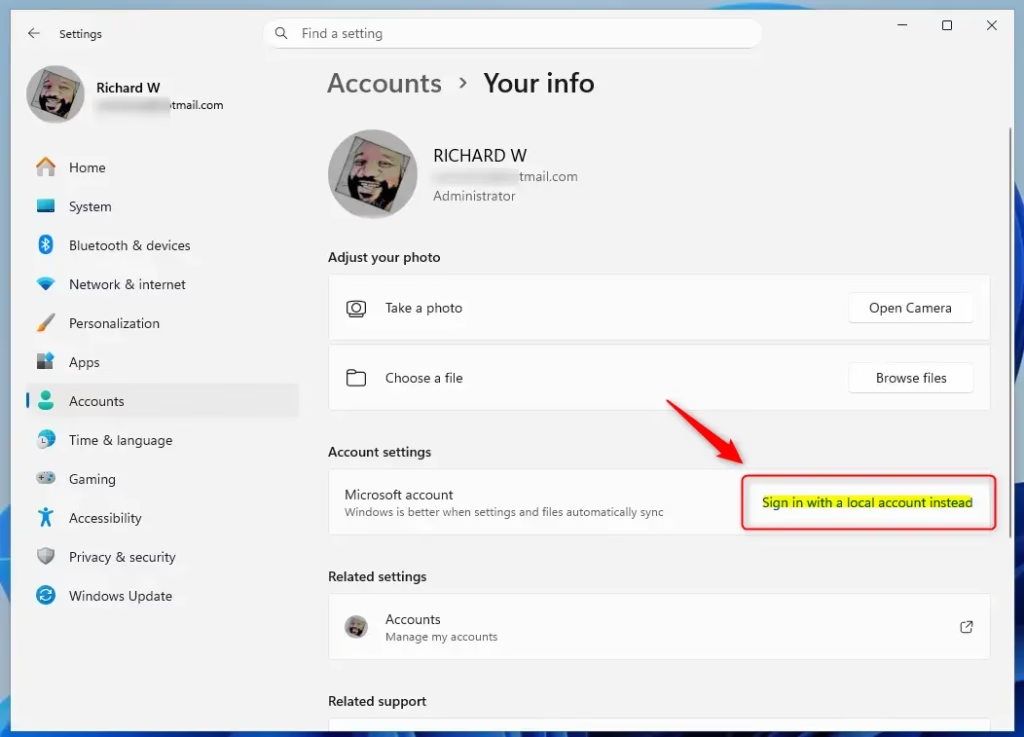
- Click the Sign in with a local account instead link under the account settings. The built-in Settings menu does the whole switch in a few clicks, so you do not need to reinstall Windows or lose your files.📝Good to KnowIf you can't find this link, you are probably already using a local account.
A work or school account, or a PC managed by an organization, may also hide it. In that case, ask whoever manages the device.
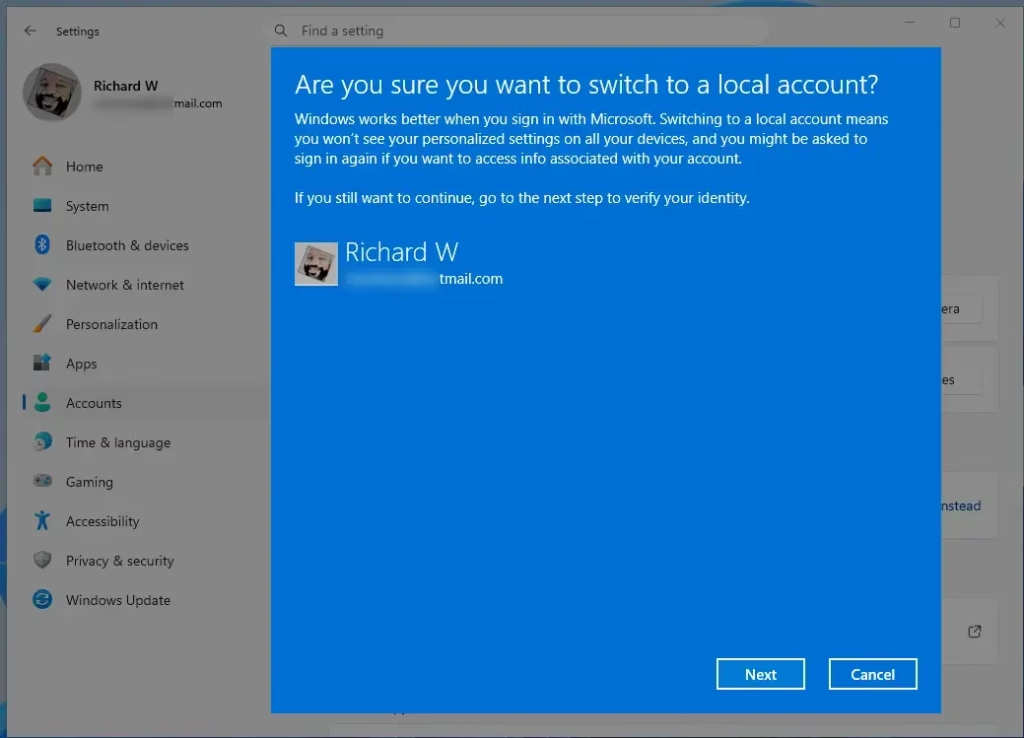
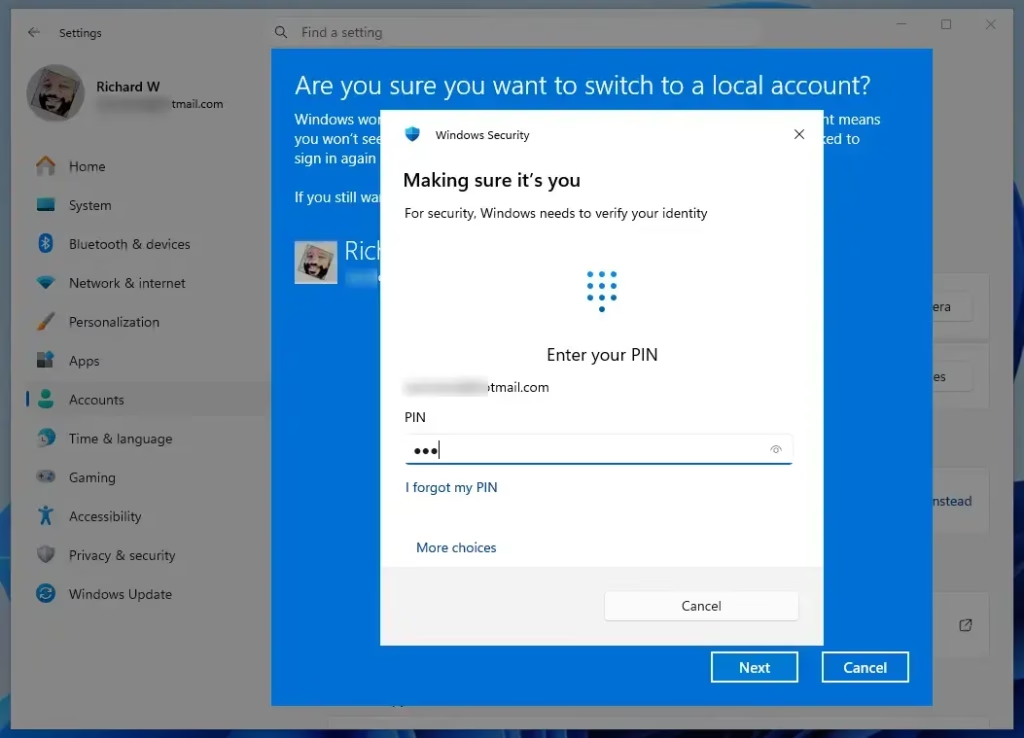
- Click Next to confirm the switch. Windows asks you to verify who you are.
- Verify your identity. Enter your Microsoft account password, or your PIN if Windows asks for it. Windows should then show a page for creating the local account.
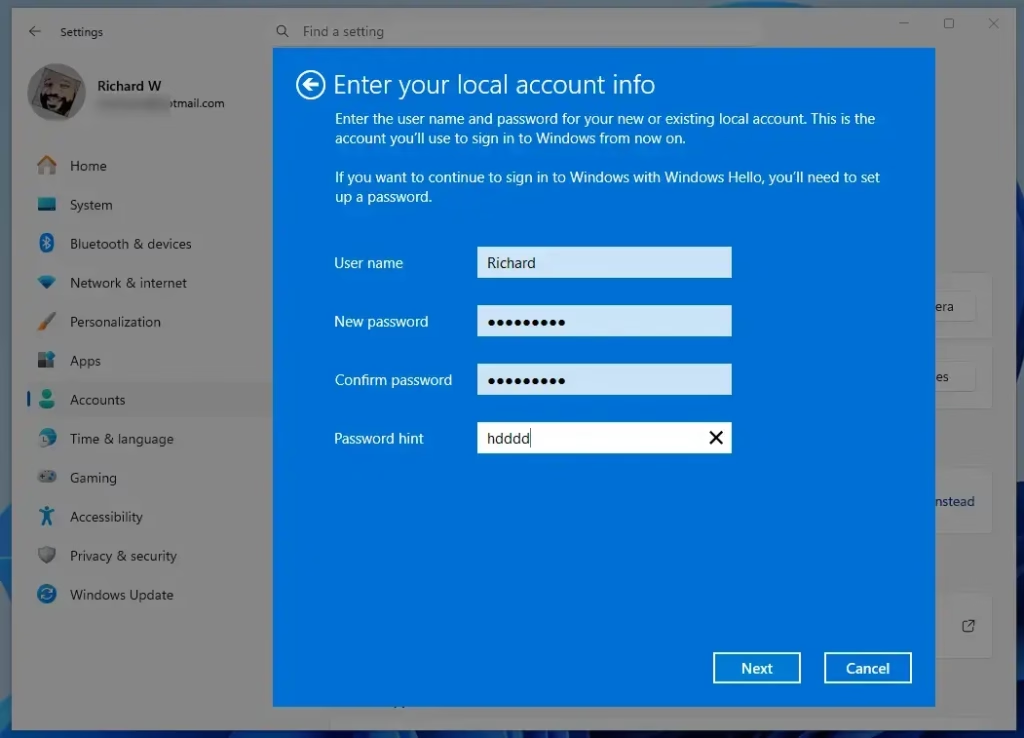
- Enter a User name for your local account. This is the name you will use to sign in from now on.
- Enter a New password for your local account.
You can leave the password fields empty if you don't want a password. Using one is recommended for better security.
- Type the password again in Confirm password. The two entries must match.
- Type a Password hint you'll remember. Pick something that helps you but would not help someone else guess the password.
- Click Next when finished. You can also add security questions later for extra protection.
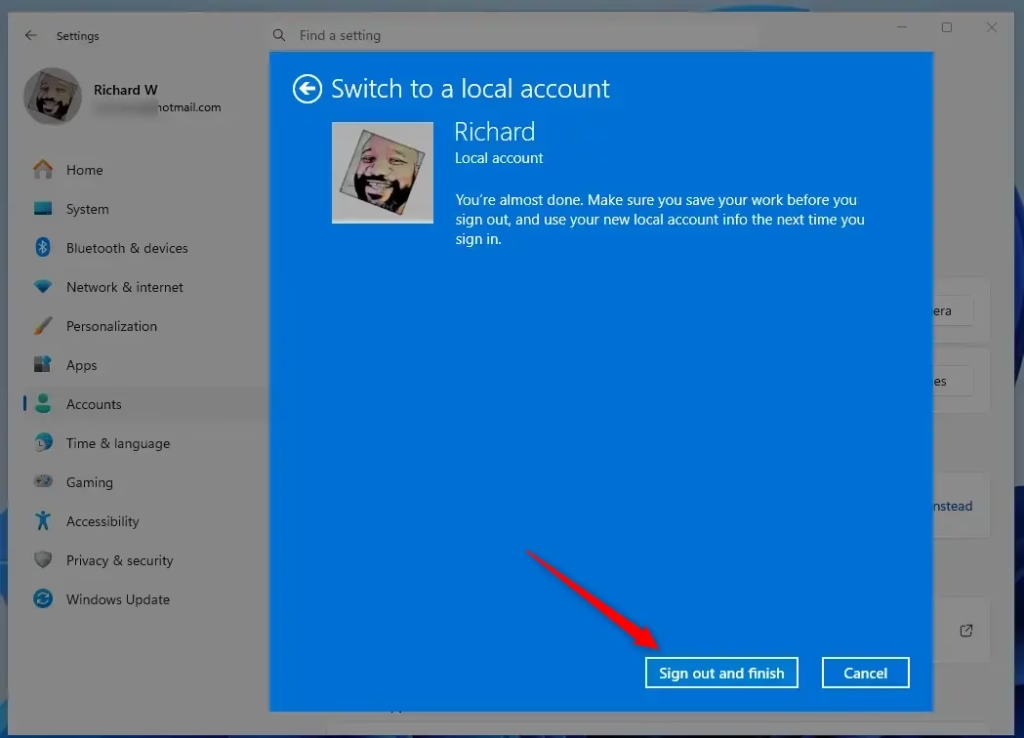
- Click Sign out and finish. ⚠️ ADMIN REQUIRED Windows signs you out, so make sure your work is saved first.
- Sign in again with your new local account. Use the local user name and password you just created. Your files, desktop and installed programs should look the same as before.
If you ever want to undo this, go to Settings Accounts Your info and sign in with a Microsoft account instead. Your files stay in place either way.
Summary
To switch to a local account in Windows 11, go to Settings Accounts Your info and select Sign in with a local account instead. Then follow the prompts to create your local user name and password.
Have a question about this guide?
Answered by AI from this guide. Good questions may be added to this page — please don't include personal details.
Did this guide fix your problem?

About the Author
Richard
Tech Writer, IT Professional
Richard is a writer at Geek Rewind who turns complex IT tasks into clear, step-by-step guides. He draws on years of hands-on experience in system administration and enterprise IT operations, focusing on Windows, Linux and WordPress: the problems people actually run into, and the fixes that work. His server and WordPress guides come from systems he runs himself. Richard builds and maintains the platform behind Geek Rewind, from its Ubuntu servers and Nginx configuration to its custom WordPress plugins. Many new tutorials start with readers' questions, and he's always glad to answer them in the comments.
No comments yet — be the first to share your thoughts!