How to Create Shared Folders in Windows 11

Shared folders in Windows 11 let you send files between different computers on your home or office network without a USB stick or an internet connection. A shared folder acts like a regular digital folder on your PC that other people can open, copy files from, and add new files to over your Wi-Fi or Ethernet connection.
This built-in Windows 11 feature works on both Home and Pro editions to help you share photos with family members or send large work documents to another PC in the same room.
Ensure both computers are on the same network and have Network Discovery and File and Printer Sharing enabled. Check that the SMB feature is turned on in “Turn Windows features on or off” and that your computer is part of the same Workgroup as the other computer.
Prerequisites for Network Sharing
Create a folder to share
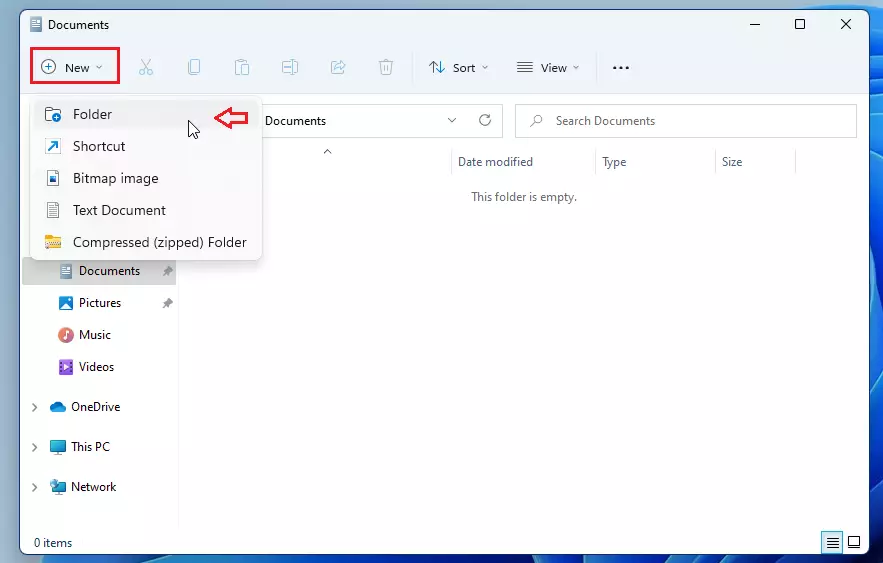
If you need a new folder for this, open File Explorer , navigate to your preferred location, click New, and select Folder.
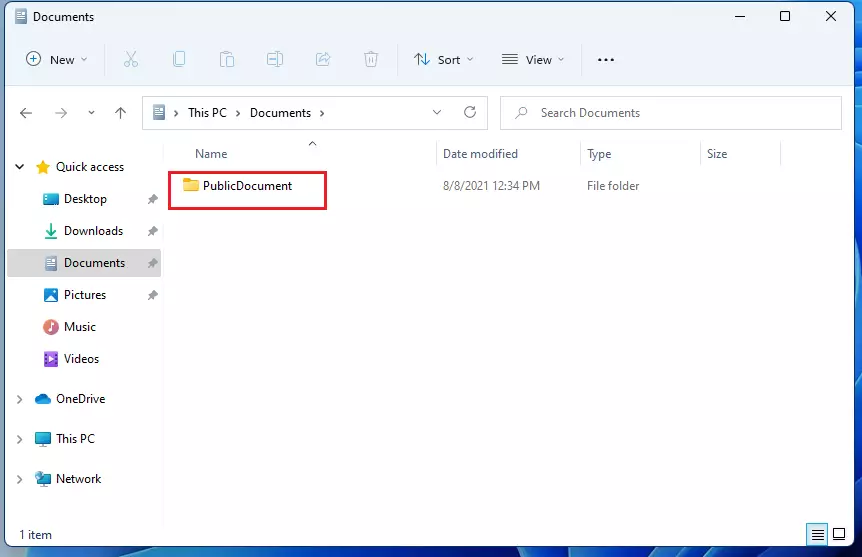
Give the folder a descriptive name.
Create a share in 🪟 Windows 11
Setting up shared folders Windows 11 lets other people on your home network access specific files and folders from their own computers. You can do this quickly by using the built-in Computer Management tool to pick a folder on your hard drive, name the share, and choose who has permission to view or change your files.
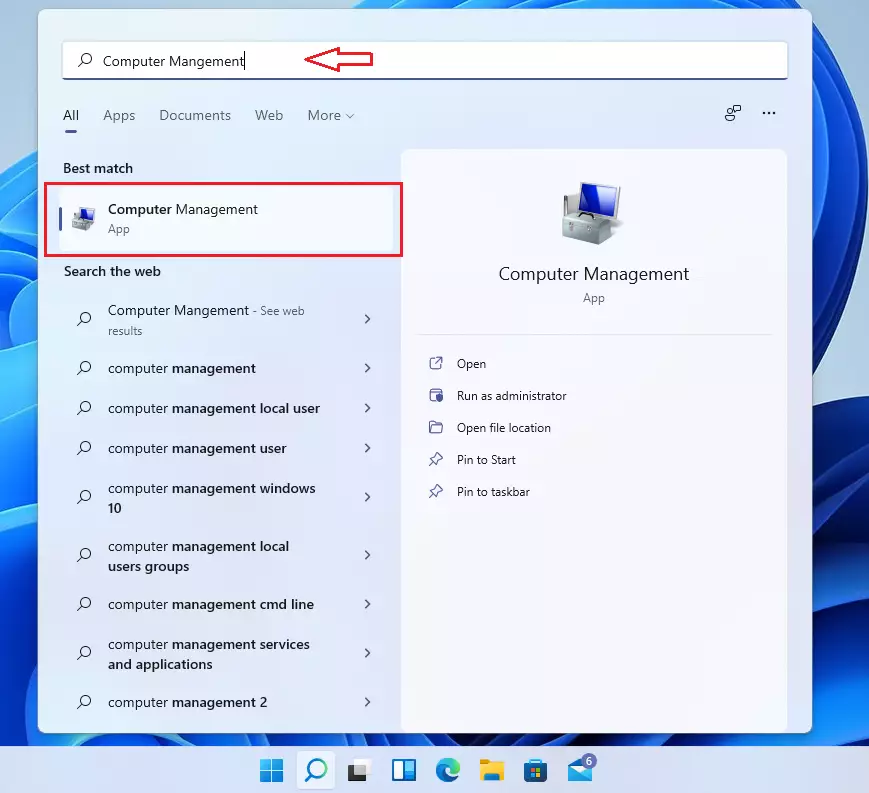
Click the Windows 11 Start menu and type "Computer Management." Select the "Computer Management" application from the search results to open the tool for managing your computer's settings.
In the app, look at the left side. Expand Shared Folders, then right-click on Shares and select New Share.
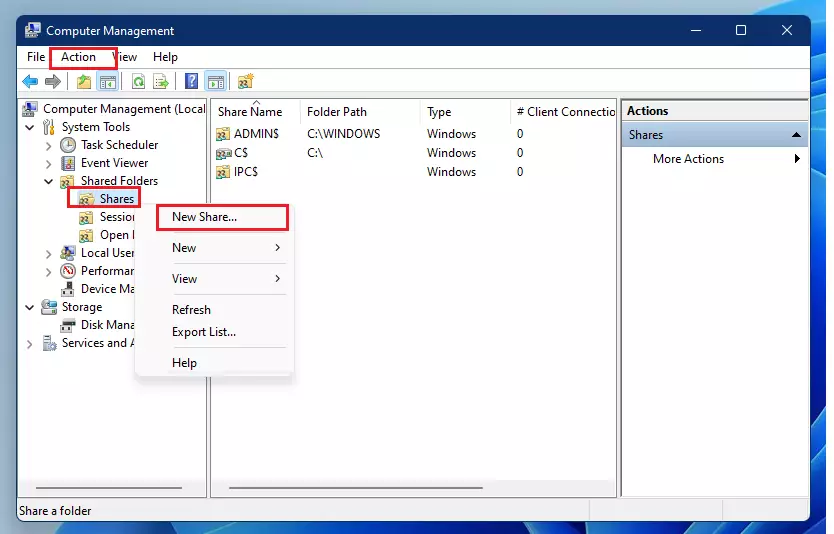
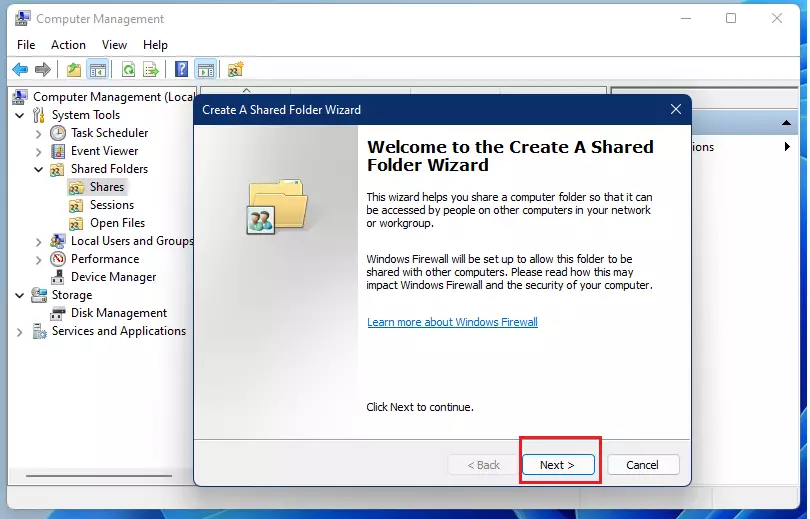
A wizard will open, guiding you through the process.
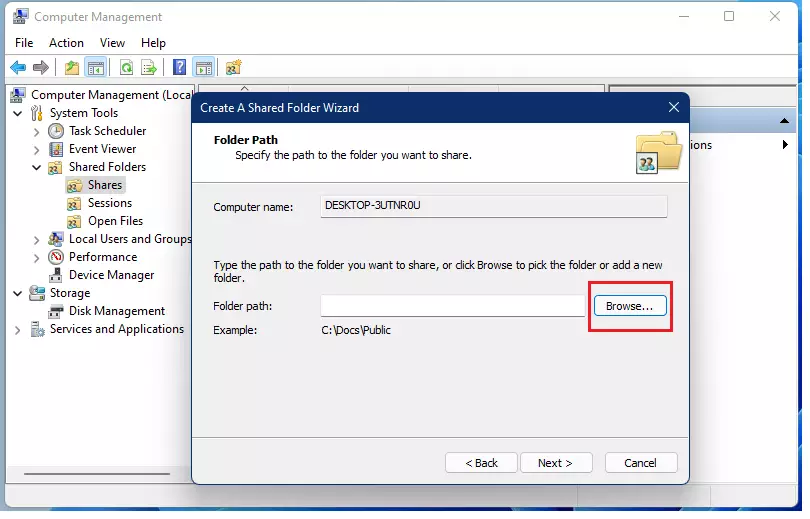
Click Browse to find the folder you created earlier.
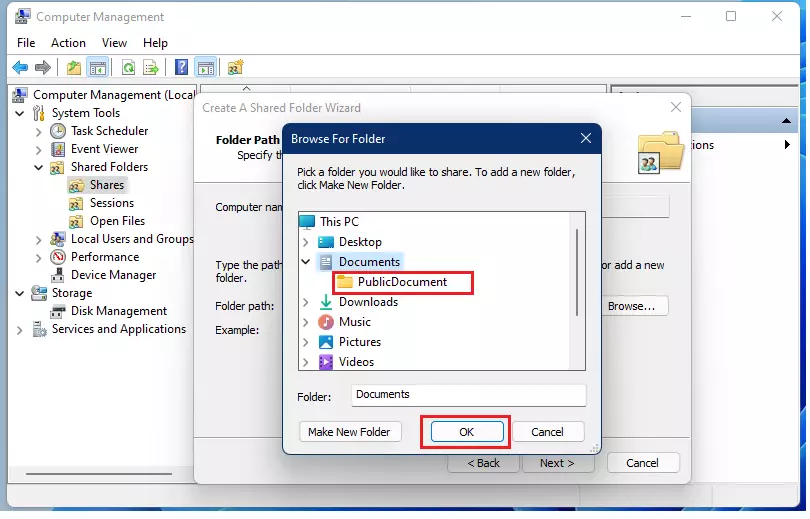
Select your folder from the list and click OK.
Give your share a name. You can use the default name or pick a new one.
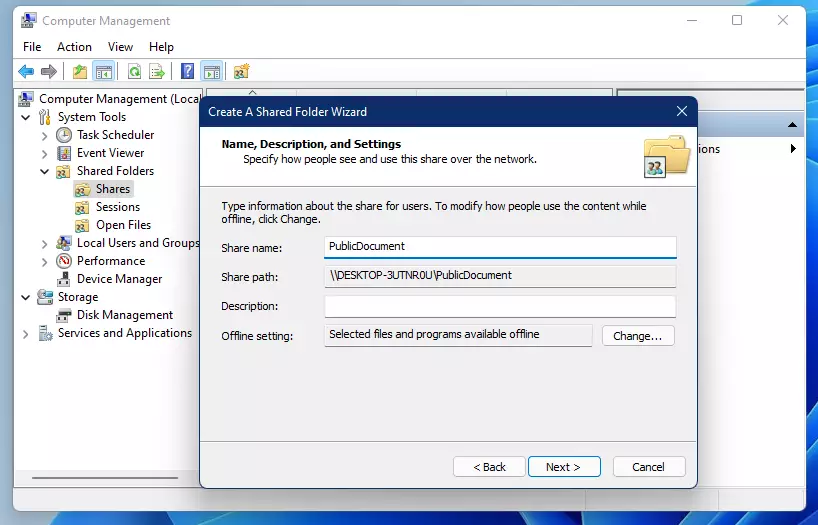
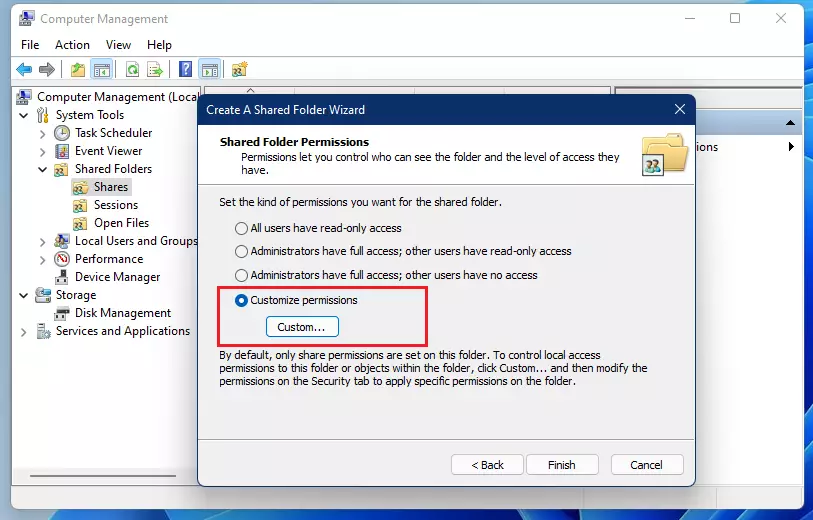
Folder permissions control who can see and modify files. To allow everyone full access to a shared folder in Windows 11, choose the "Customize permissions" option within the sharing settings. This ensures that all users can view and edit files within that specific shared folder.
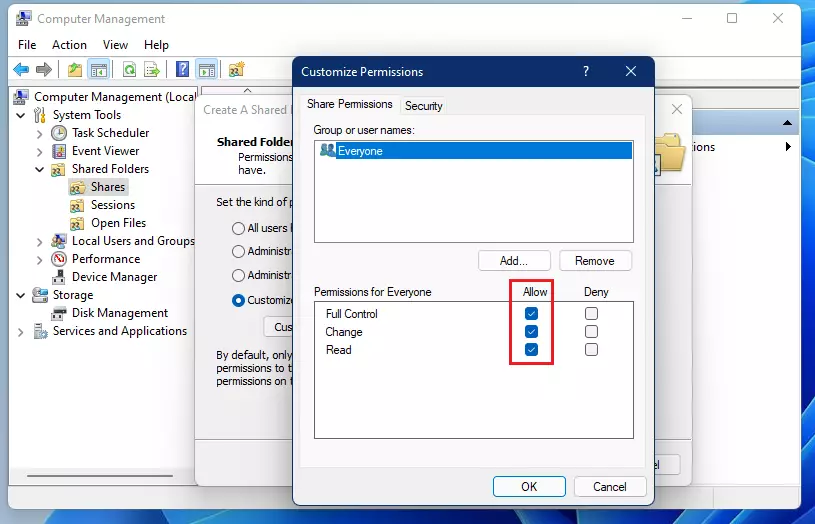
Select Everyone from the list, then check the Allow box for Full Control. Click OK.
Click Finish to close the wizard.
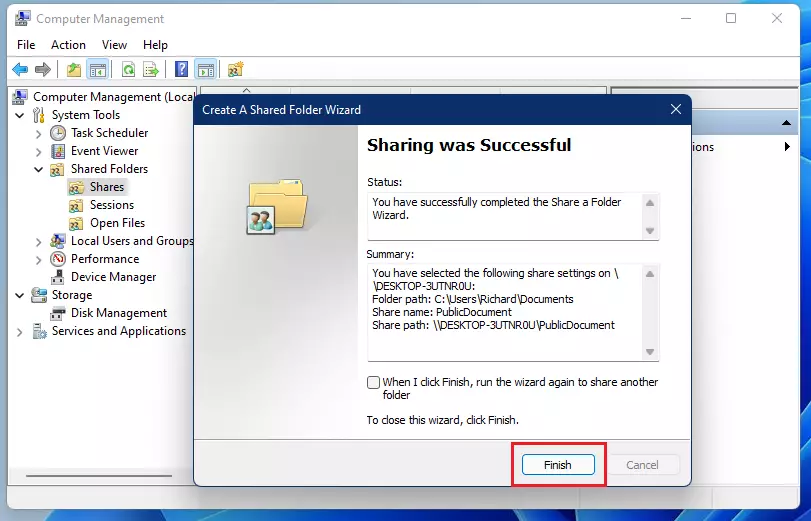
You have successfully shared your folder! To reach this folder from another computer, use the computer name and the folder name in this format:
\\COMPUTERNAME\SharedFolderName
For example, if your computer is named COMPUTERNAME and the folder is PublicDocument, you would type \\COMPUTERNAME\PublicDocument.
Managing Permissions and Security
Managing who sees and changes your shared folders in Windows 11 involves adjusting permissions through the folder's Properties, specifically on the Sharing and Security tabs.
How to stop sharing a folder
Right-click the folder you want to stop sharing and select Stop Sharing. This immediately removes network access for all users.
Troubleshooting Connectivity Errors
Trouble accessing shared folders in Windows 11 usually comes down to three things. Check that both computers are on the same network, confirm SMB (Server Message Block, the protocol Windows uses for file sharing) is turned on, and verify your saved login details.
Summary
Sharing folders in Windows 11 makes collaboration and file exchange efficient, but remember to be cautious about who has access and avoid storing sensitive data.
Was this guide helpful?

About the Author
Richard
Tech Writer, IT Professional
Richard is a writer at Geek Rewind who turns complex IT tasks into clear, step-by-step guides. He draws on years of hands-on experience in system administration and enterprise IT operations, focusing on Windows, Linux and WordPress: the problems people actually run into, and the fixes that work. His server and WordPress guides come from systems he runs himself. Richard builds and maintains the platform behind Geek Rewind, from its Ubuntu servers and Nginx configuration to its custom WordPress plugins. Many new tutorials start with readers' questions, and he's always glad to answer them in the comments.


Thanks for help
My computer screen shakes and hangs when it shakes what can be the posible blobem
Useless, it still wants effin permissions
[…] you begin, ensure you have enabled file sharing on both computers and that you have shared the folder for the files you are […]