How to Set Up Microsoft Family Safety Group

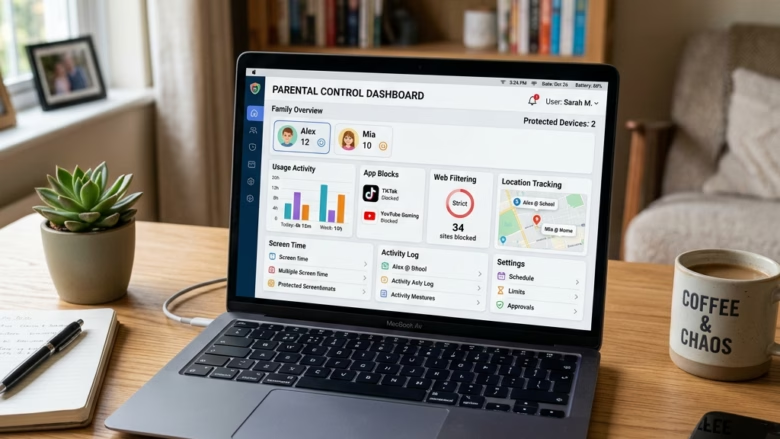
Microsoft Family Safety is a free service. It lets you manage screen time, filter websites, and set spending limits for the people in your household. A family group holds up to 6 members, and each person uses their own Microsoft account. The organizer gets weekly email reports on online habits, and you can apply rules on Windows 11 PCs, Xbox consoles, and Android phones.
You build the group by sending email invites from your Microsoft account’s family page. Once everyone accepts, you can set daily schedules for each child and check app usage from one place. Location tracking is also available, but it runs through the Family Safety mobile app.
Open account.microsoft.com/family, sign in with your Microsoft account, click Create a family group, then click Add a family member and enter each person’s email address. Send invites, and once they accept, you can manage their screen time, web filters, and spending limits from one dashboard.
Step 1Go to the Family Safety Website
Everything starts on the Family Safety website. It acts as the control panel for screen time, web filters, and other settings for everyone in your household. Use the account you want as the main manager, because that account becomes the organizer.
- Open a web browser and go to account.microsoft.com/family.
- Click Sign in.
- Enter the email address and password of the Microsoft account you want as the main manager, or organizer. Complete any verification prompt, such as a code sent to your phone.
After you sign in, you should see the Family Safety page for your account. If you have not created a group yet, it will offer to start one.
It only takes a few minutes. If you already use Outlook, Xbox, or Microsoft 365, you already have an account, so use that one.
Step 2Create Your Family Group
Once you are signed in, creating the group takes a few clicks. You are setting yourself up as the organizer, the person who controls the group settings.
- On the Family Safety page, find the button or link labeled Create a family group or Add a family member. The wording can differ slightly depending on whether you already have a group.
- Click it and follow the on-screen instructions to set up the organizer account. Microsoft typically asks you to confirm your account details.
- When the steps finish, you should see your new family group with you listed as the organizer.
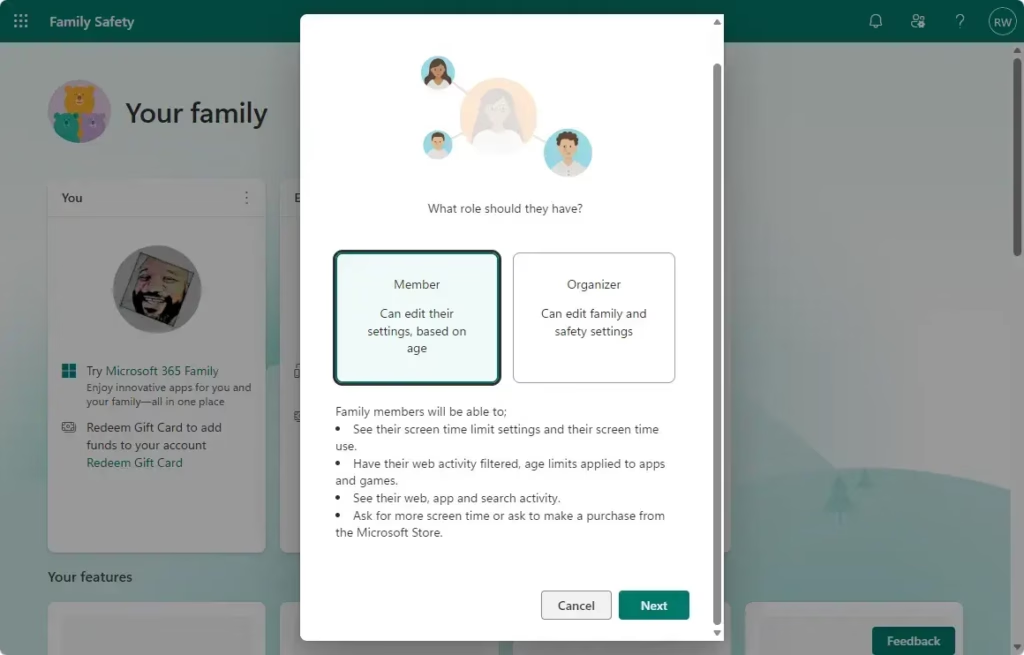
Changing this later is difficult. If you want a second adult to share control, invite them as an organizer instead (see the sections below).
Step 3Invite Your Family Members
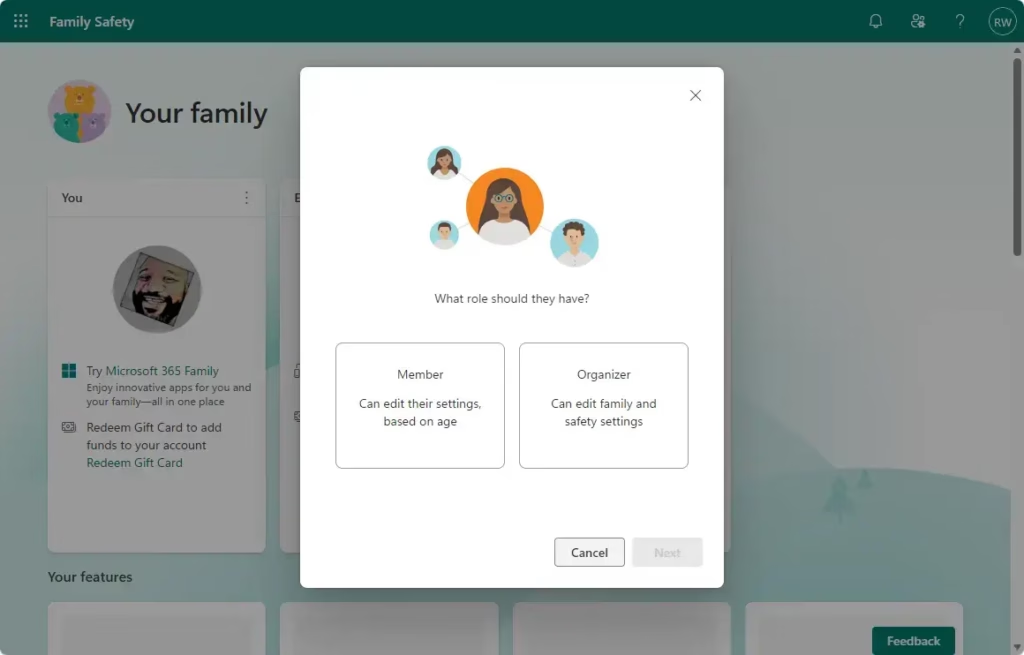
Inviting people lets you manage their devices and accounts. Each person needs a Microsoft account, and each one gets a role in the group.
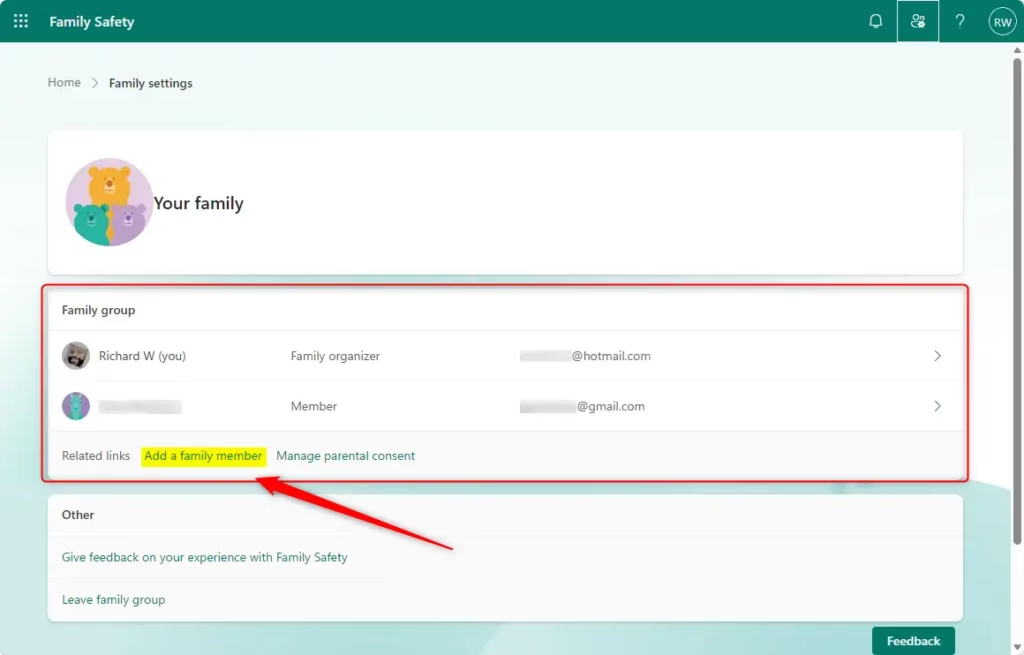
- Go back to the main Family Safety page.
- Click Add a family member.
- Type the email address tied to that person's Microsoft account. For a child, use the address of the account they will sign in with. If they do not have an account yet, you can help them create one during this step.
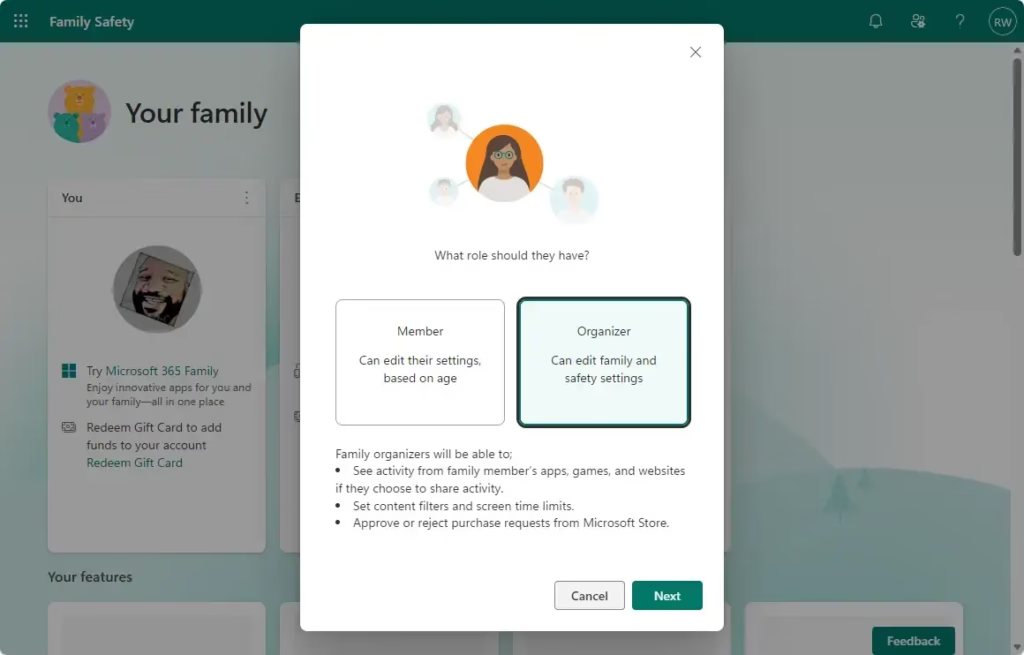
- Choose a role. Select Member for children and teenagers. Select Organizer for adults who will help with tasks like content filters and screen time limits.
- Click the button to send the invite.
Microsoft emails the person you invited. They must open that email and accept the invitation before they join the group. Until they accept, they show as pending and none of your rules apply to them. If the invite does not arrive, ask them to check their spam folder, then resend it.
Talk to your family before you turn on any limits. Explain why you are setting up the group, for example to manage screen time and block inappropriate websites. Kids are far more likely to accept the rules when they understand the reasons, and it cuts down on workarounds later.
Adding a Child or Teen
When you add a child or teen, enter their correct birthdate. Windows and Microsoft use it to apply the right safety rules for their age, so a wrong date can mean the wrong protections.
Microsoft requires a parent or guardian's permission before a child under 13 can join a family group. The exact age threshold varies by country. You will need to approve the request when it comes up.
Important: Users under the age threshold for their country need permission from a parent or guardian to make a Microsoft account and join a family group. The system guides you through this process. Microsoft may ask for proof of parental or guardian status.
Adding Another Adult Organizer
Adding another adult as an organizer is worth doing. A second organizer can help manage the group, approve app requests from children, and set screen time limits. That means you are not the only person who can respond when a child asks for more time or wants to install something.
Only give this role to adults you trust, since organizers have the same management powers you do. To add one, follow the same invite steps and choose Organizer as the role.
Reference:
https://support.microsoft.com/en-us/family-safety/set-up-microsoft-family-safety
Summary
Microsoft Family Safety helps you manage children's online activity and device use. Visit the Family Safety website, sign in with the account you want as organizer, and create the family group. Then invite members and assign roles, and you can set screen time limits, block content, and manage app downloads.
Was this guide helpful?

About the Author
Richard
Tech Writer, IT Professional
Richard is a writer at Geek Rewind who turns complex IT tasks into clear, step-by-step guides. He draws on years of hands-on experience in system administration and enterprise IT operations, focusing on Windows, Linux and WordPress: the problems people actually run into, and the fixes that work. His server and WordPress guides come from systems he runs himself. Richard builds and maintains the platform behind Geek Rewind, from its Ubuntu servers and Nginx configuration to its custom WordPress plugins. Many new tutorials start with readers' questions, and he's always glad to answer them in the comments.




No comments yet — be the first to share your thoughts!